
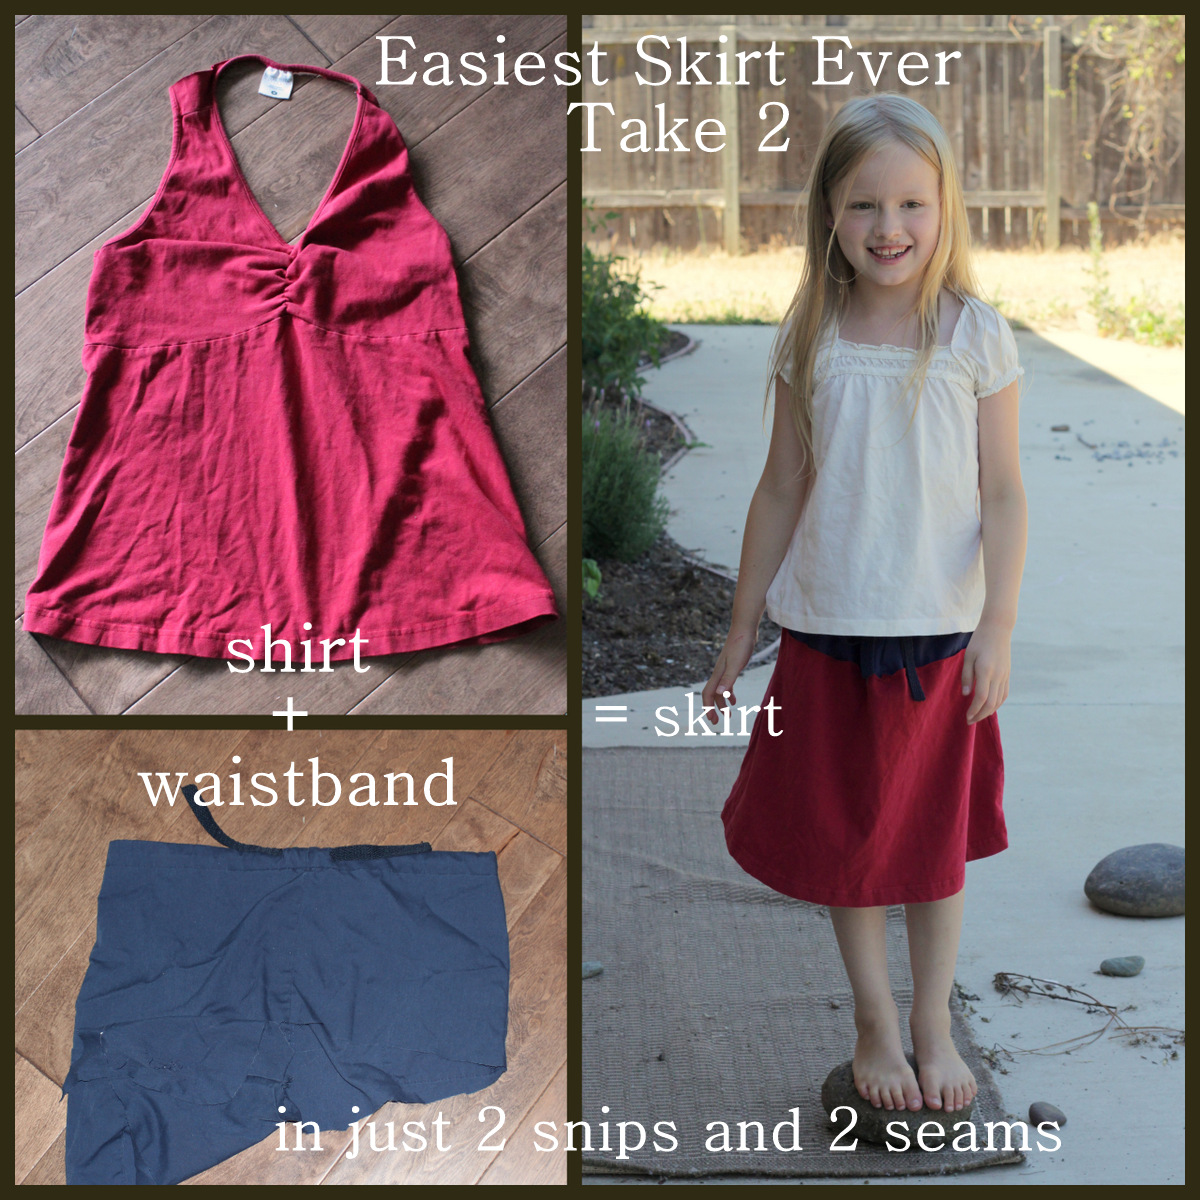
First, Happy 4th of July!!! Now, on to the project.
This is about how I roll of late. Yesterday, we rummaged around for red, white, and blue clothes for the 4th of July. When we found out Drew didn’t have anything red I grabbed an old shirt that was already a bit cut up and the drawstring top of an old pair of scrub pants. 2 snips and 2 seams later (no double folds or ironing!) she had a 4th of July skirt that I’m a little jealous of. I think I’ll be making some light comfy summer skirts for myself soon. I posted before on how to make a skirt super easily from a shirt and stretchy knit shorts waistband. This one was a bit different because the waistband was just drawstring and the fabric not stretchy at all. But it was actually even easier to make if that’s possible!
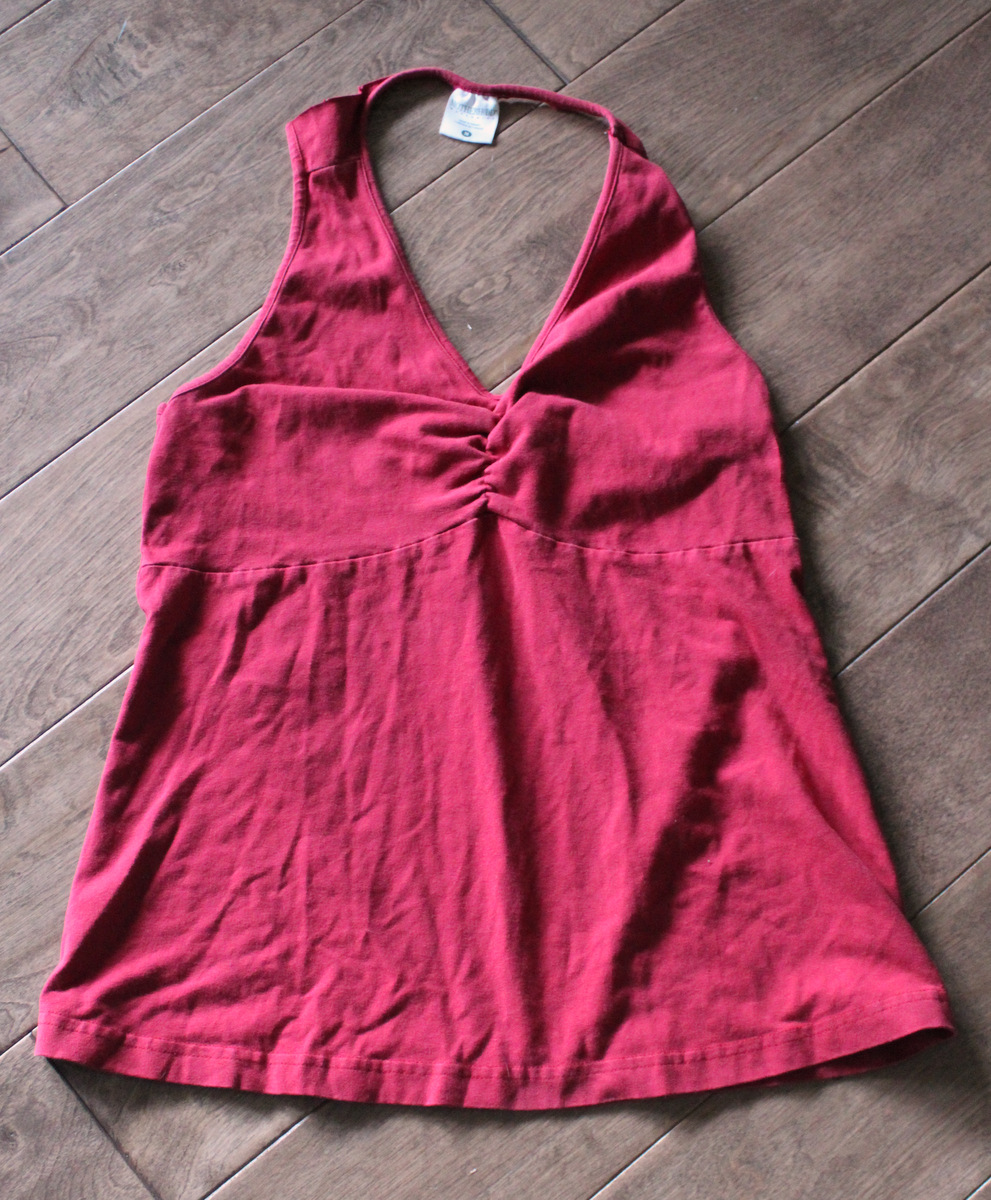
Here’s the how-to. Here’s an old red shirt that’s already been chopped up a bit on the back top of it. I cut a straight line below the bust seams and kept the bottom portion of it.
And here’s an old pair of scrub pants top. I used the legs already for a really awesome project I’m going to blog about soon. Did you know I’m a nurse? That’s why I have scrubs. But I’ve been very blessed to be able to stay at home and mommy my kids and… craft 🙂 so some of these scrubs have gone to the fabric scraps pile to be recycled. Anyway…
I cut off about 4 inches of the top of the scrub pants. The skirt piece was about 11 inches seam to top. The skirt piece was about 33 inches around. Since Drew’s waist is about 22 inches I knew this would give it some good twirl. 🙂 The drawstring waistband is bigger than the skirt but we’re going to fix that the easy way. If your skirt piece is bigger than your waist piece you’ll fix it with the same trick. If they’re the same, lucky lucky you only have 1 quick line to sew.
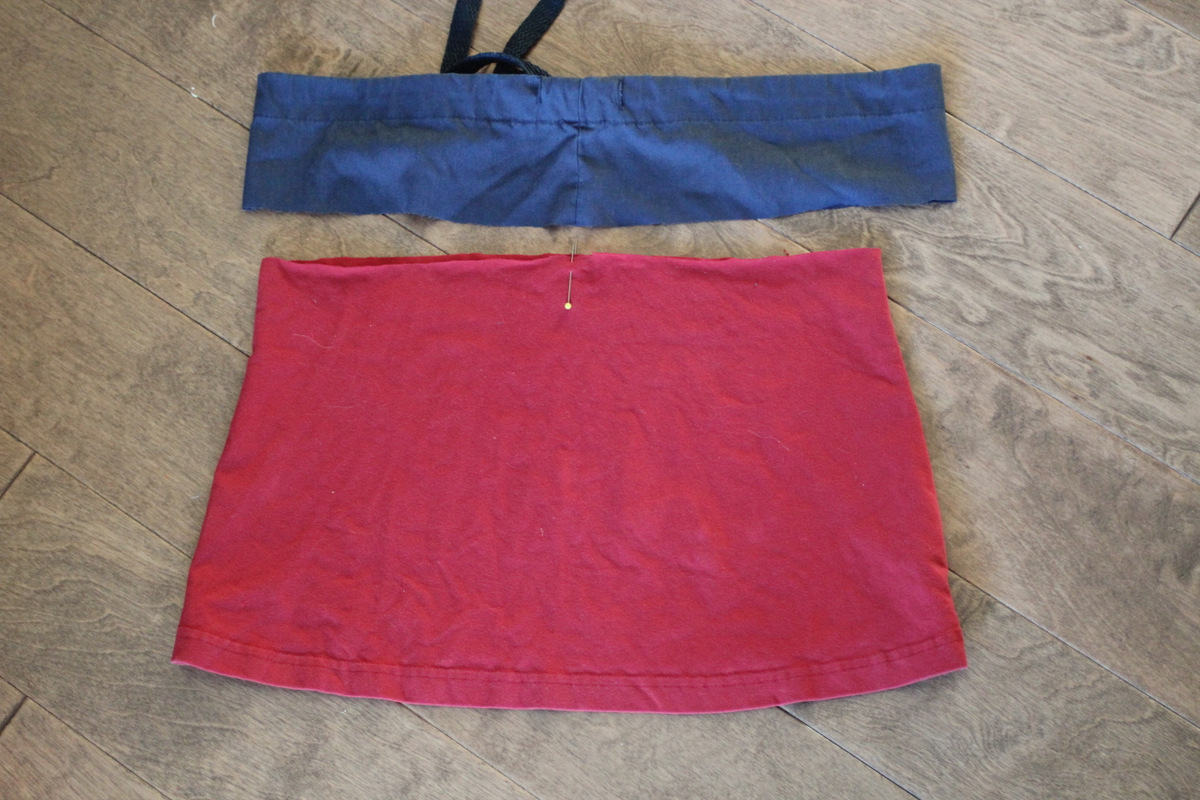
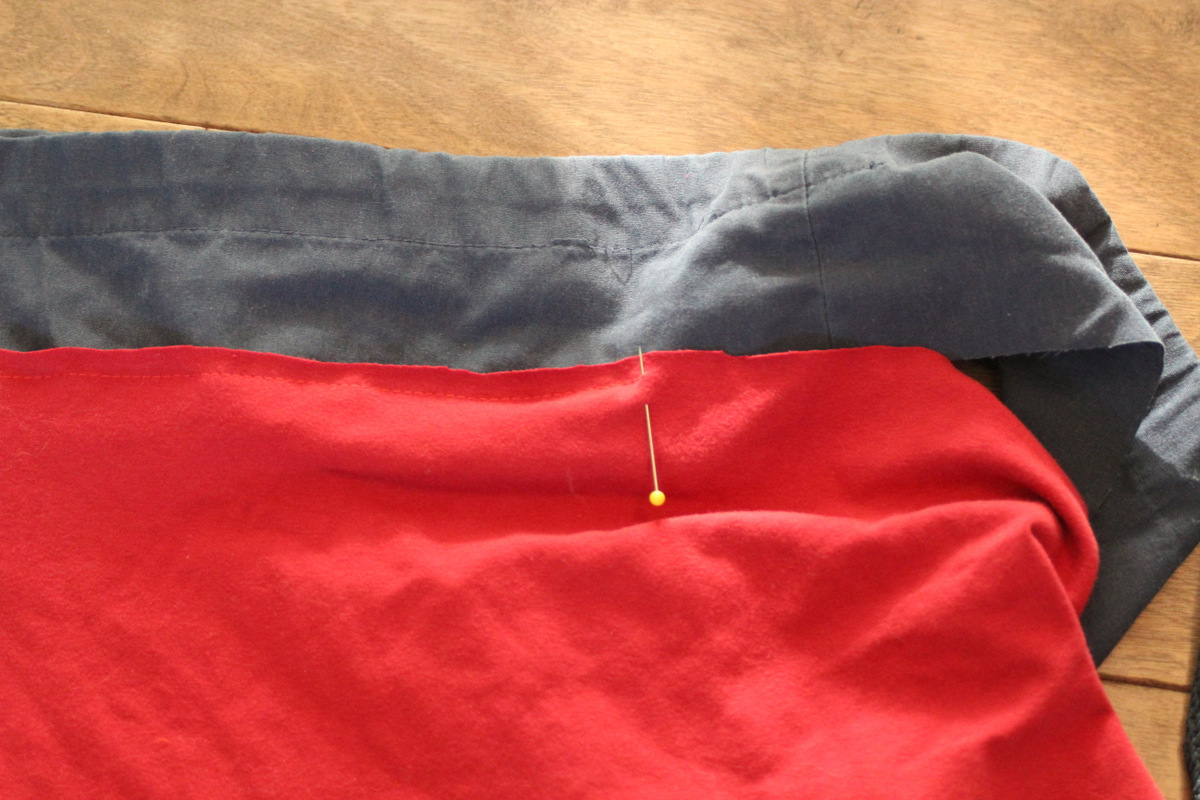
So mark the middle front and back of the skirt piece (more narrow piece) with pens. Mark the front middle of the waistband also if needed. Mine has a middle seam so I went with that. I penned them together, overlapping about 3/4 inch, with the knit edge of the skirt piece on top. I’ll leave this edge raw as the knit won’t fray, just curl a bit. The knit fabric from the scrub pants will fray so you can finish the edge if you want. I just used fray check.
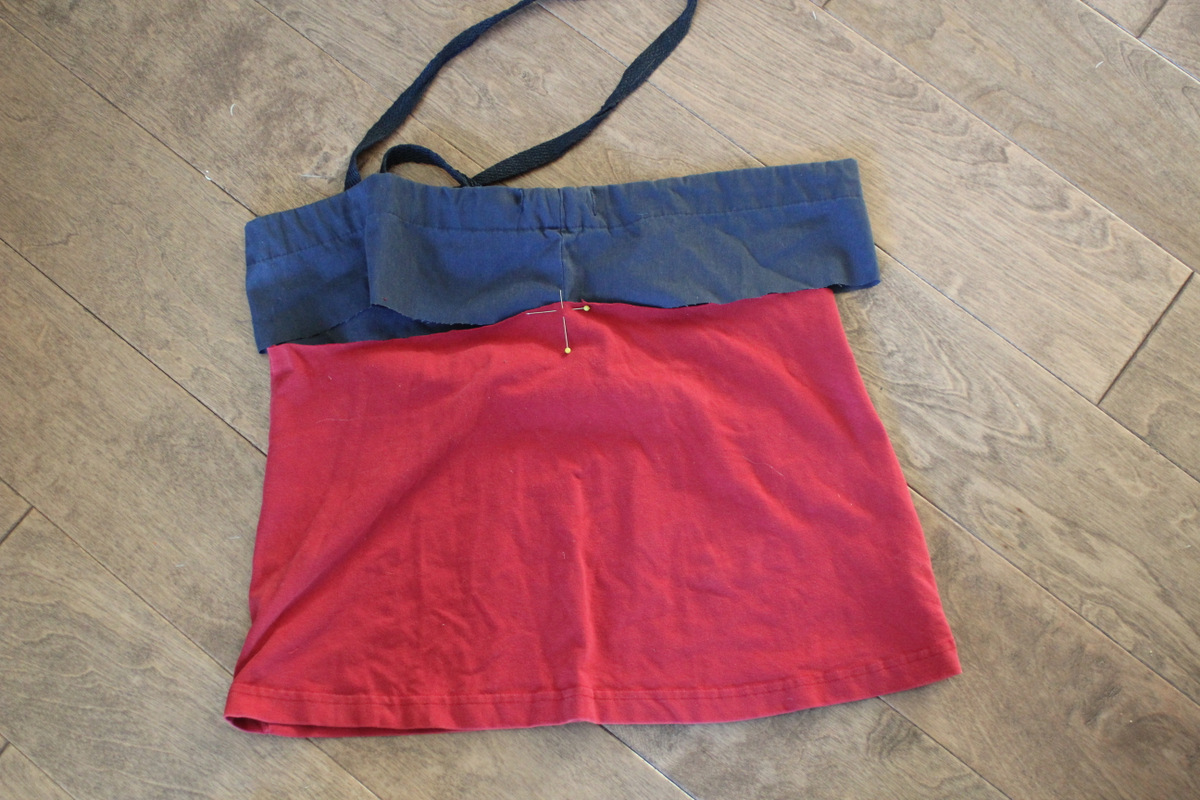
Beginning at the front center where I marked I sewed until I got around to the back center of my smaller piece that I had marked. I stopped there, back-stiched a bit and cut the threads.
Starting at the front center again I sewed the other side of the skirt. When I got to the back I folded up all that excess fabric of the waistband and sewed just up to it.
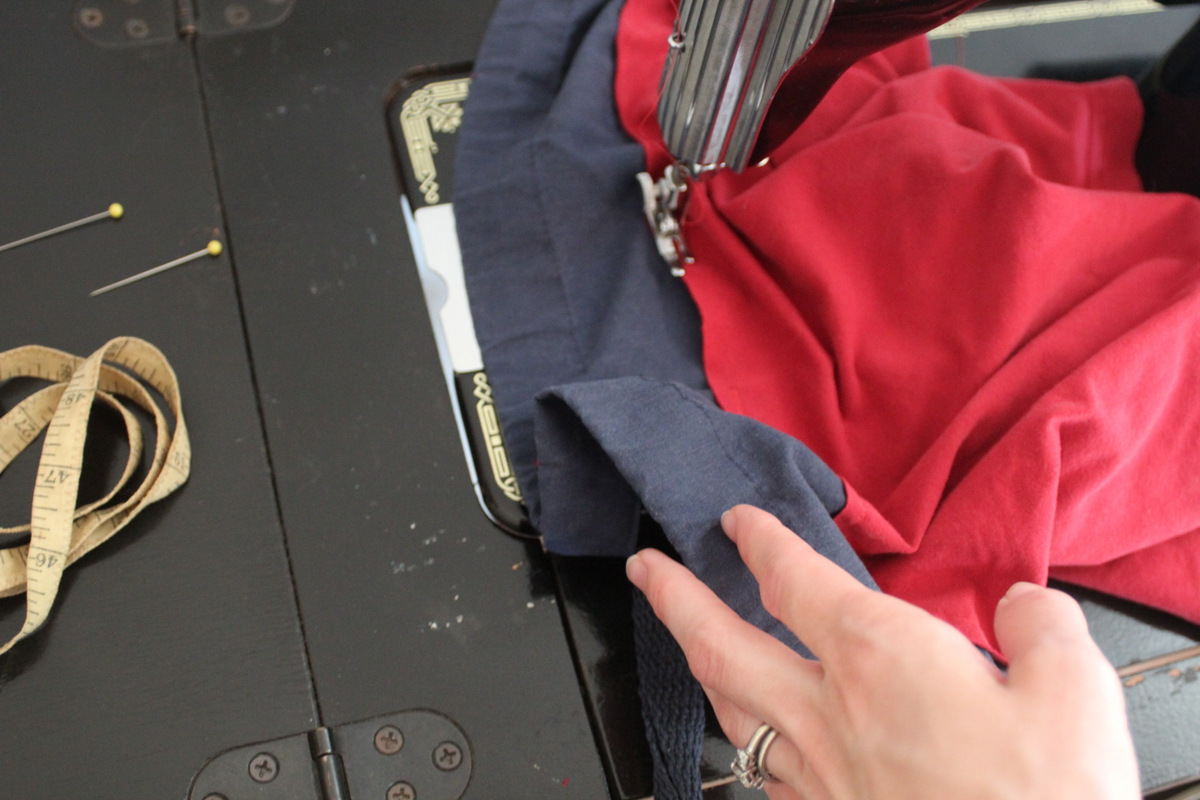
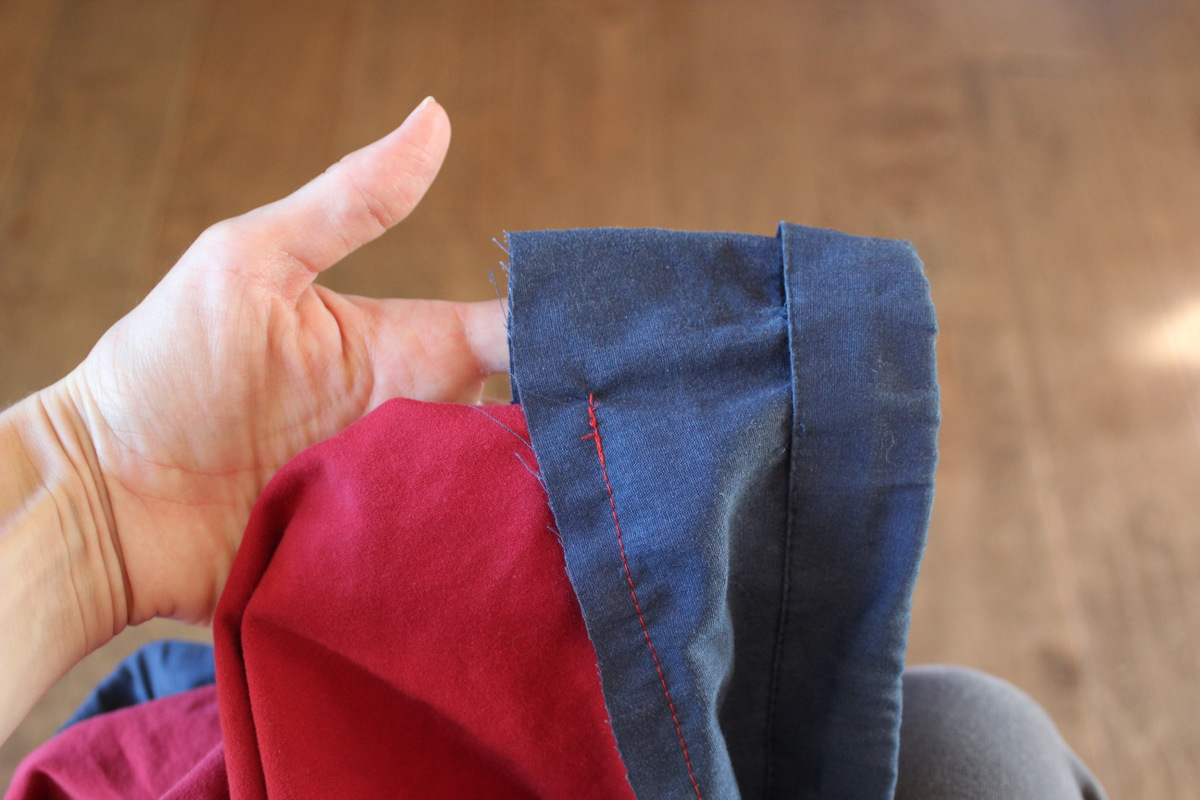
See the excess?
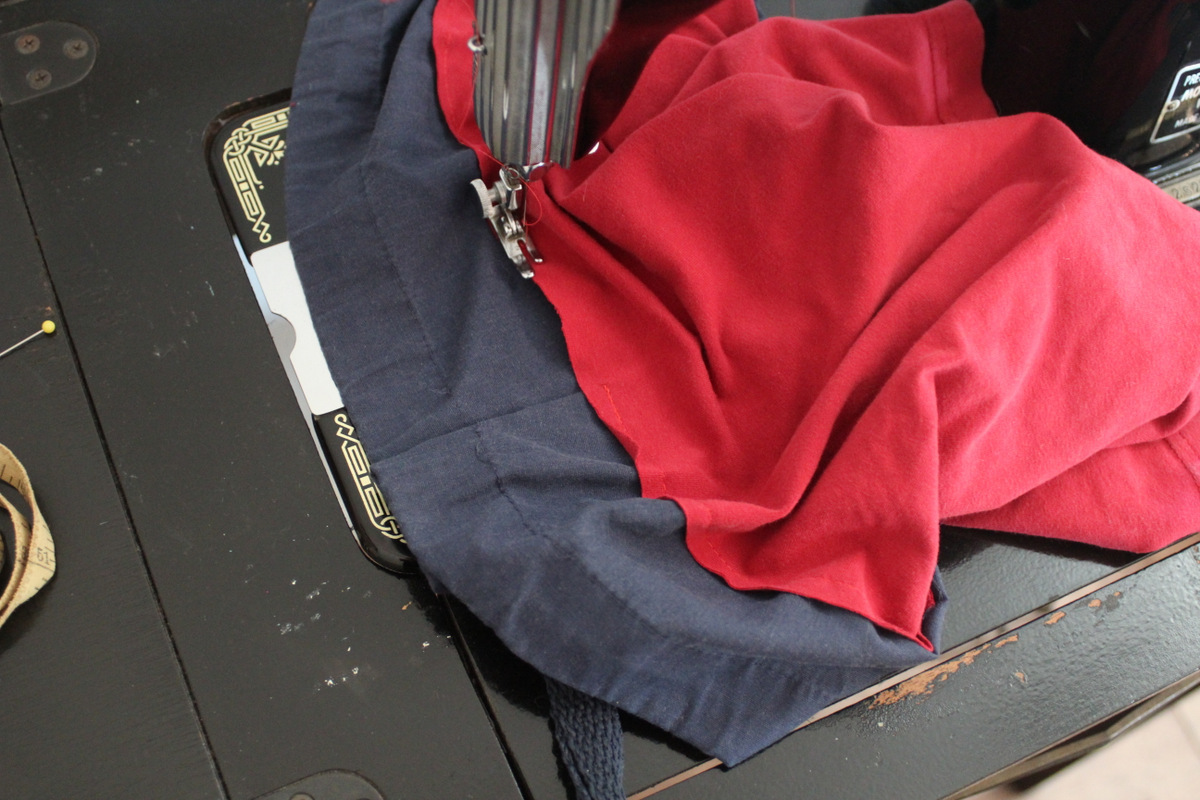
Turn the skirt inside out and pinch up the excess on your wider piece.
And sew it up even with the smaller piece. Sew it a little straighter than I did, if you like. 😉 You are sewing over the waist ties inside there and that is fine! It will just anchor them at the back of your skirt which I prefer so they don’t come out in the wash and all. Still, before you sew this seam make sure that the ties are at an equal length at the front… not one way long and the other so short you can’t tie it. 🙂
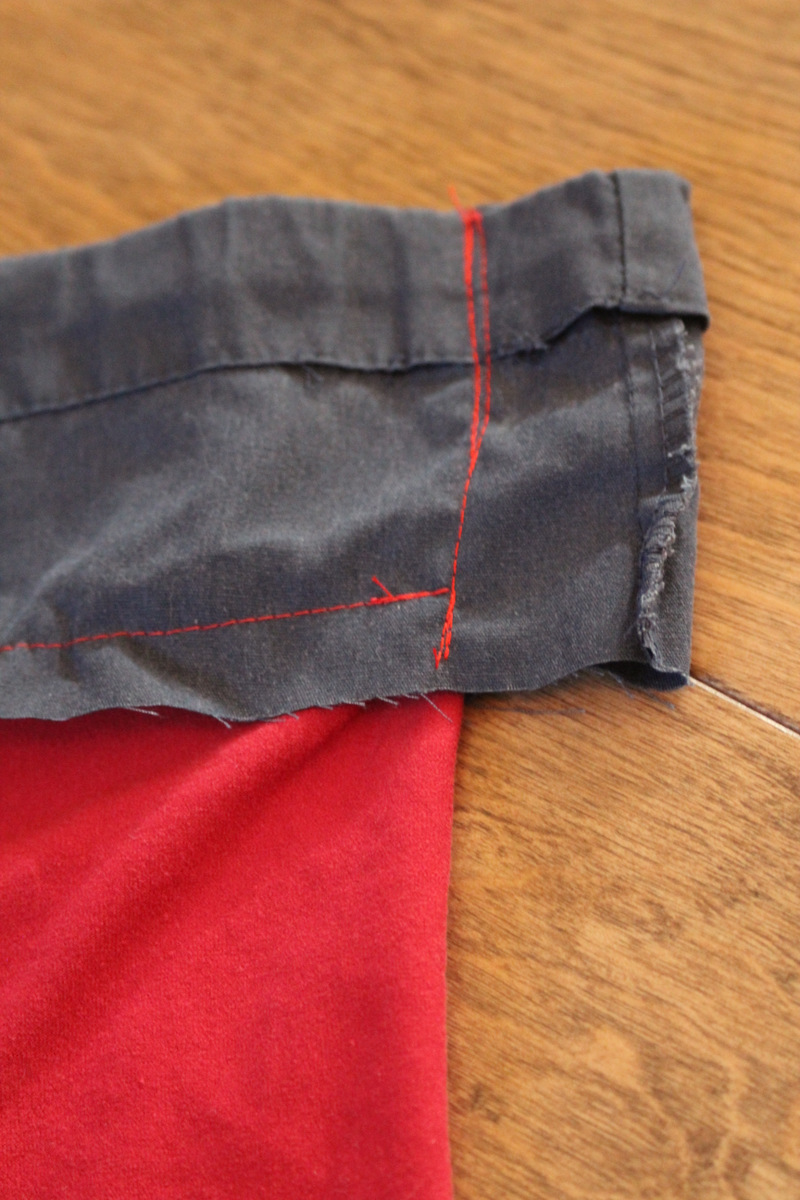
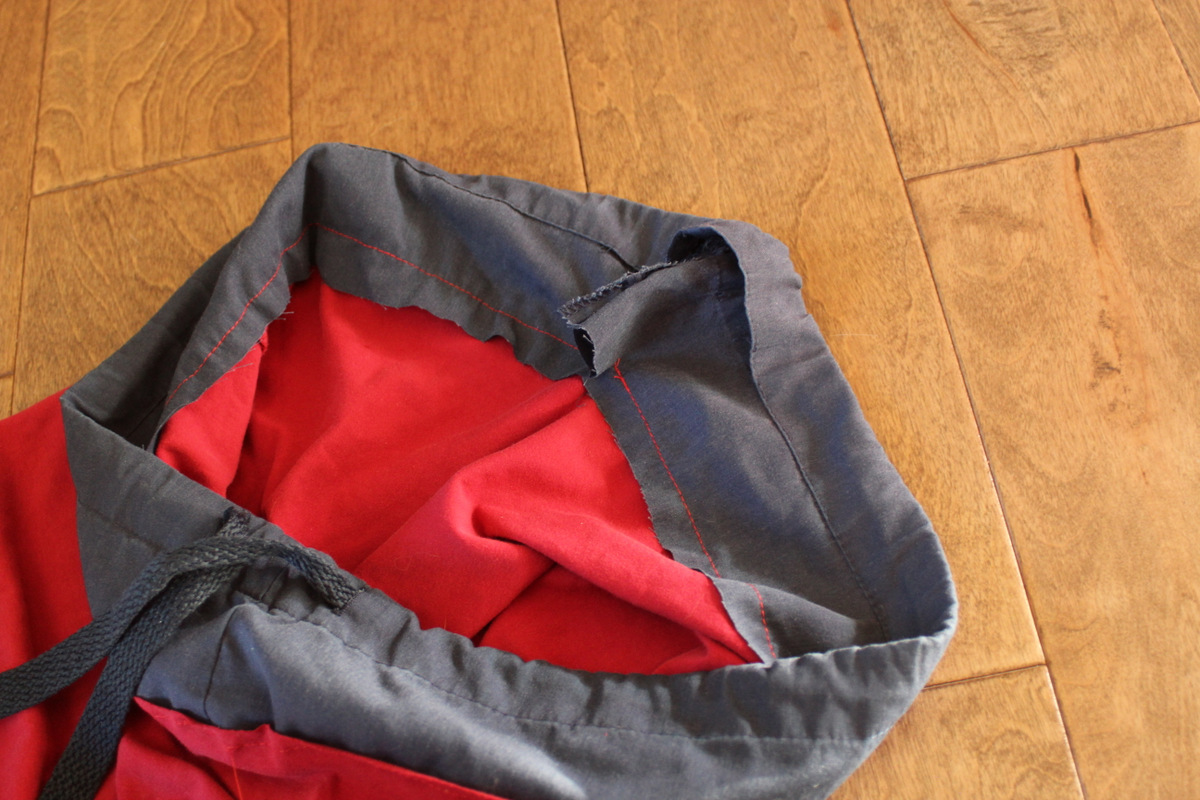
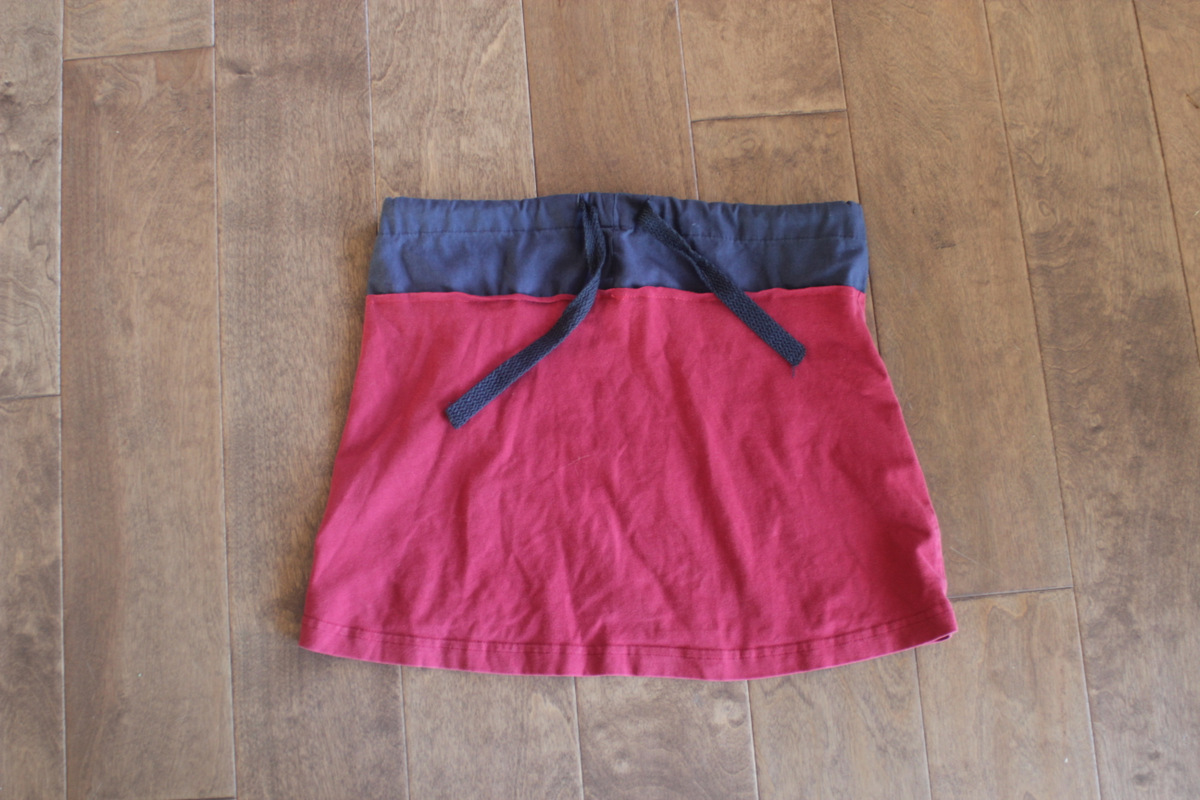
I trimmed off the extra bulk then used a little fray check on all my edges that would fray. And, voila, a skirt.
And a happy little girl in a twirly skirt excited about fireworks standing on a rock.
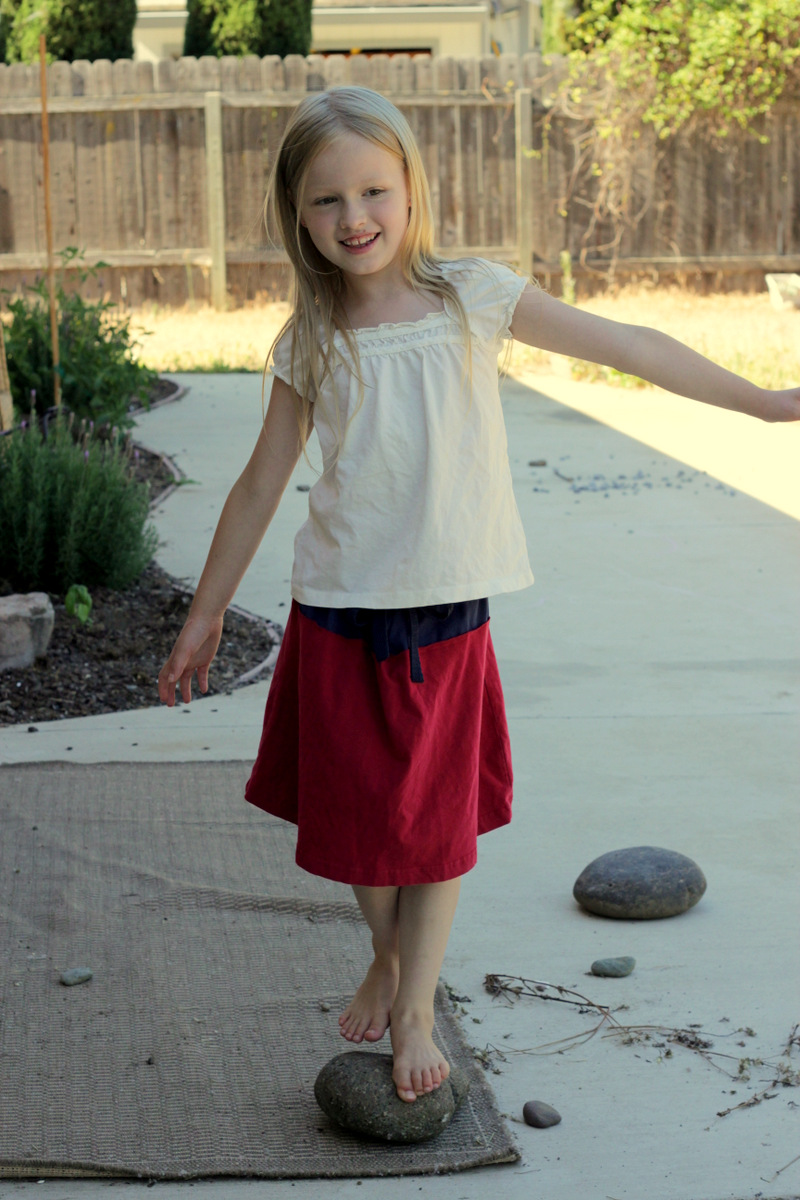
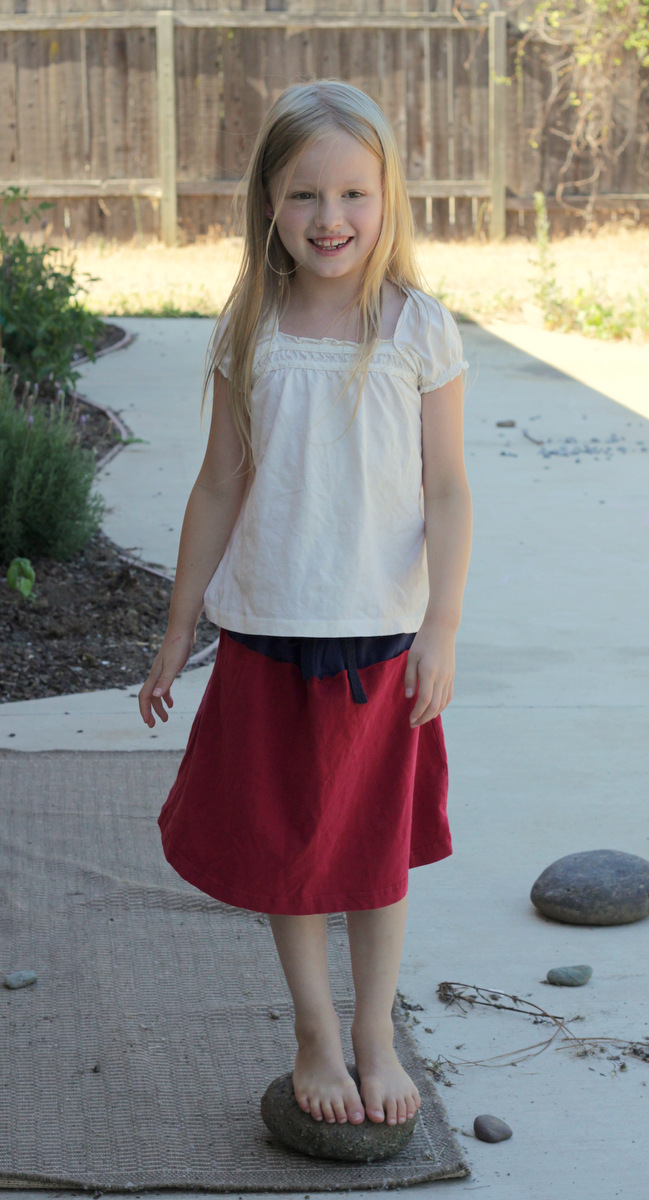
Kids LOVE to stand on rocks. It’s the simple things.