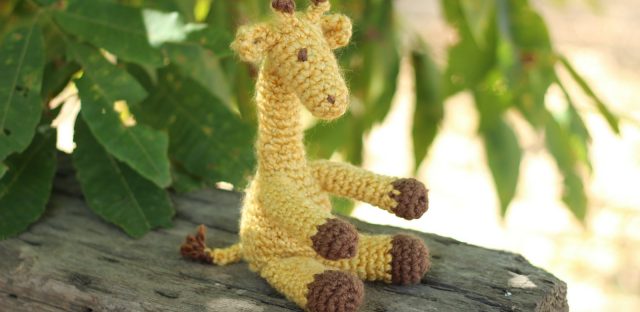
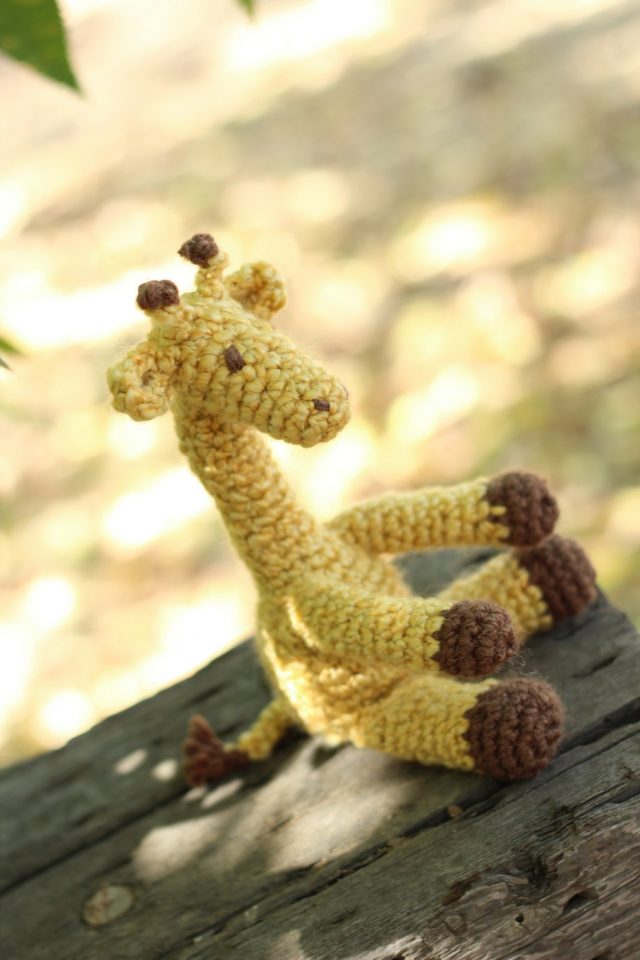
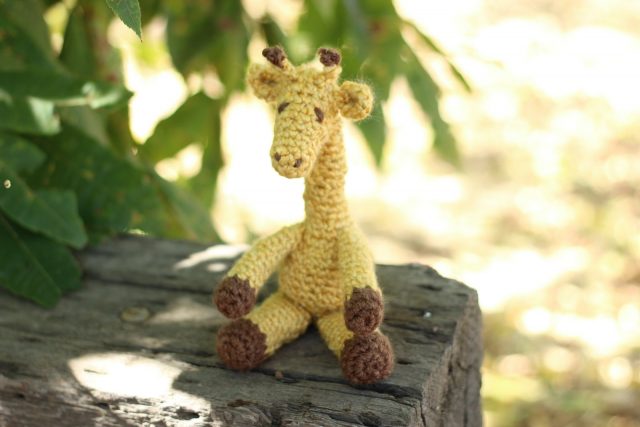
When I decide to make up a new amigurumi animal it takes me a while to figure out what style to make it in. Should it have a huge head, somewhat realistic proportions, or should I humanize it by, for example, making it sit when that animal never would? I guess not having a set style makes me more of a crafter than artist. I’m not very cohesive in my creating it seems. Maybe I should work on that. It seems to vary with my mood (which varies a lot) and the times. It must be like my handwriting in that. One time I made a cat like this and another, a cat like this. I love the first one, by the way, and the second, well, it’s cute too. Now that this has all been thoroughly over thought and mourned, here is the little challenged giraffe. He is spotless. I know. I didn’t feel like making spots. Lazy crafter that I am. He is for sale in my store and the free pattern is below.
Giraffe
PatternHe is about 8″ tall and I used some worsted weight homespun yarn and a g hook
Head
Row 1: 6 sc in a loop, tighten loop
Row 2: *sc, 2sc* repeat around (9 total)
Row 3-5: sc even
Row 6: *sc, sc, 2sc* repeat around (12 total)
Row 7-8: sc even around
Row 9: *sc, sc, sc, 2sc* repeat around (15 total)
Row 10: sc even
Row 11: *sc, sc2tog* repeat around (10 total)
Row 12: sc2tog around (5 total)
Stuff, sew up
Neck and body
Ch 8, join to first ch with a sl st without twisting
Row 1-9: sc even (8 total)
Row 10: sc, sc, 2sc, sc, sc, 2sc, sc, sc (10 total)
Row 11-12: sc even around
Row 13: sc, sc, sc, 2sc, sc, sc, 2sc, sc, sc, sc (12 total)
Row 14: *sc, sc, sc, 2sc* repeat around (15 total)
Row 15: *sc, sc, 2sc* repeat around (20 total)
Row 16: *sc, sc, sc, 2sc* repeat around (25 total)
Row 17-22: sc even around
Row 23: *sc, sc, sc, sc2tog* repeat around (20 total)
Row 24: *sc, sc, sc2tog* repeat around (15 total)
Row 25: *sc, sc2tog* repeat around (10 total)
Row 26: sc2tog around (5 total)
Stuff, sew up bottom, leave neck open and sew to head
Ears
Row 1: 3sc in a loop, tighten loop
Row 2: 2sc in each around (6 total)
Row 3: sc ch1 sc in next, sl st, sl st, sc ch1 sc in next, sl st, sl st (10 total)
Flatten, shape into cup and sew onto head.
Horn
With yellow, join to head with a sl st, ch 3, switch to brown, ch 1, sc in 2nd ch from hook, switch to yellow, sl st in next 3
Finish
Tail
Join to body with a sl st, ch 6, turn and sl st in next 5 and back to body
Make a brown tassel at the end of the tail
Arm (make 2)
Row 1: With brown, 6 sc in a loop, tighten loop
Row 2: 2sc around (12 total)
Row 3: sc even
Row 4: *sc, sc2tog* repeat around (8 total) sl st to round off and switch to yellow
Row 5-15: sc even around
Sl st to even off, stuff lightly
Leg (make 2)
Row 1: With brown, 8 sc in a loop, tighten loop
Row 2: 2sc even around (16 total)
Row 3-4: sc even around
Row 5: *sc, sc, sc2tog* repeat around
Sl st to round off and switch to yellow
Row 6-14: sc even
Sl st to even off, stuff lightly
Sew parts together, weave in ends, embroider nostrils and eyes.
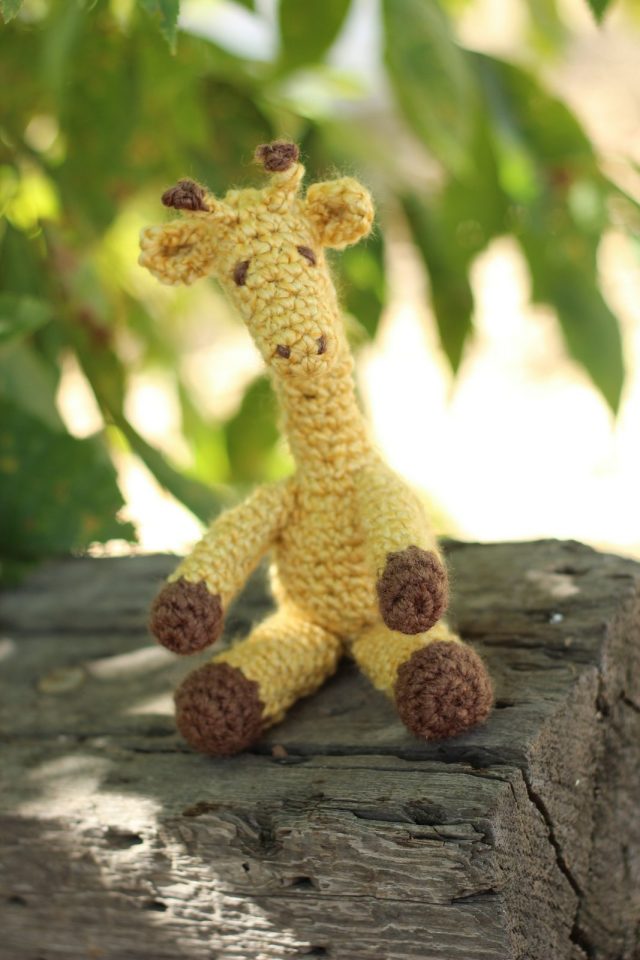
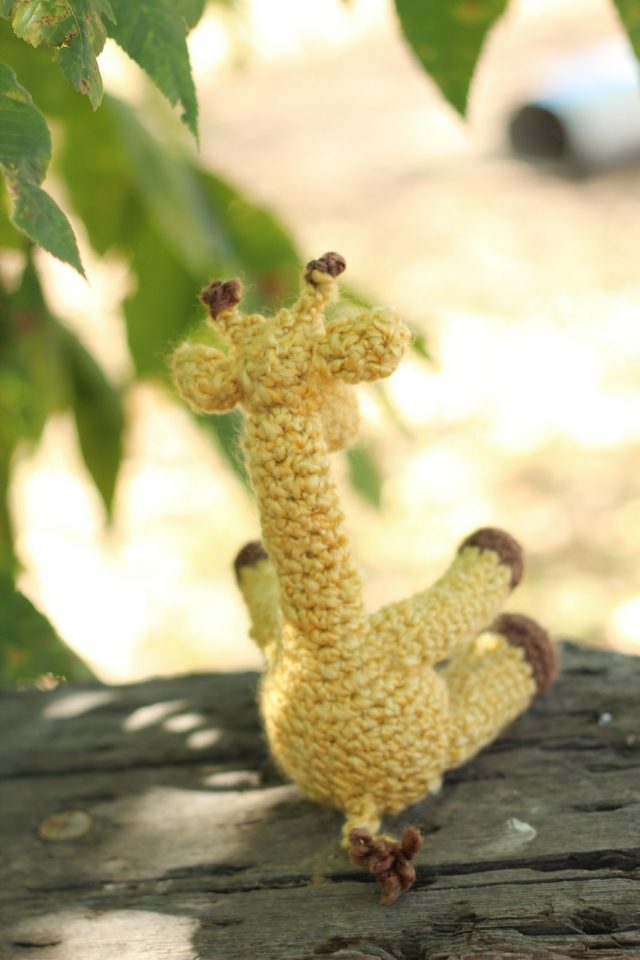
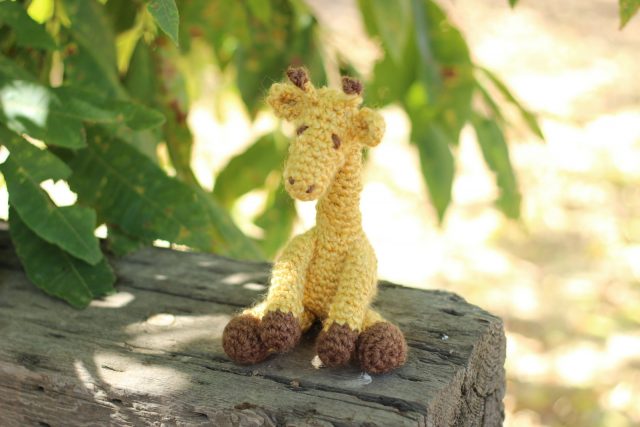
I am having some trouble visualizing how the ears should be formed and sewn to the head. Surely I don’t leave them in the cone shape that they’re currently taking??
Otherwise, fantastic pattern. I am having so much fun making it!
Hey, Linda. Be sure you keep a tighter tension when working the ears. When you are done flatten them down so they aren’t open inside. Then pinch them at the base while you sew them on.
The flattening and pinching technique is shown in this pattern though obviously the ears are a different shape.https://bethsco.com/2011/01/carrot-the-bunny.html