You may know that I love vintage sewing machines. My full time machine for the past year and a half is this beauty from the 1950s. I got rid of my modern machine shortly after getting this it to work and have never looked back. Though it only does straight stitch, my results in every sewing endeavor were much benefited by this graceful machine. It is an example of the all metal machines that continue to sew on after 60+ years and will probably keep on sewing for the next 50 years or more. Anyone with the time and patience to invest into learning how to restore and maintain these old machines can. That is the other beauty of pre-plastic and pre-computer era machines. I first delved into this hobby after finding some thorough instructions here. My more advanced questions have all been answered through various yahoo groups for vintage sewing machine fanatics. I’m hoping to addict more people to vintage sewing machines. There are so many out there un-used and they are so well built and just a joy to sew on.
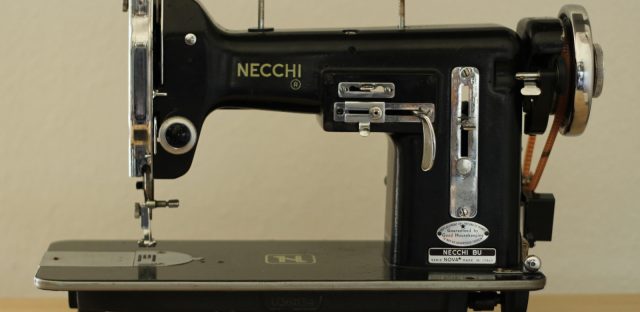
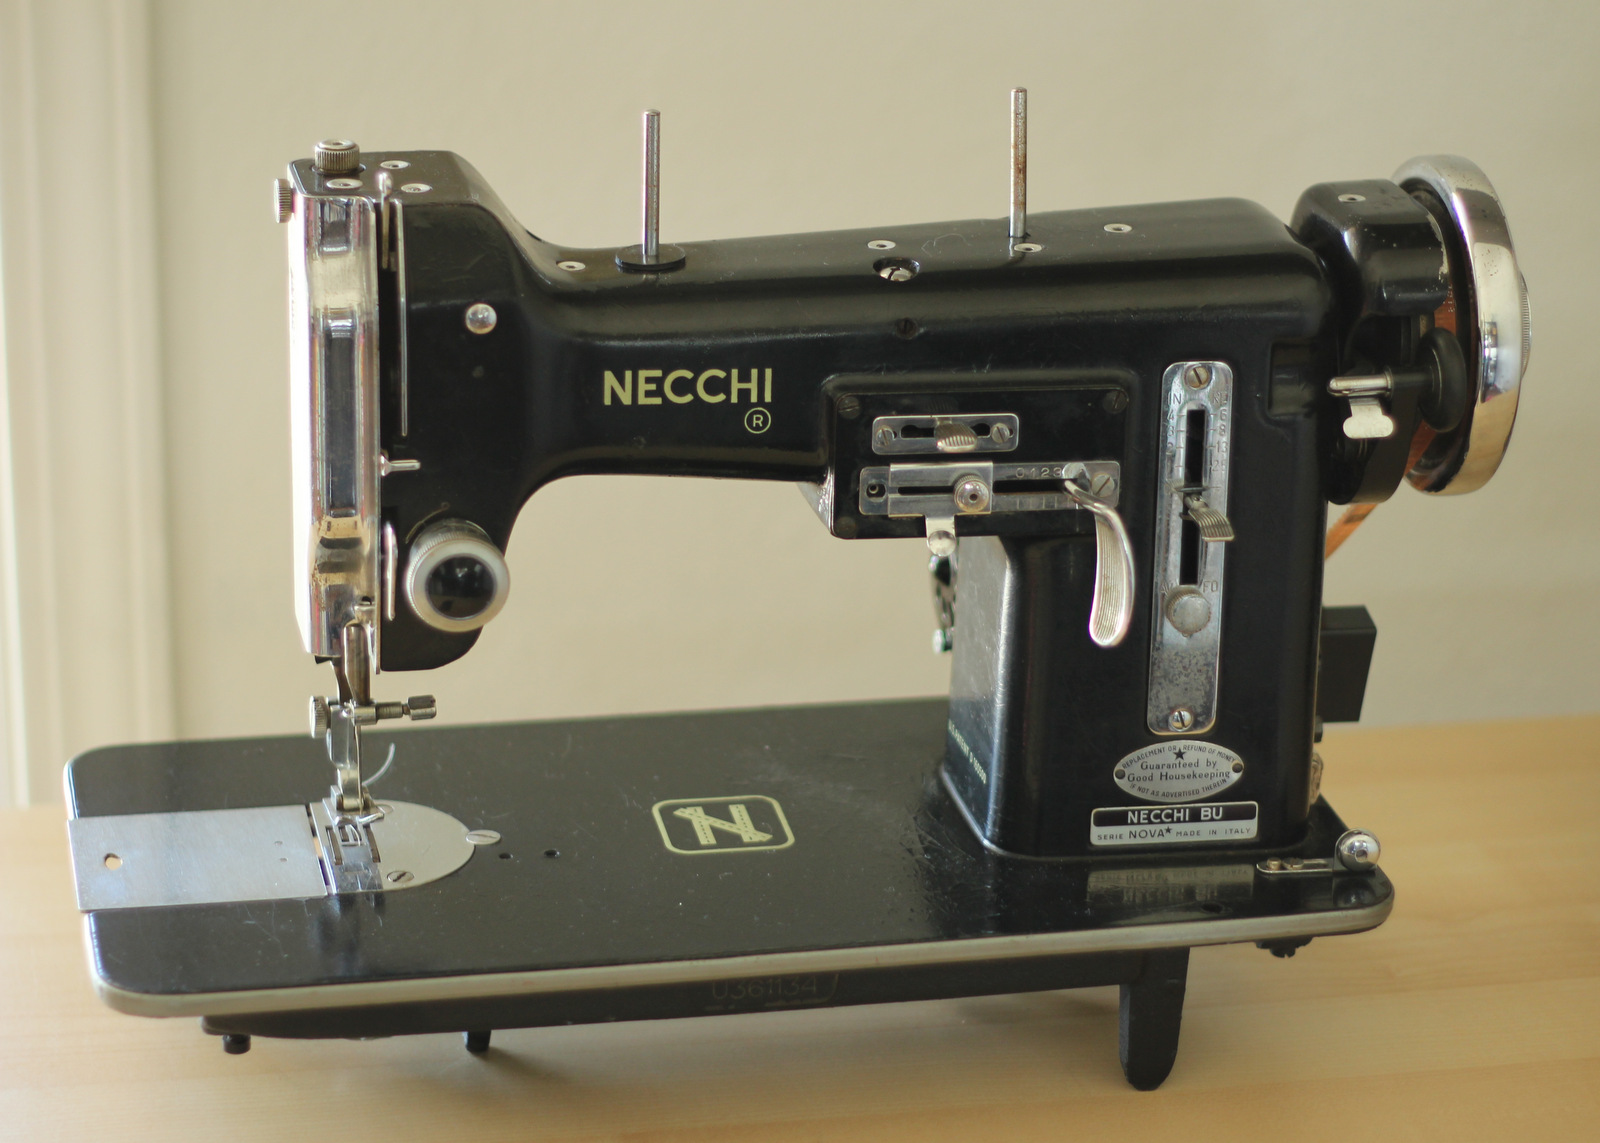
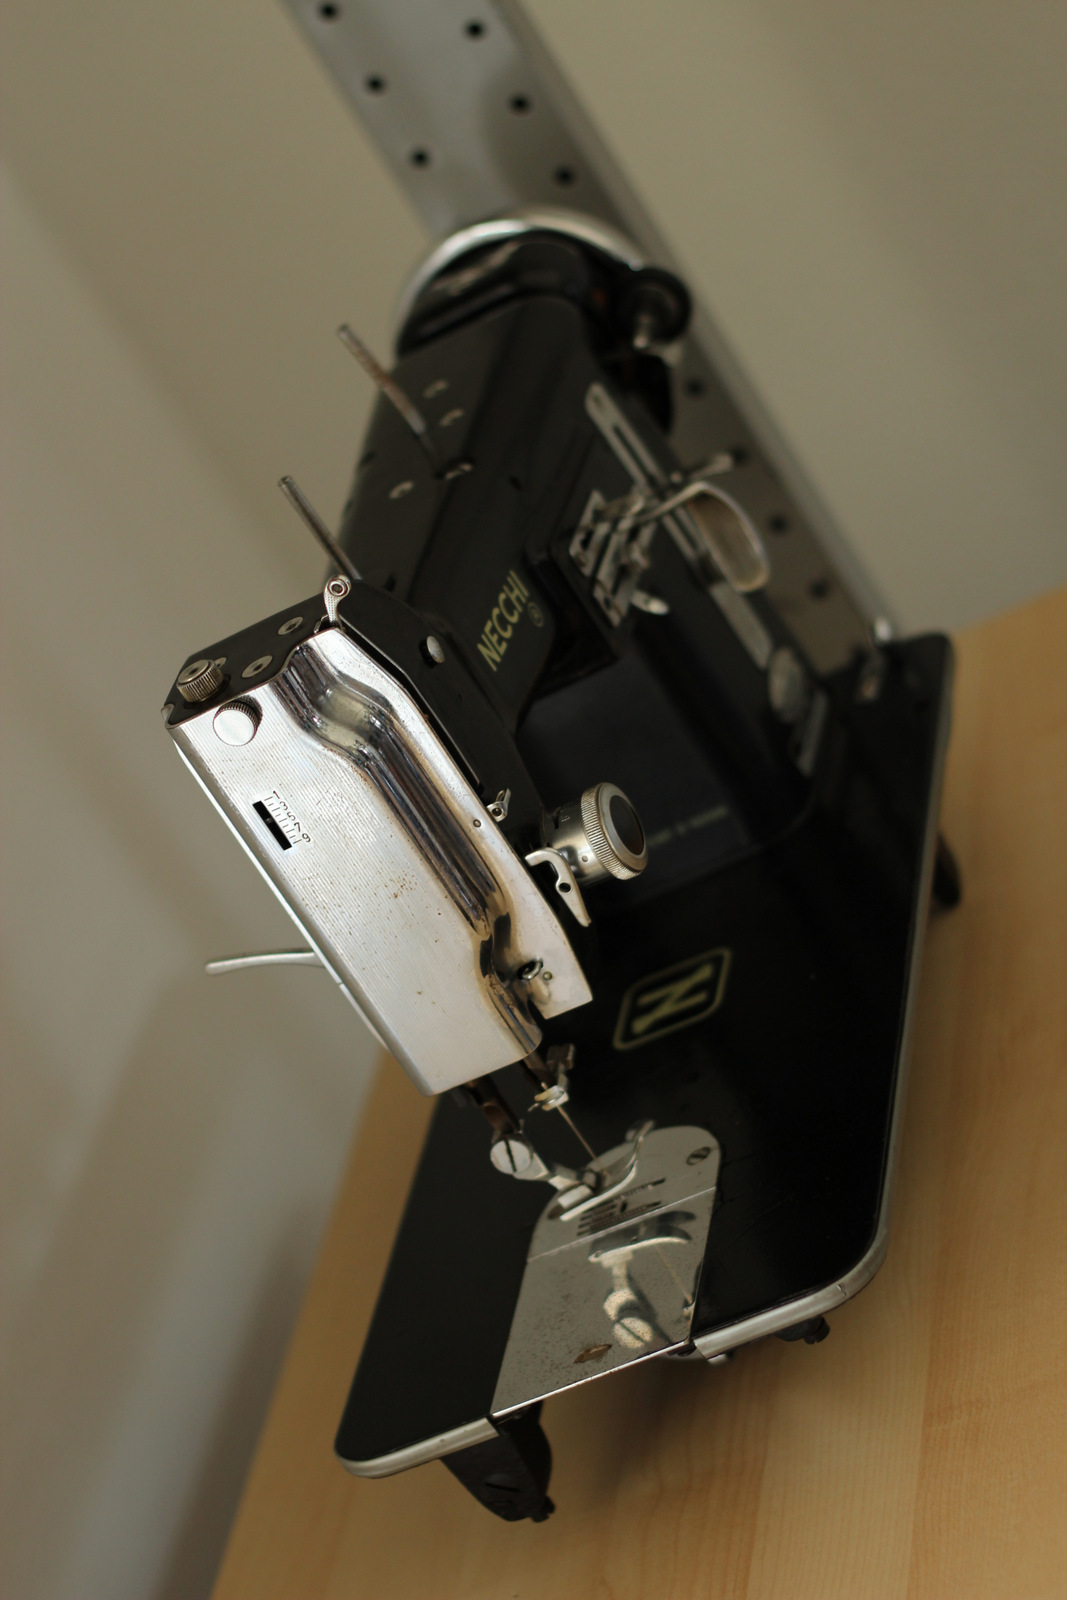
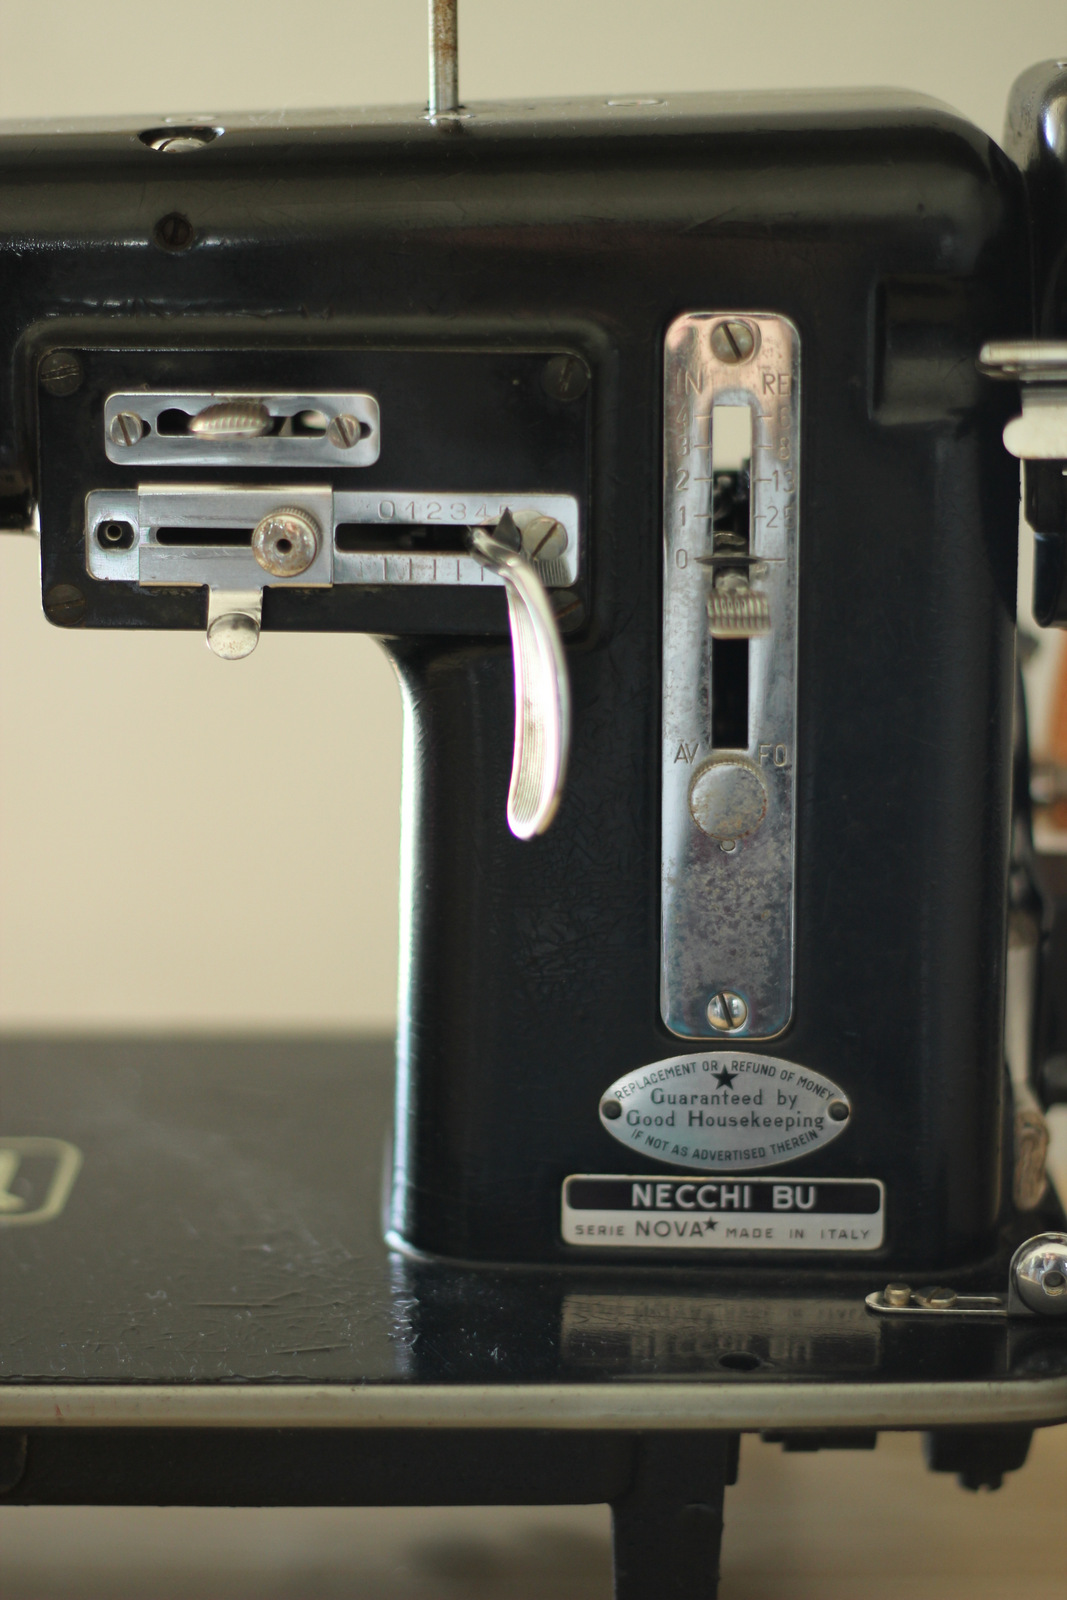
About a year ago I got another machine from the same time period. It’s a Necchi (pronouced Neck-ee) Nova BU. Italian made vintage ’50s Necchi sewing machines are thought by some to be the finest machines in the world and it has been a pleasure to restore this one. It can straight or zigzag stitch and it sews like a dream.
But this is what it looked like when I got it.
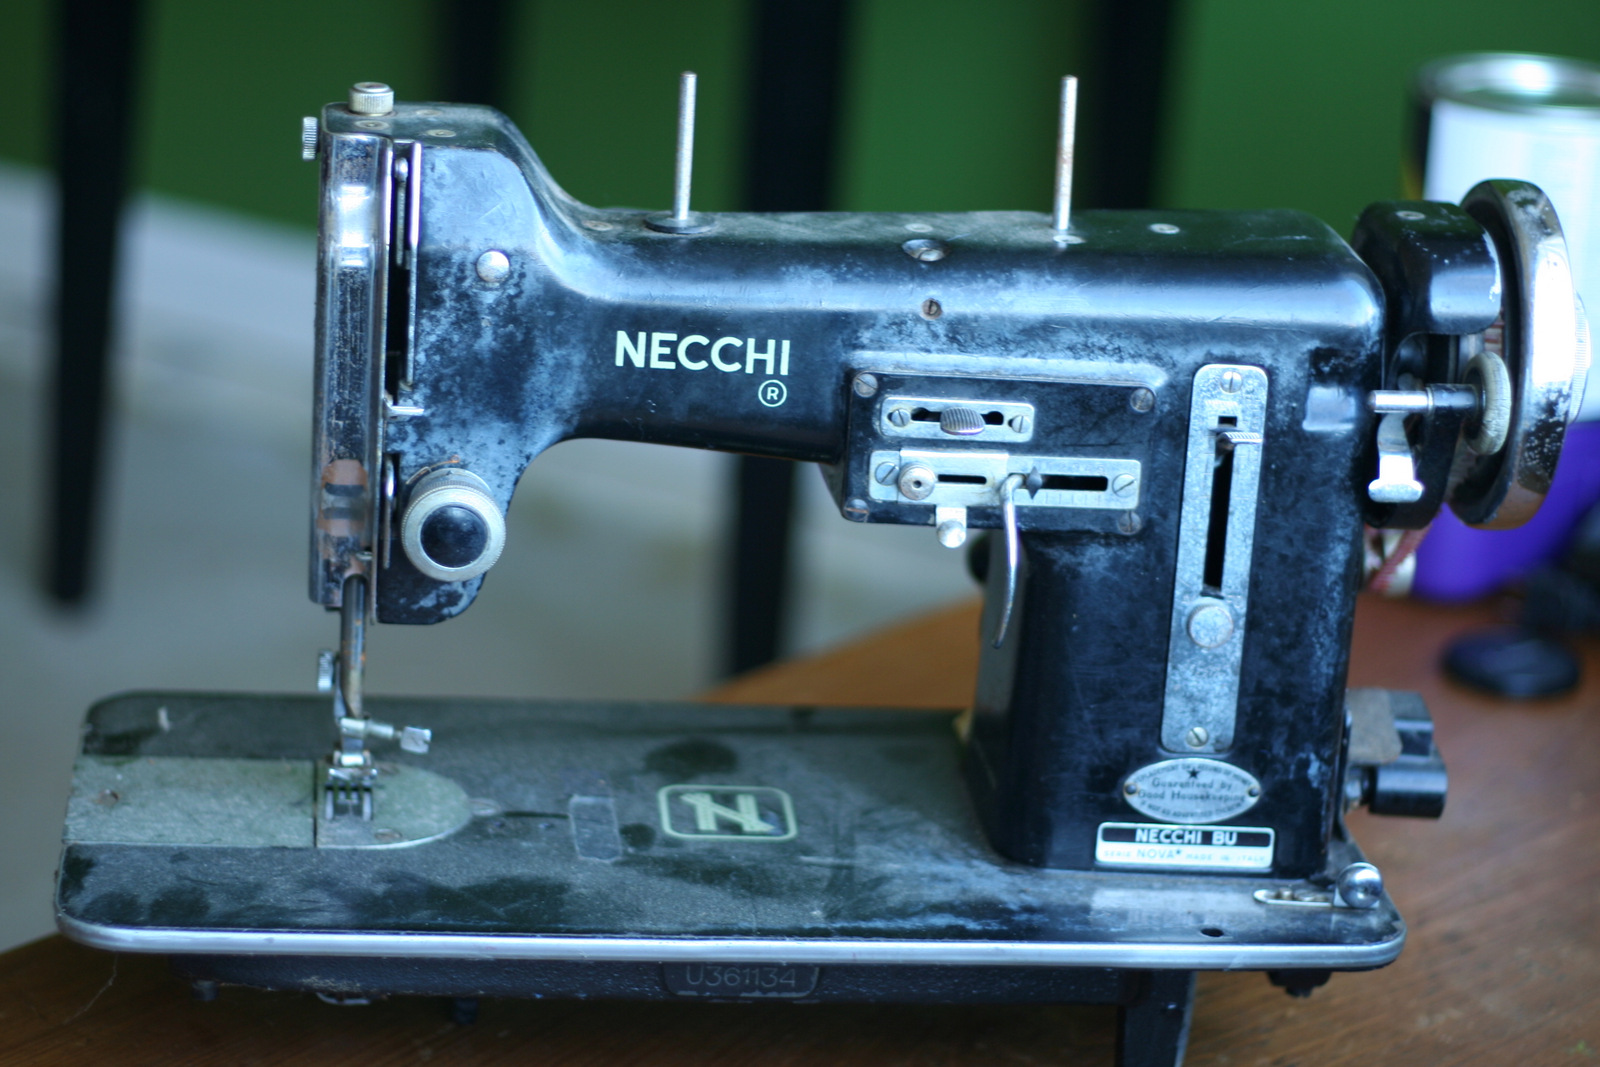
I rescued it from the garage of a man that could have been on an episode of Pickers or Hoarders… either one. The poor machine was rusted and filthy, the electrical cord insulation was crumbling, and the cabinet it was in was only standing because it was leaning on something else. The hand-wheel wouldn’t turn at all. Period. Not knowing quite what I was getting myself into, I paid $25 for it.
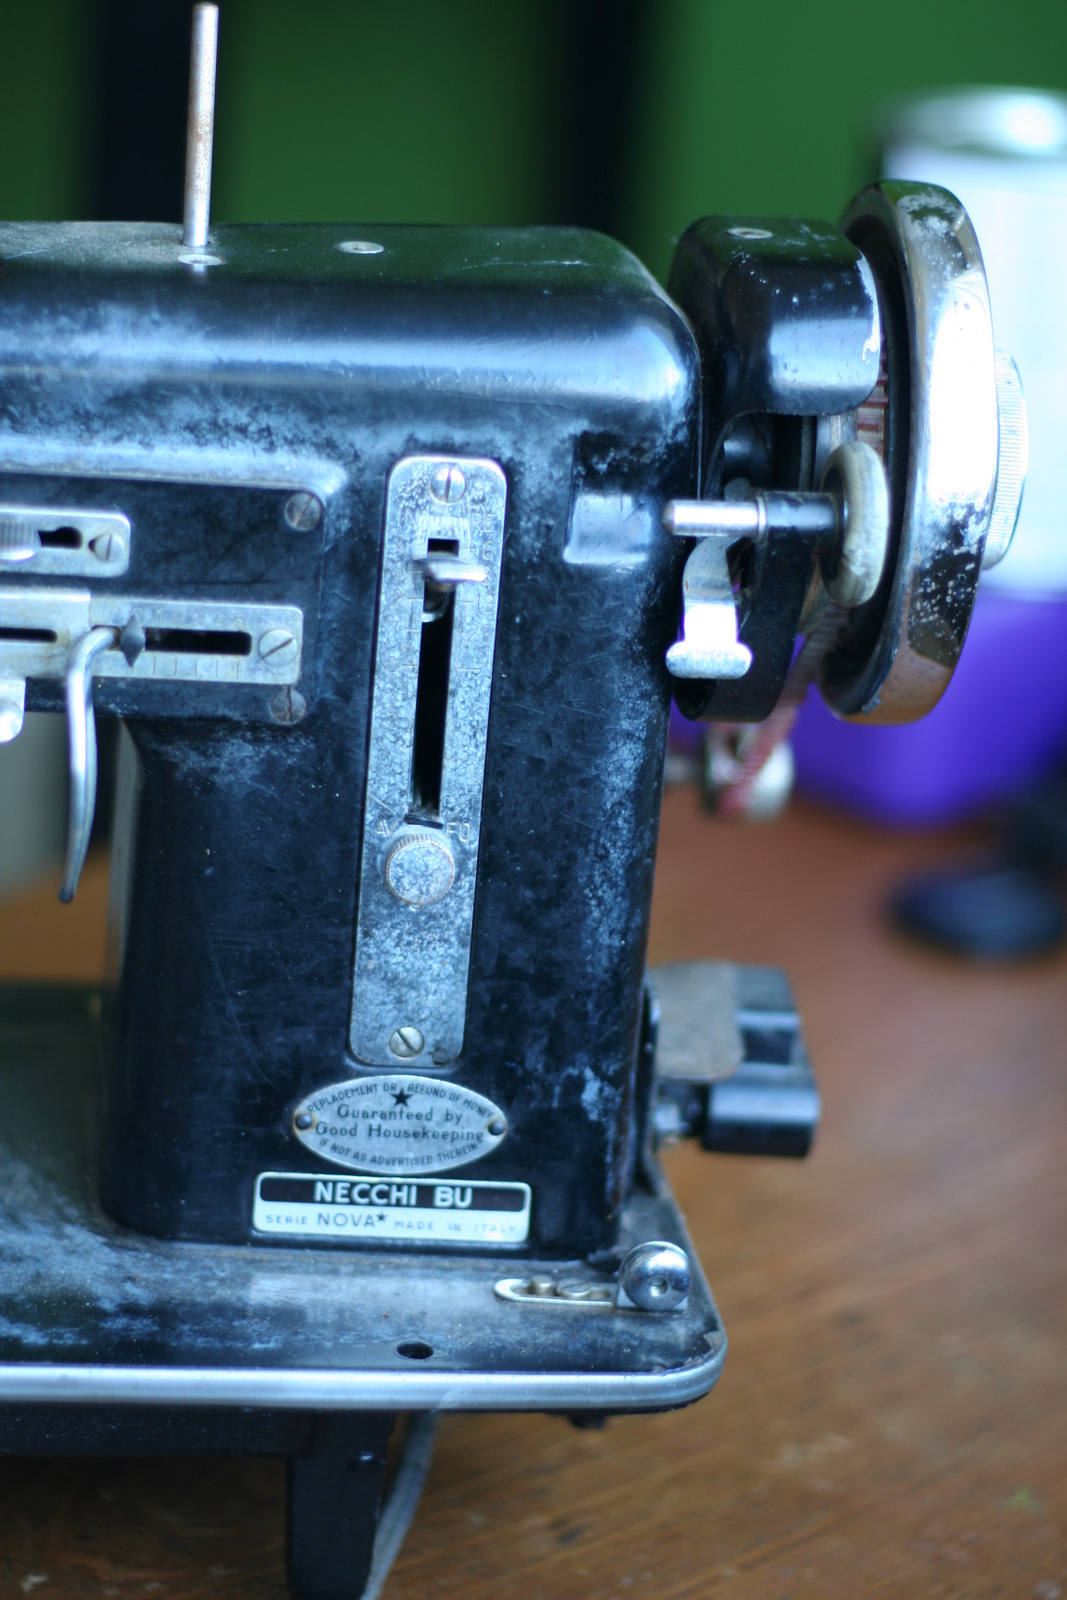
The cabinet went straight into the trash can. I tried to leave it with the man but he said his wife would be grateful to have it gone and I took pity on her. He might have had issues with throwing things away. The paint cleaned up very nicely with just a damp cloth and a lot of time. The inside of the machine was an ordeal to clean up and “un-freeze” it so that it would again move. But it was wonderful when I finally got it to move just a little and then slowly loosen up more and more with a good oiling. I also replaced the motor and foot pedals. The interior of the motor was too far gone from all the moisture it had been exposed to over the years for me to repair.
I still has a bit of work left to do. I want to polish off the remaining rust on the chrome and my husband is helping me rewire the light into the new motor. This is for sure my kind of vintage treasure love… very practical and beautiful and brilliantly made.
What a great looking machine! A very lovely find. Congrats!! 🙂
Will it sew through denim? I have a singer that is newer and mostly plastic. It won’t sew through my seams when I am hemming jeans. I mother in law wants to give me a Necchi, but the motor needs replacing. We are wondering if it is worth the money to replace the motor. Since I can sew other items with my current machine I don’t want her to spend money unnecessarily.
Hey, Clare. Thanks for your comment! Mine sews through denim very easily. Just powers through it. You may still have to ease it over the side seams as those are very thick. When you get to sewing through that many layers of a thick fabric, your foot is frequently so high up from the bed that it effects the tension of the machine. I haven’t had problems as long as I turn the machine by hand and ease the fabric under the foot for those few stitches. I also have had the newer machines balk at jean hemming but have had no problem with any of my vintage machines. As far as replacing the motor, I had a hard time finding a compatible one just because of how the motors mount. I’d recommend looking for a necchi motor for your model. I ended up using one of these motor kits http://shop.sew-classic.com/Motor-Kit-Deluxe-w-Controller-Cord-set-and-Terminal-SCEFM190.htm and fastened it to the machine using just one screw. I then had to use some folded up bits of cardboard under the mounting bracket to position the motor and belt correctly. I hope that helps and I’d love to hear back from you if you end up going on this adventure. 🙂