
There’s nothing quite like a really really good diaper cover that’s really cute and looks like you spent hours, and hours, and hours, knitting it. What makes it even better is the fact that really I just found a large $4 wool sweater at the thrift store and will get 5 sewn covers from it! And it doesn’t take as long as knitting covers, or even crocheting covers.
I’ve been wanting to find an easy fool-proof non-pattern for sewing wool diaper covers. After looking at many, many… many sewing instructions for diaper covers I’ve been discouraged. Most patterns are ones you have to print out to use, and I can’t help but wonder if the pattern will be right for my super long tiny thigh baby. And I’m positive they’ll be wrong for my 38 lb 2 year old! Another type of pattern is one that says something like, “Start forming the leg curve” or “just freehand a shape like this.” *Sigh* I get the feeling that if I just started chopping until I got the shape just right it would fit nothing but my 6 year old’s doll in the end. It would be like the hair cut that just wasn’t straight… until it was a bob. I’m a little perfectionist like that.
So, as I usually do, when I can’t find what I want, I created it. I took inspiration from the Easiest Crochet Wool Soaker, decided rectangles were perfect for sewing as well, and created my own non-pattern. I found that I like it much. Extra fabric in the crotch region is great for a little extra absorbency in the right spot. It’s very easy to customize! Very good for getting the most out of your sweater! Very forgiving. I don’t know about you, but I don’t have a serger. For anyone that’s had trouble sewing thick knit sweater material with a plain old sewing machine, this one’s for you! The lines are straight and the cuffs actually take advantage of the tendency of the material to stretch under the foot. I hope you find it useful!
Easy Sew Wool Cover
Tutorial(also known as soakers)
To make this custom fit you can measure your baby, or one of their good fitting diaper covers, first. Measure:
1. Around the largest part of the upper thigh
2. Around the hips (over the kind of diaper you’ll be covering… prefold, fitted…)
3. The rise (over the diaper you’ll be covering… from above the diaper in the front middle-usually belly button level, go between the legs, to above the diaper in the mid-back.)
If you don’t have a baby on you at the moment 😉 or you’re sewing for friend, family, or expected, here’s a bit of a guide I’ve developed in my own search for this info. It’s really hard to say what will fit one baby because they are all so different! Some are super skinny, in between, or super chubby. In addition, there are tall and short babies and those with huge mongo thighs and those without. Since a knit sweater is usually pretty stretchy hopefully it will last a while! And… when in doubt I go a little big. One thing for sure about babies… they grow! And one thing’s for sure in sewing, you can always take it in. 🙂 My cover here had 9 inch thighs, 14 inch hips, and 16 inch rise. It fits my 3 month old (maybe 12 lbs now), looks like it won’t fit too much longer but would have probably worked when she was born too (8lbs 5 oz).
Diaper Cover Measurements
Newborn Small Medium Large XL
Hip: 13-15 14-16 15-18 18-21 19-22
Rise: 12-14 14-16 16-18 18-20 19-24
Thigh: 6-8 8-10 10-13 11-14 13-17
Tips: I’ve found a wide, long zigzag stitch does best at not getting wonky when sewing thick knit material like sweaters. Try it out on a scrap piece first! If you feel like the long wide zigzag stitch is not strong enough you can sew it twice. It can also help to not sew too close to the edge of the material. In general, ease and push the knit fabrics under the foot of the machine while you sew it. Do not stretch it through or it will get very stretched out and ripply at the edges. But… I do instruct you to stretch out the cuff material when sewing it on to get a good fit around the thigh.
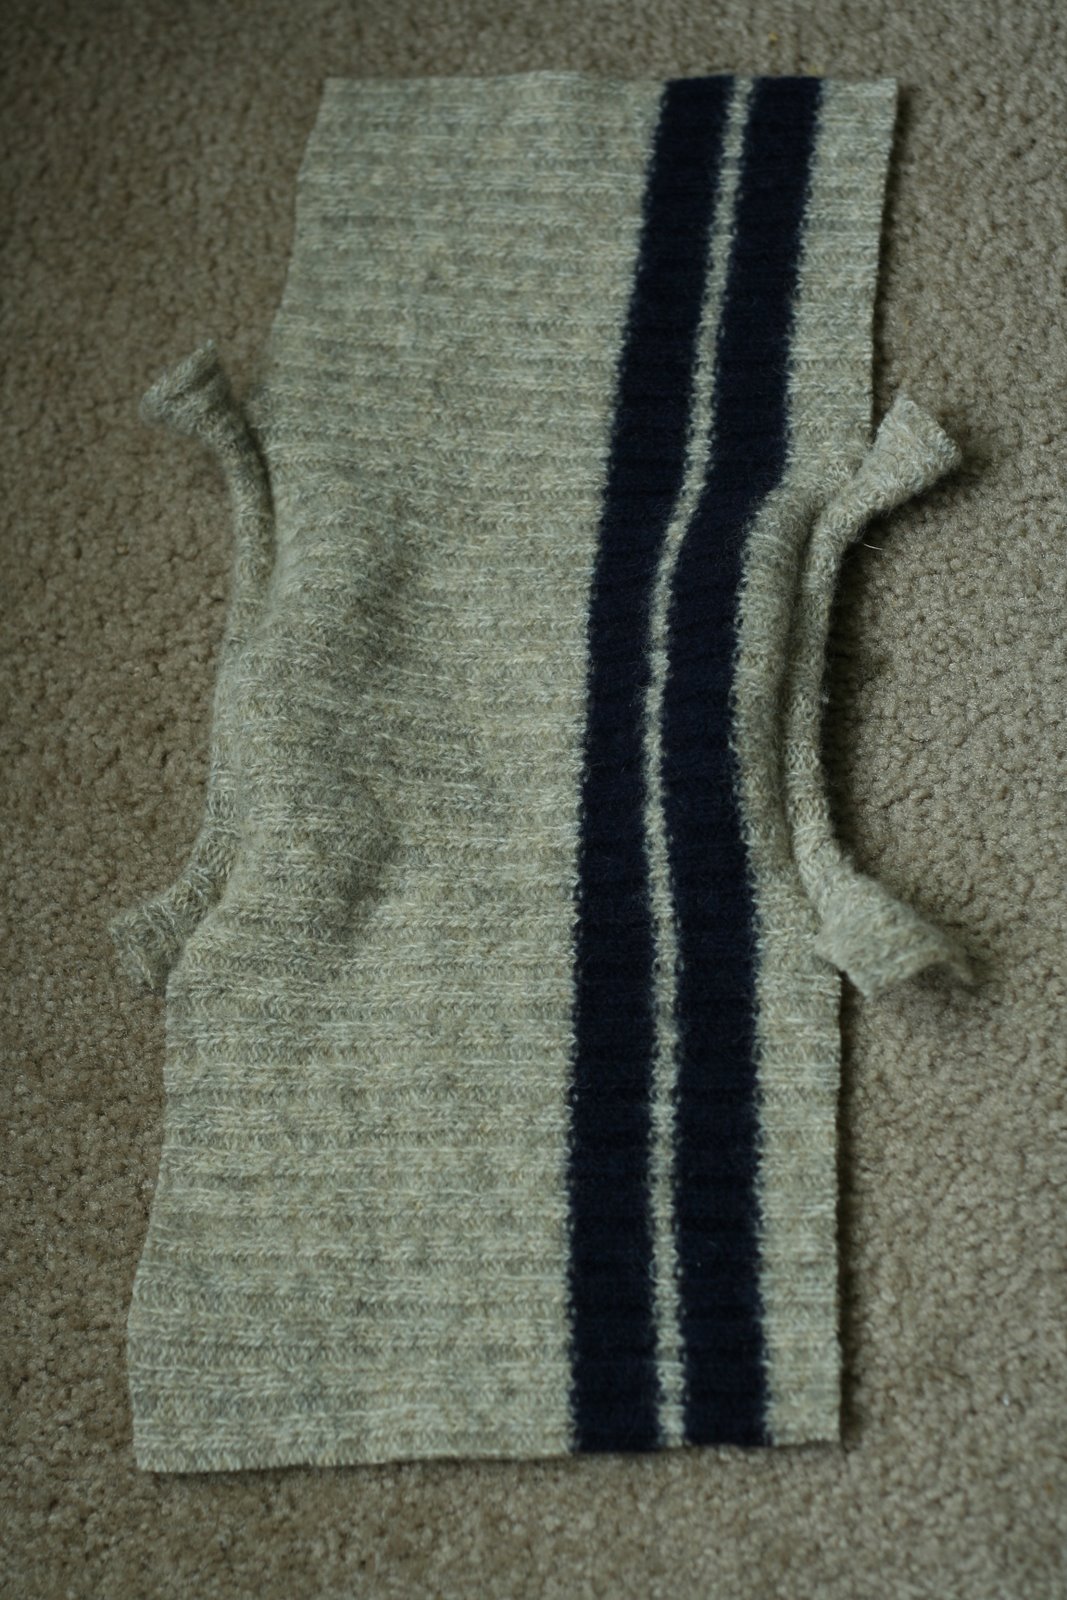
1. Cut out 3 rectangles.
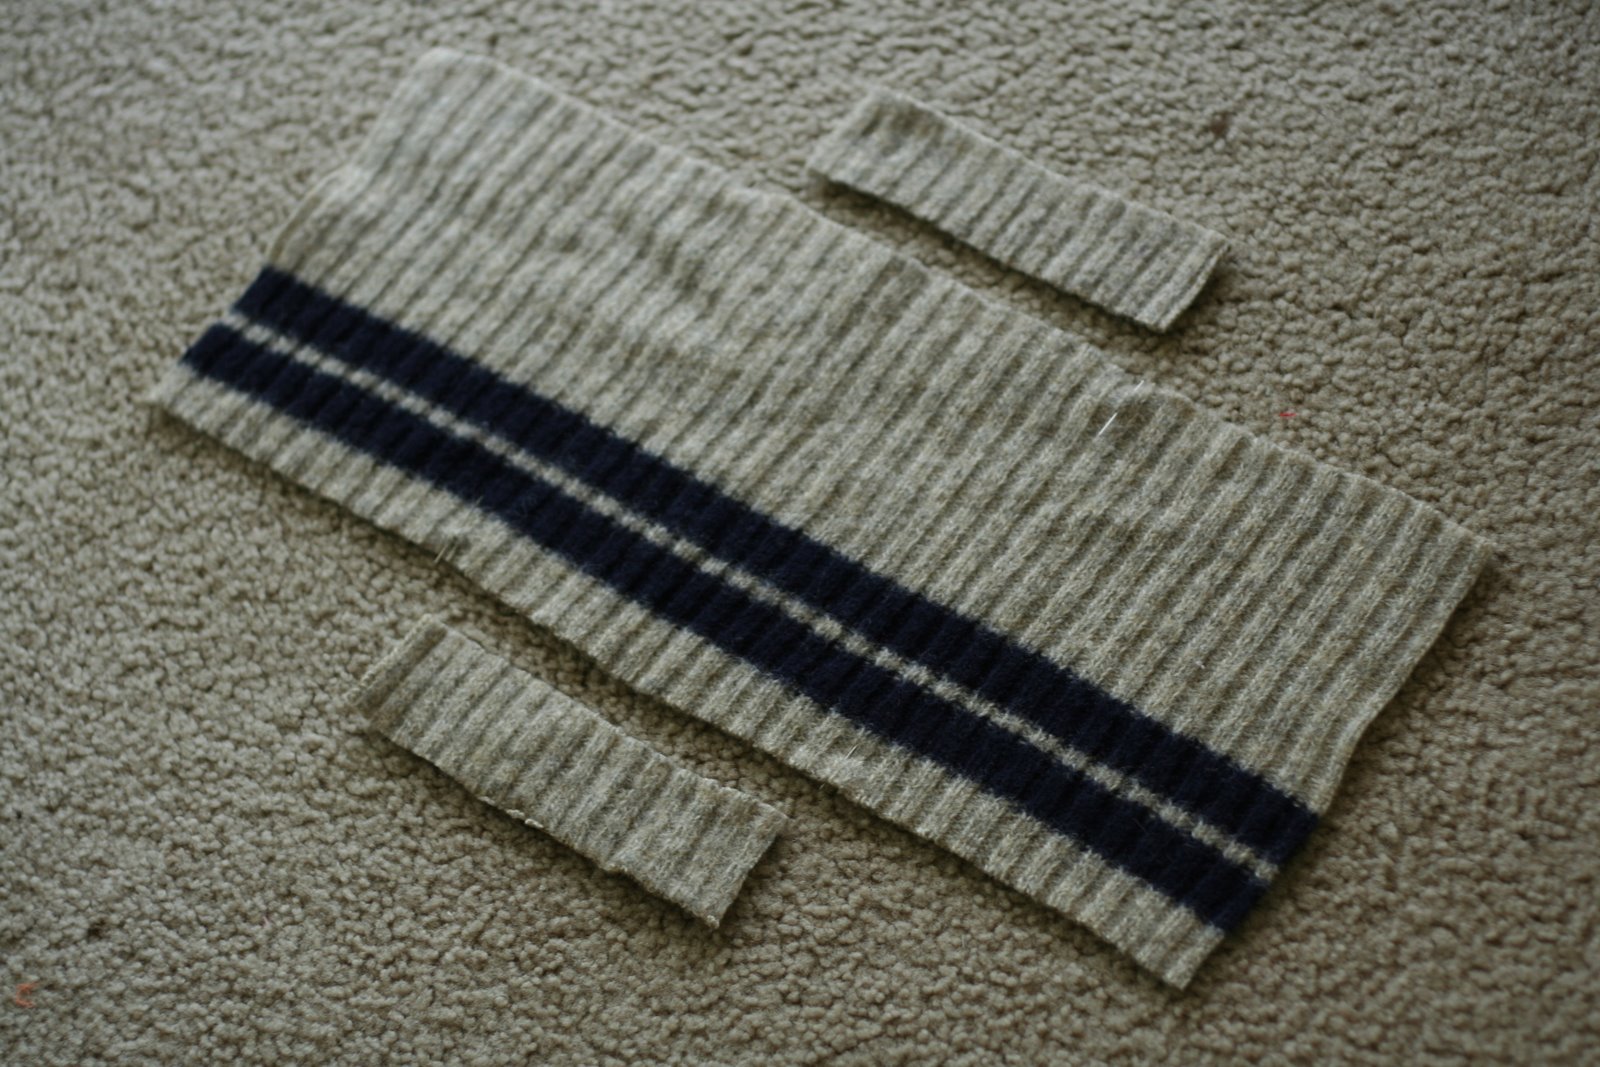
The large rectangle (body of the diaper) will be the rise measurement + 3 inches by 1/2 of the hip measurement + 1 inch. The 2 cuff rectangles will be 2 inches by your thigh measurement (no worries about seam allowance on this. You will stretch it.)
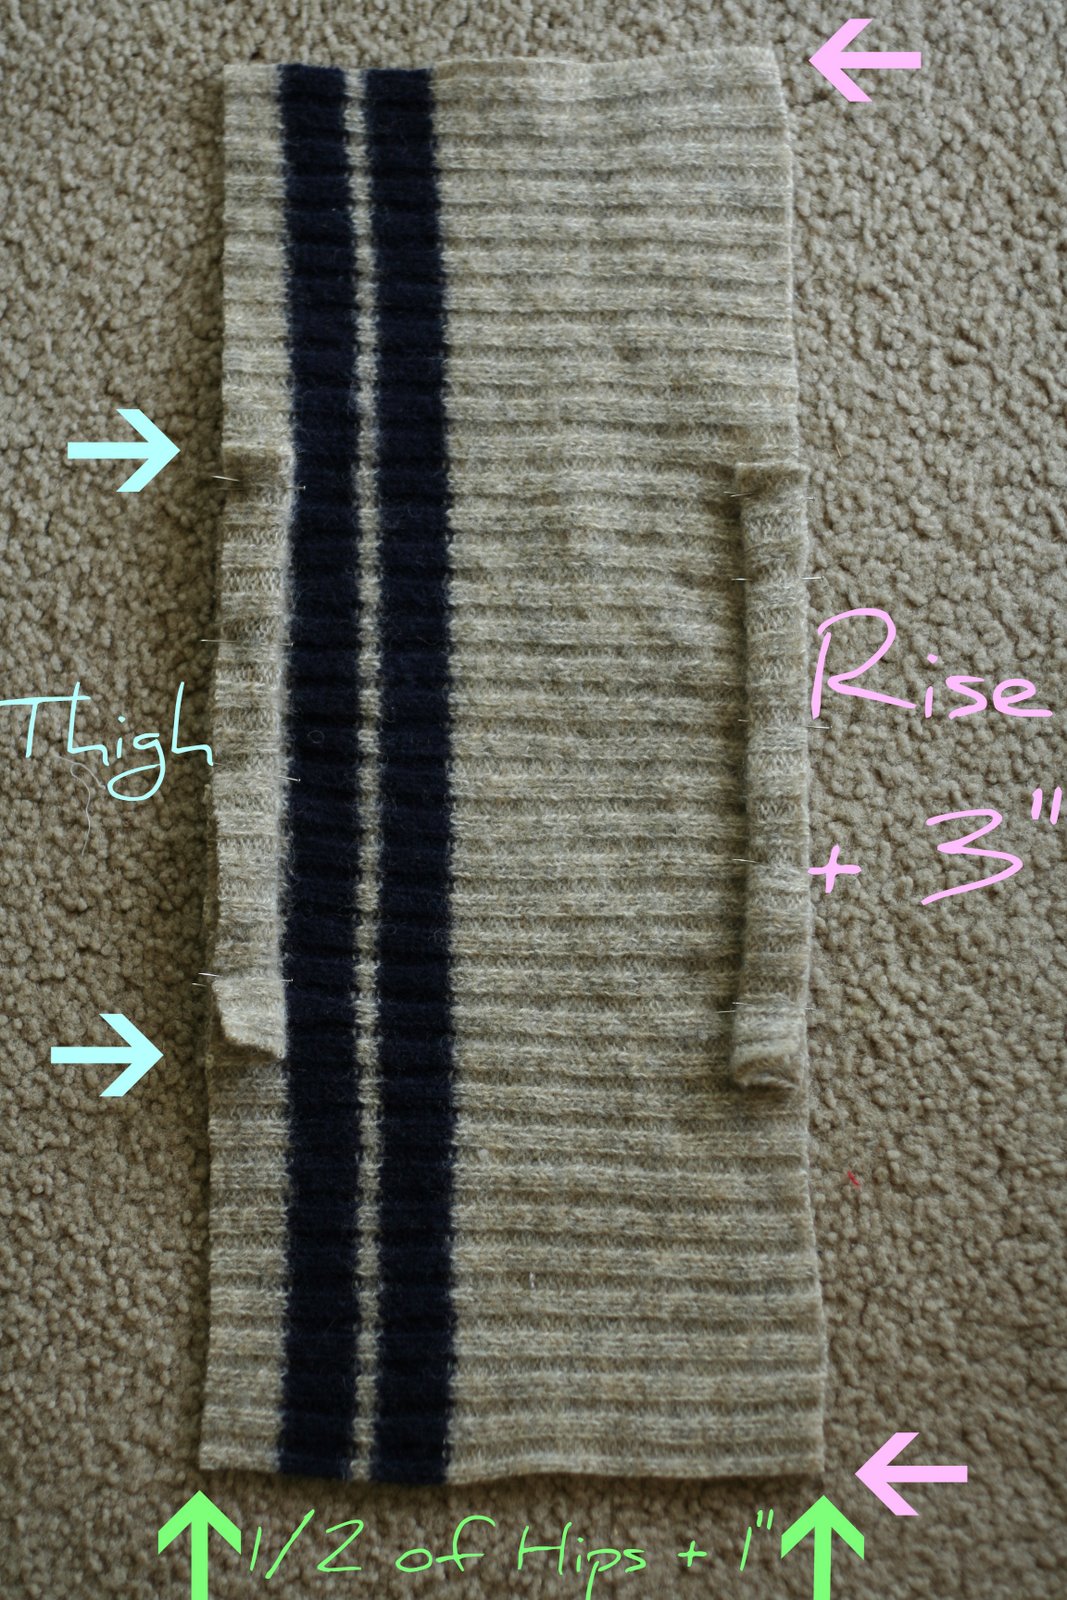
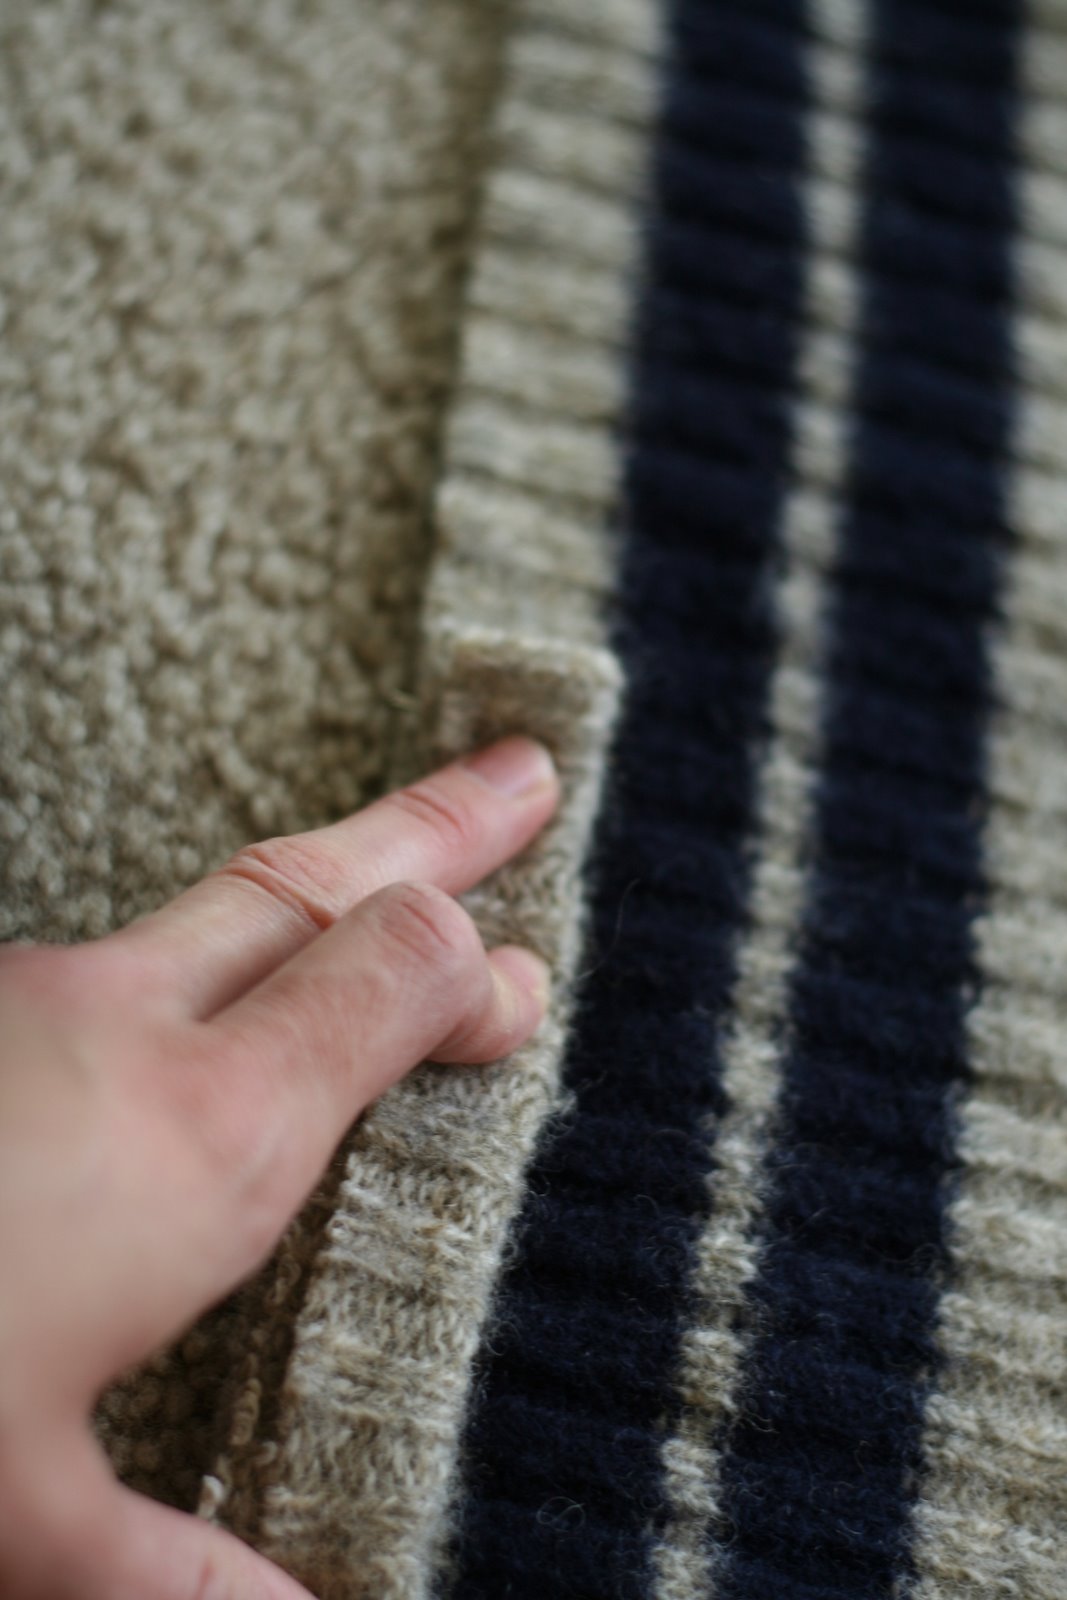
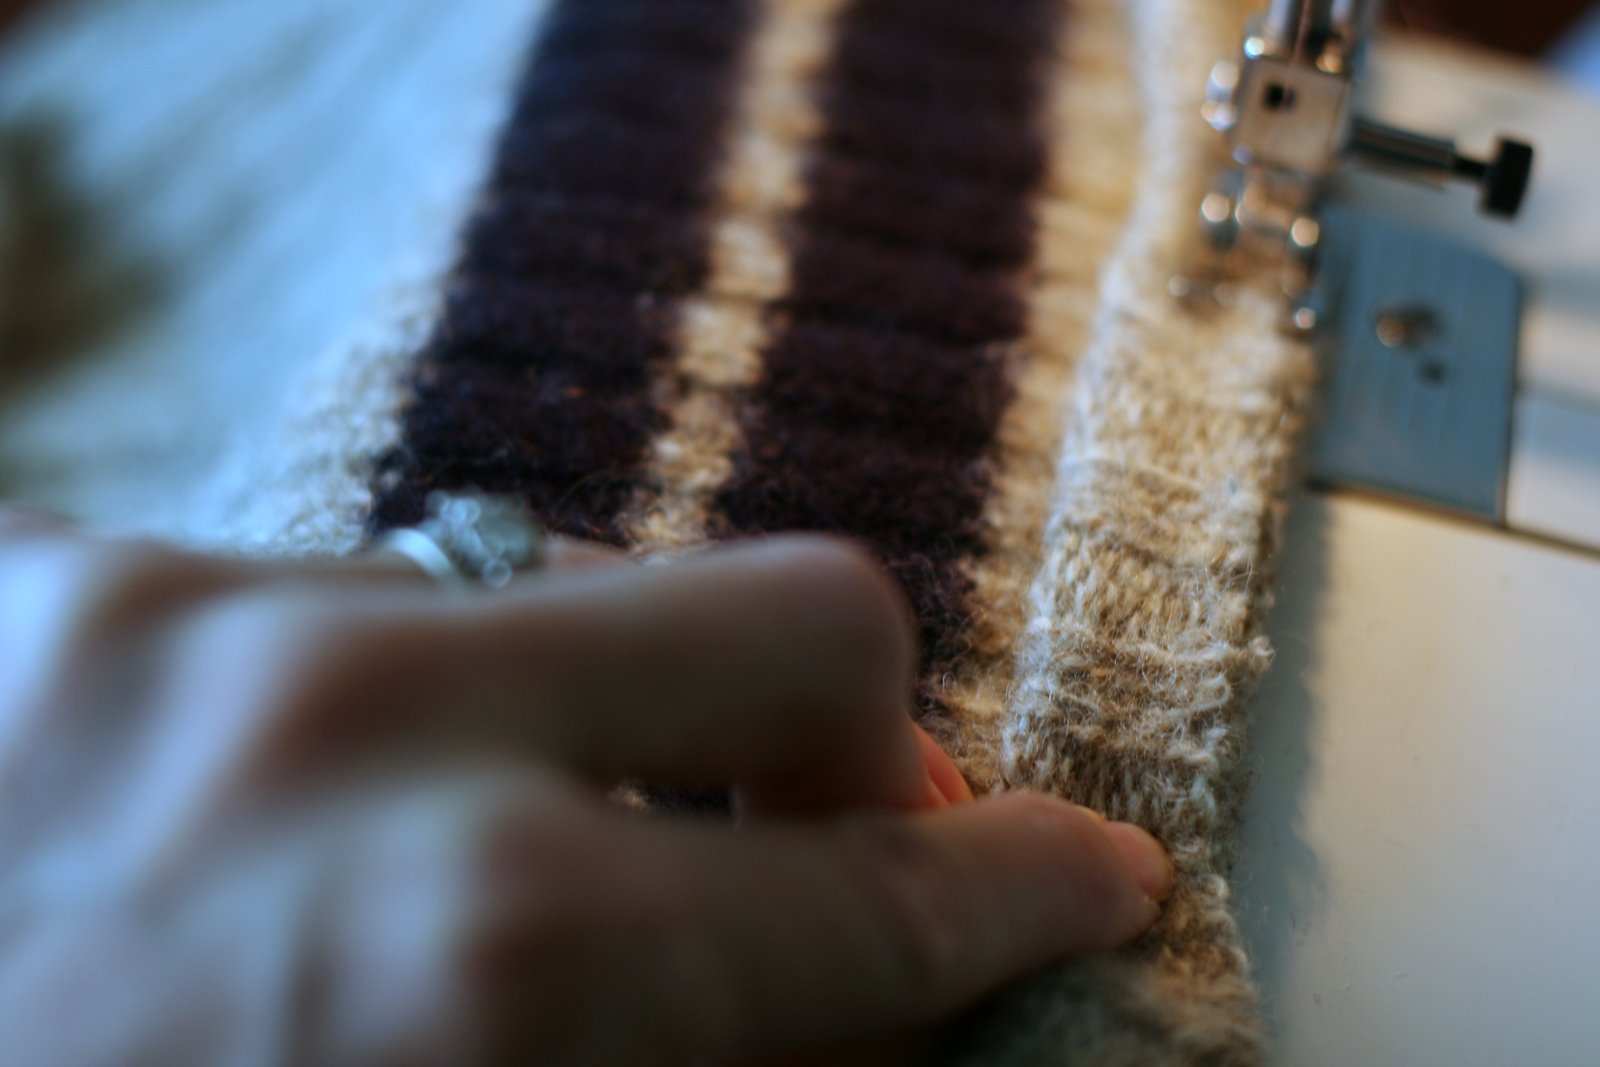
2. Fold the cuffs in half lengthwise and pin to the center of the long sides of the body. Raw edges all facing out like below. Stretch out the cuffs as you pin them on… but don’t stretch the fabric for the body. See the difference below in the width of the ribbing below?
Mark on the fabric with pins the top and bottom of your thigh measurement so you know where to start and stop sewing. Below you can see that I left the ends of the cuffs sticking off. Don’t worry about this for now.
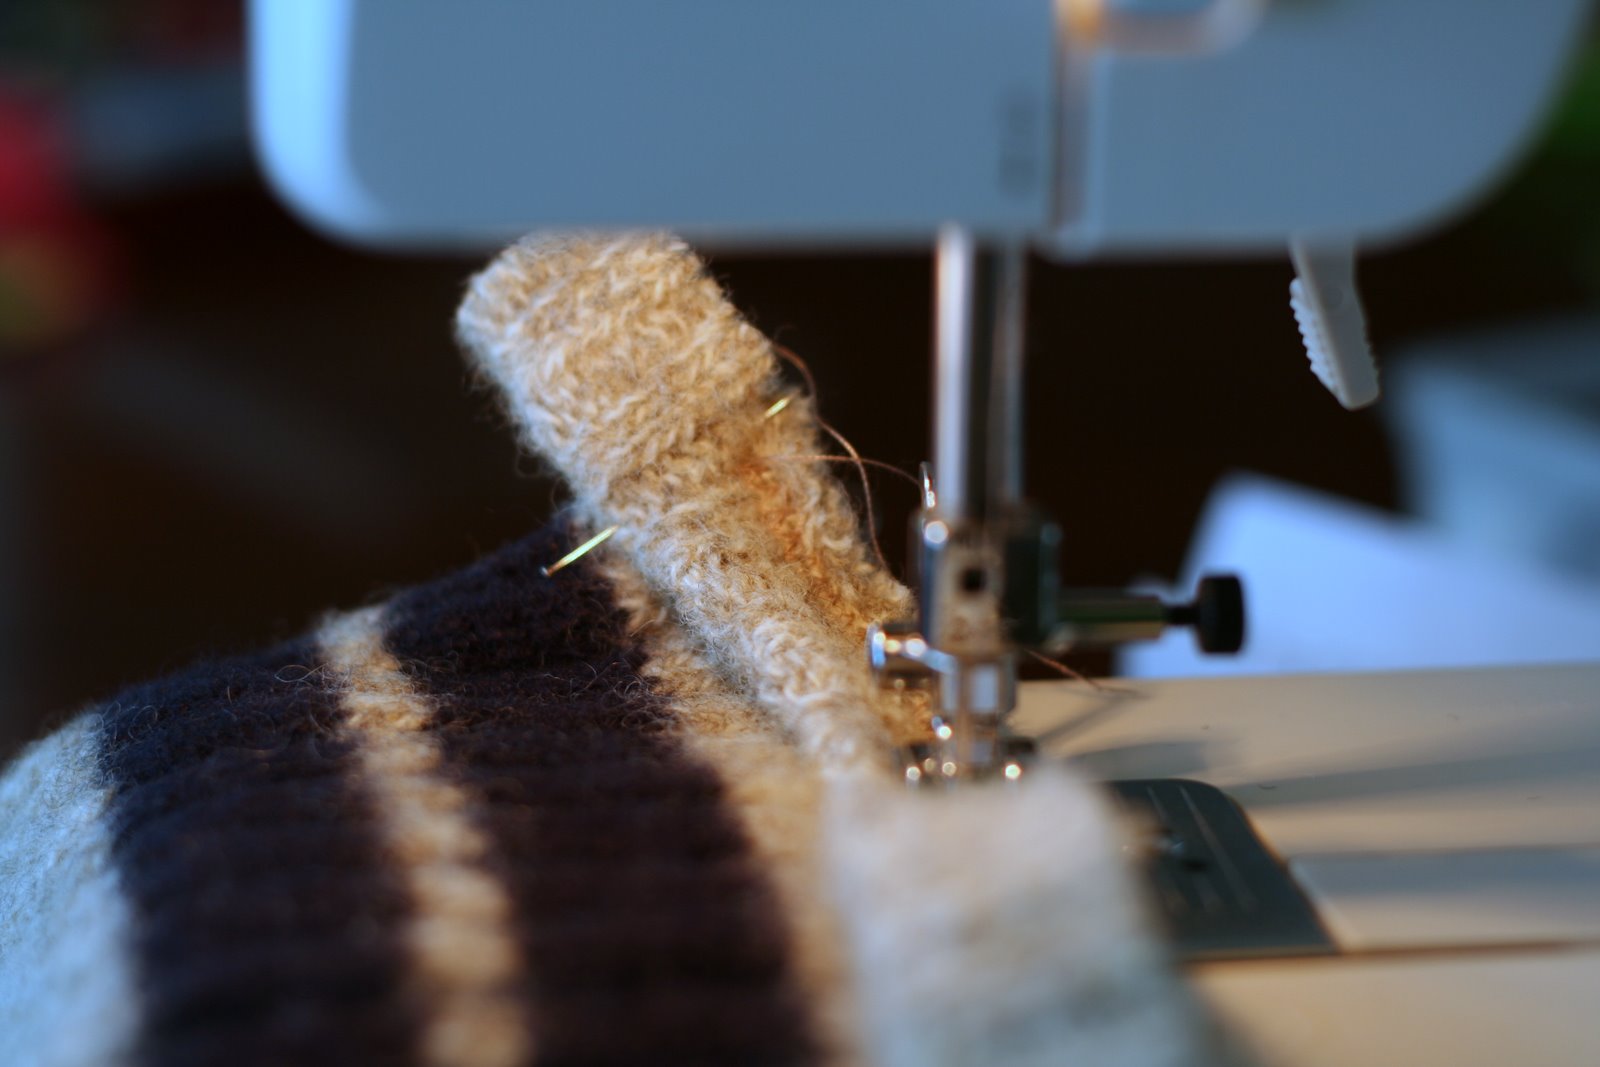
You can see again here that while it was going through the machine, I stretched the cuff fabric while easing the main body fabric underneath. Sew it with your foot right at the edge.
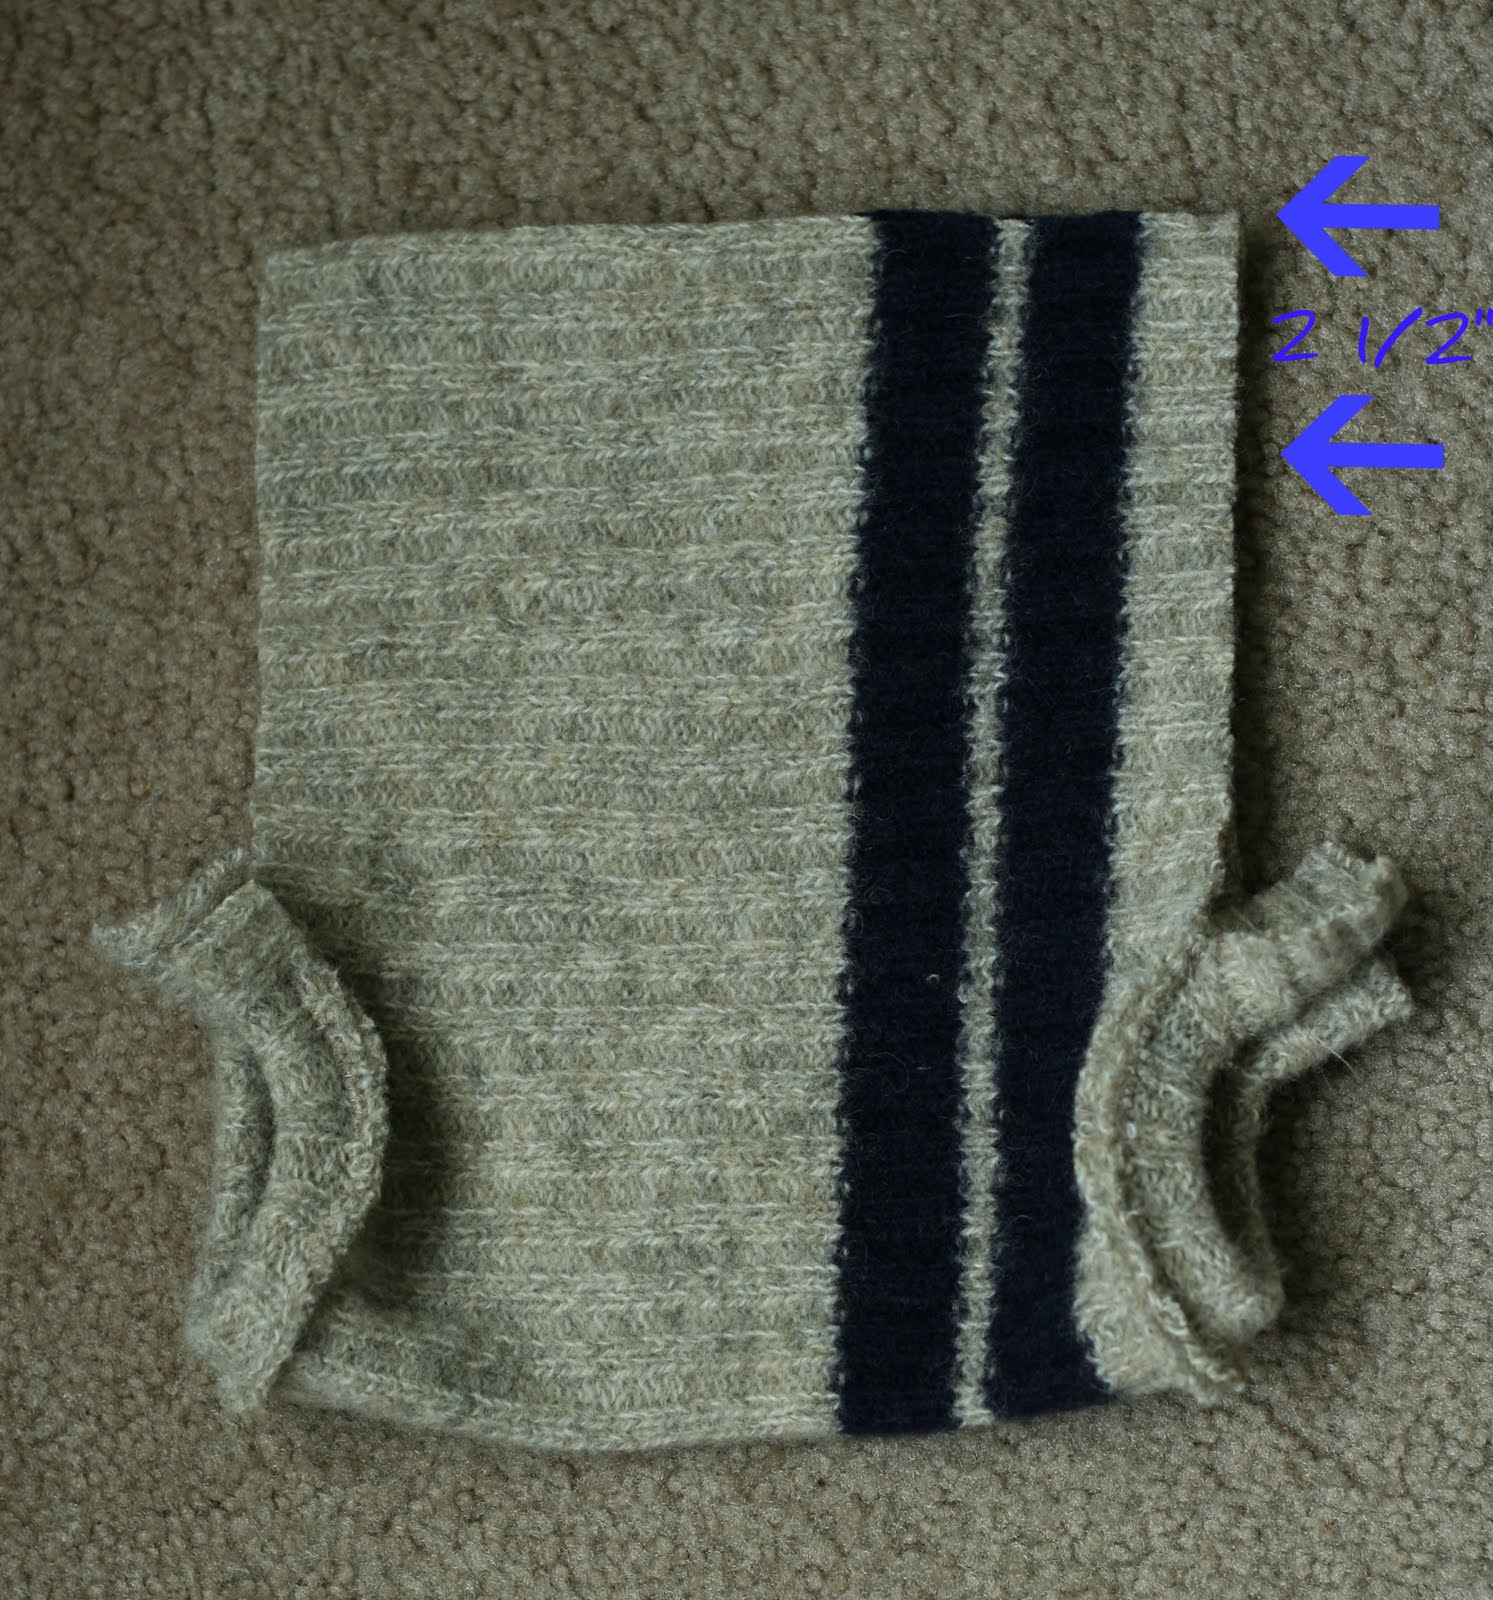
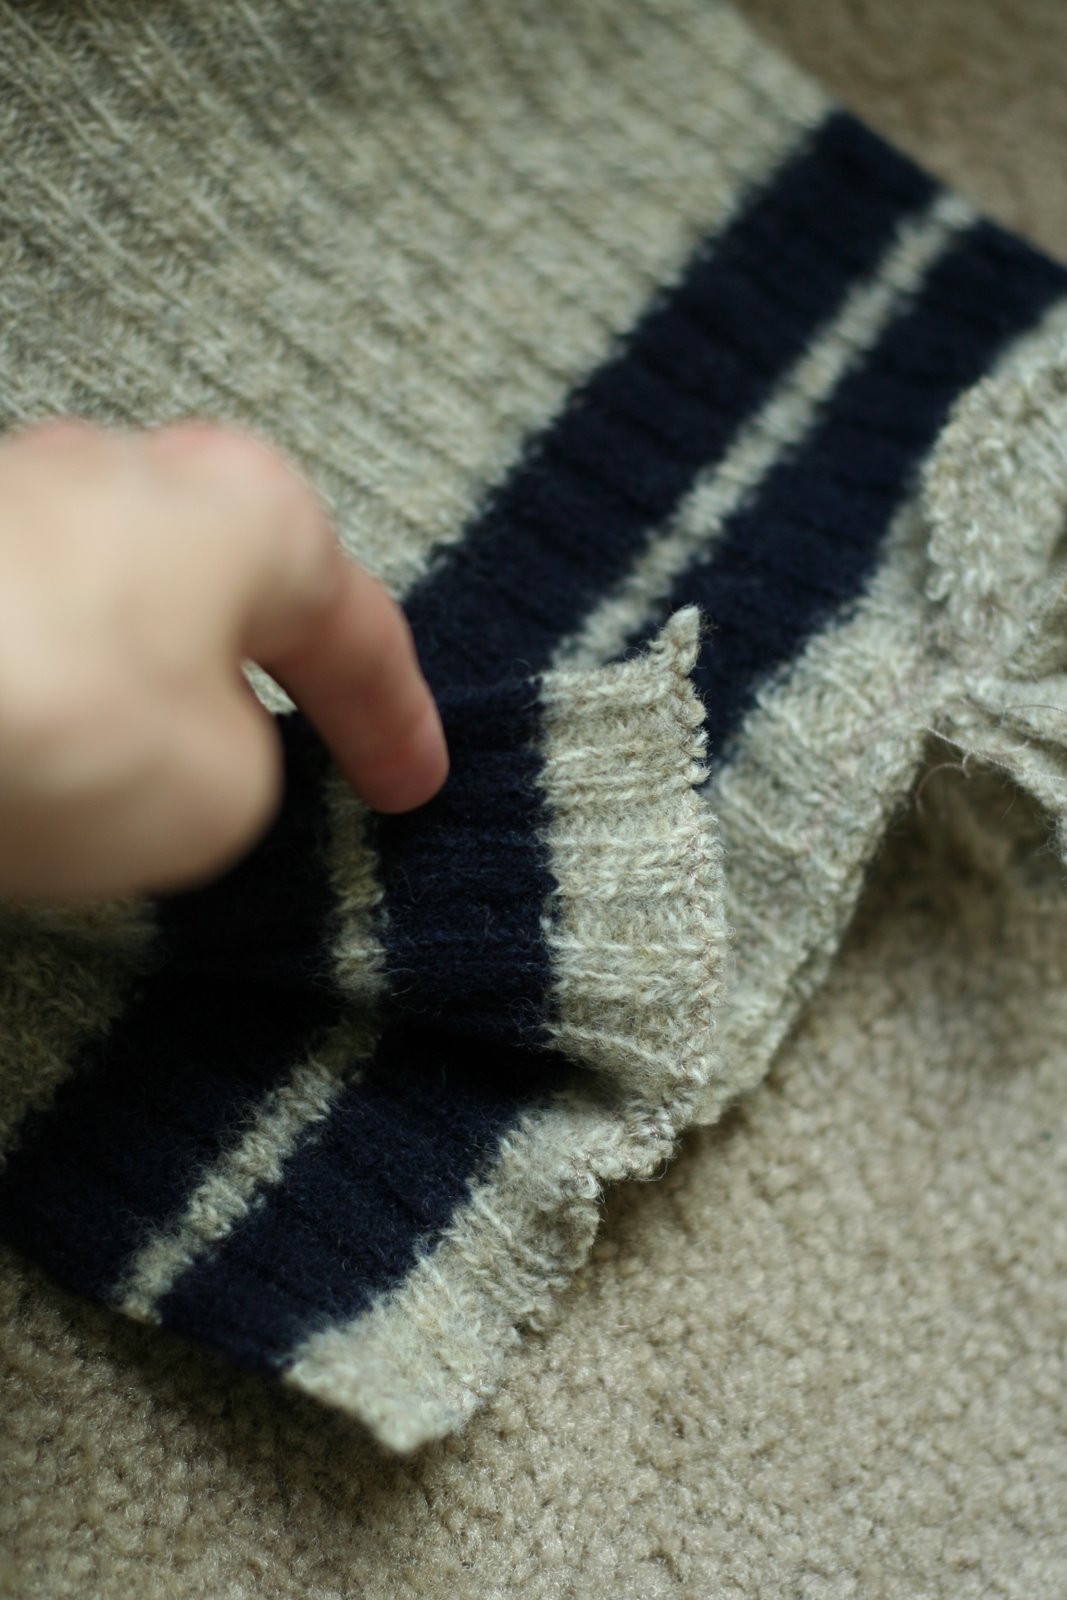
3. Now, fold your diaper in half, right sides together like below. Pin sides and the ends of the leg cuffs. If you’d like to do a side drawstring like I did leave 2 1/2″ un-sewn at the top of one side (location shown between blue arrows below.) Sew down each side with a 1/2 inch seam allowance. When you get to the top of the leg cuff, turn, and sew the 2 ends together. After sewn, trim the extra edges of the cuffs.
Now, the fabric that you didn’t sew together, go over the edges separately with zigzag stitch so they won’t fray.
4. With your diaper cover still inside out, fold down the waist 1 1/2 inches and sew.
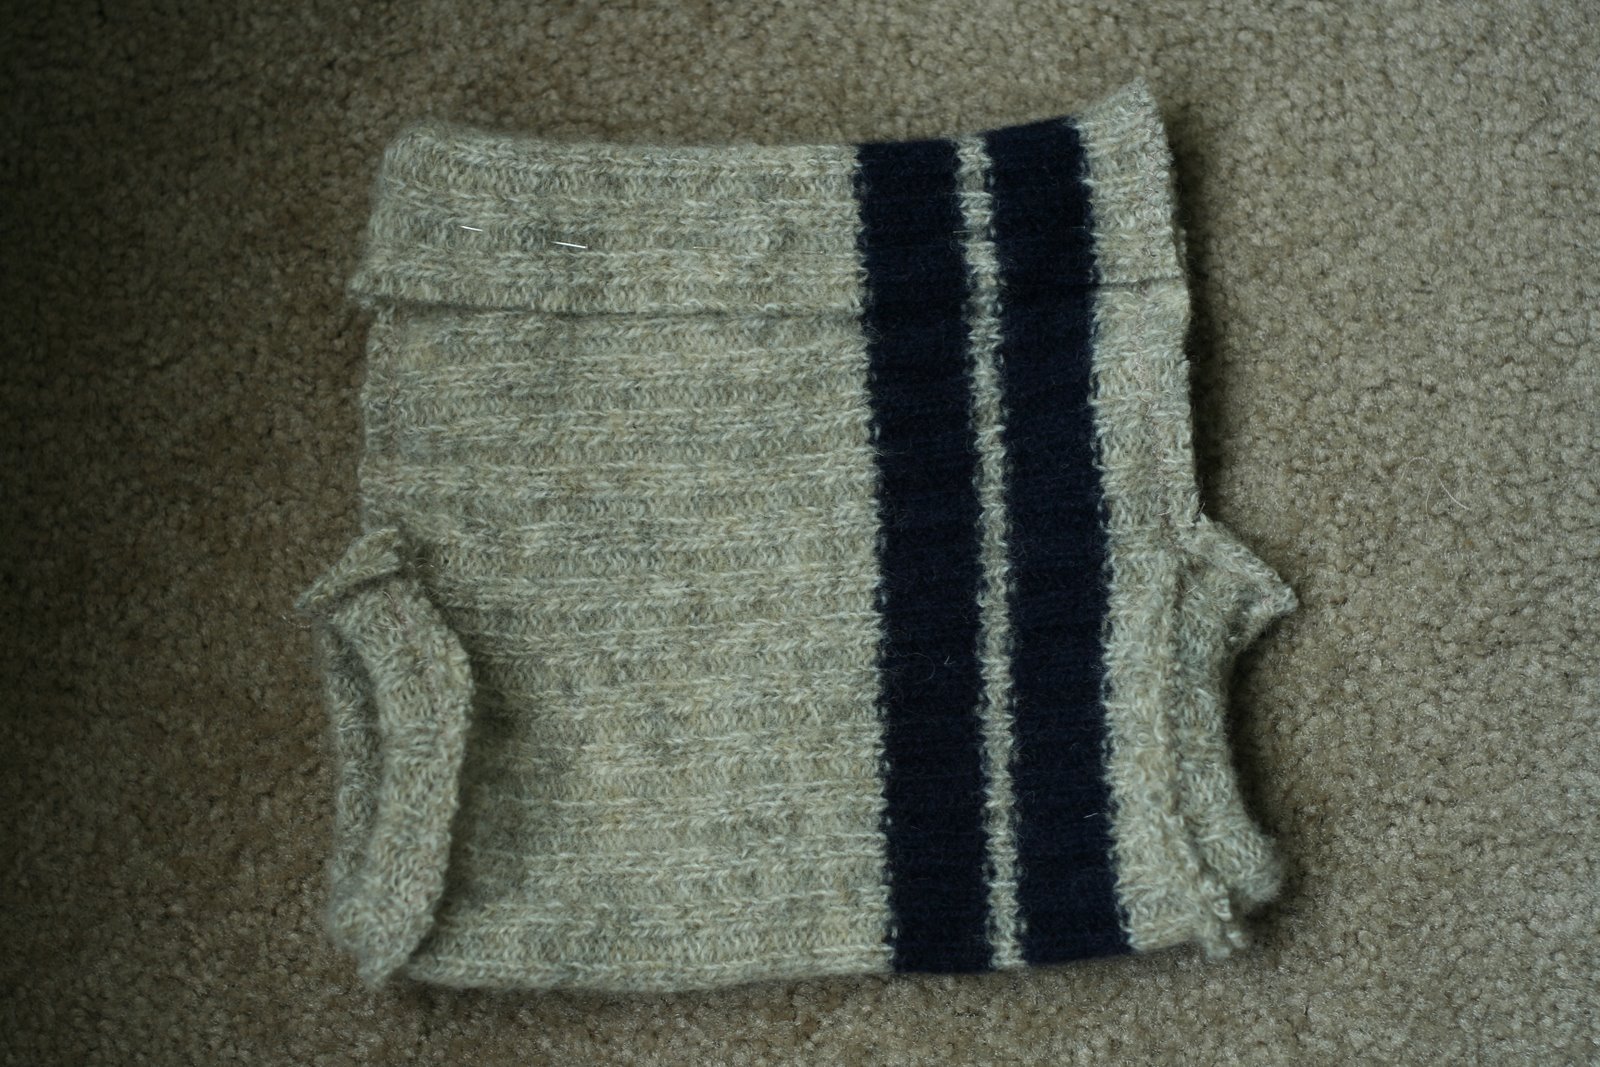
You’re basically done. You can just as easily add elastic and sew up the opening but I like the side drawstring too. I crocheted the actual drawstring from some wool yarn by chaining until it was the length I needed, about 100. Ok, 101, because I do obsessively count everything and… yes… not so much an estimator… Then I turned, sl st in 2nd ch from hook and each ch after that. Thread your drawstring through the top and tie and you’re done! Side note: I love the off center stripes on this. LOVE!

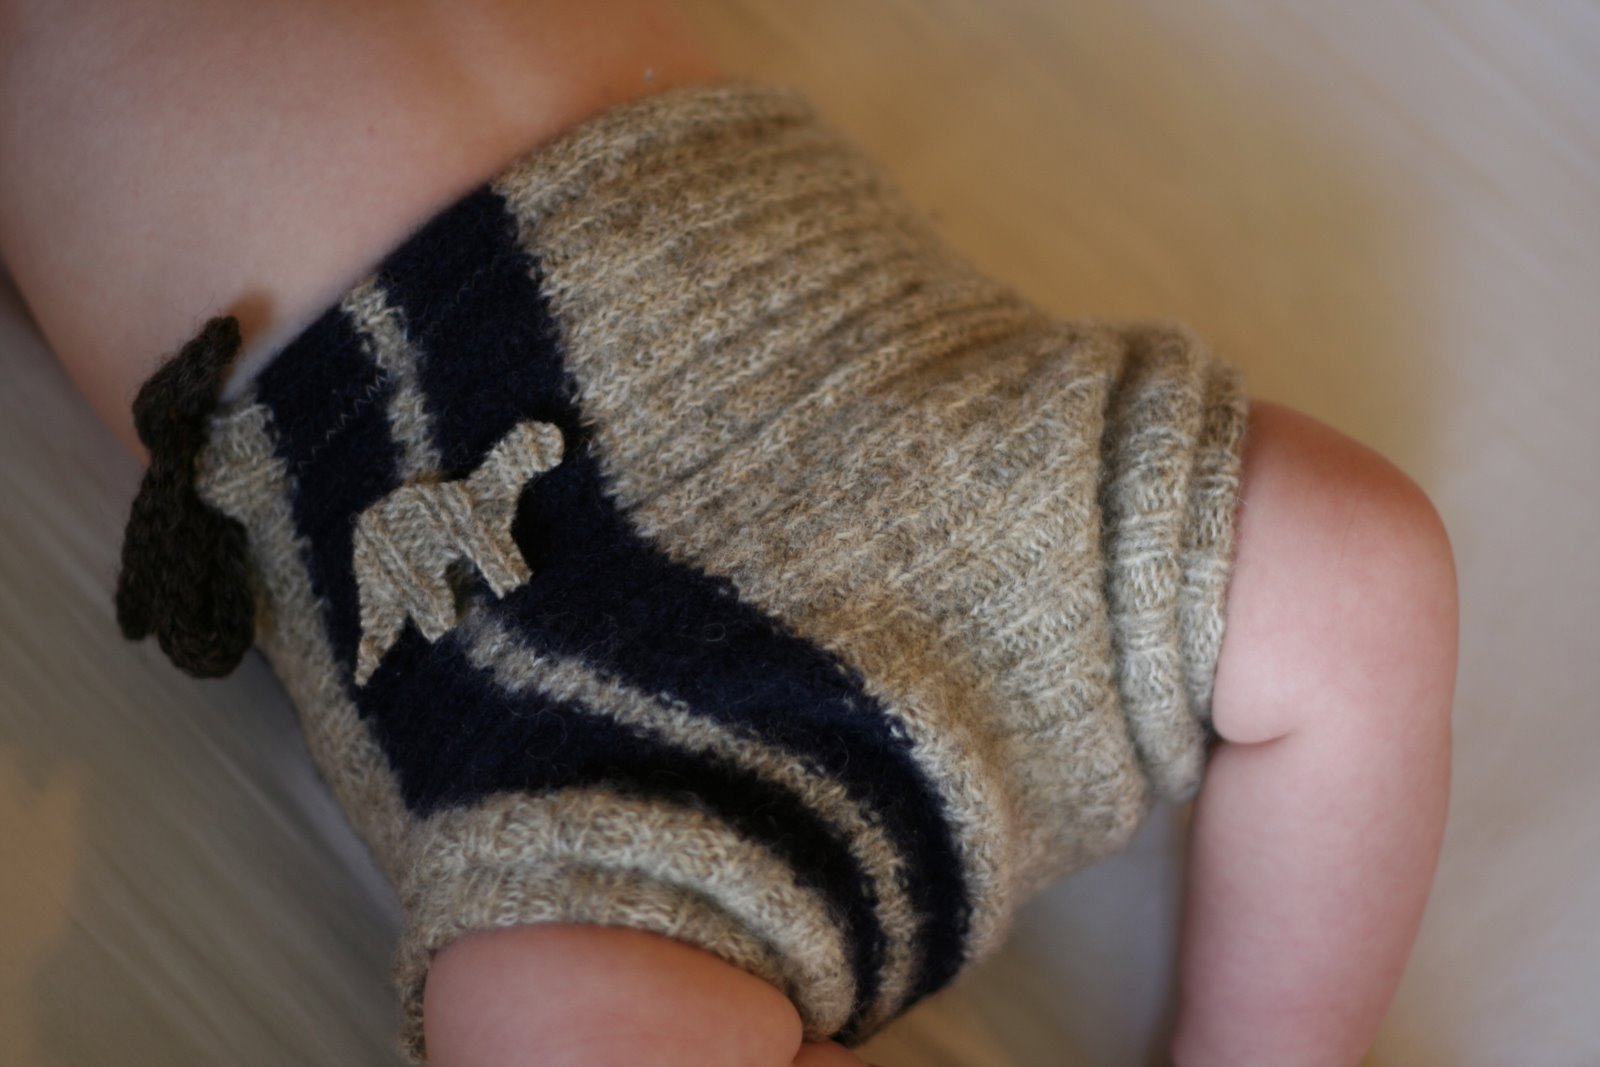
Oh, unless you want to embellish! Then you could cut out a cute little dinosaur for a boy and sew it on…
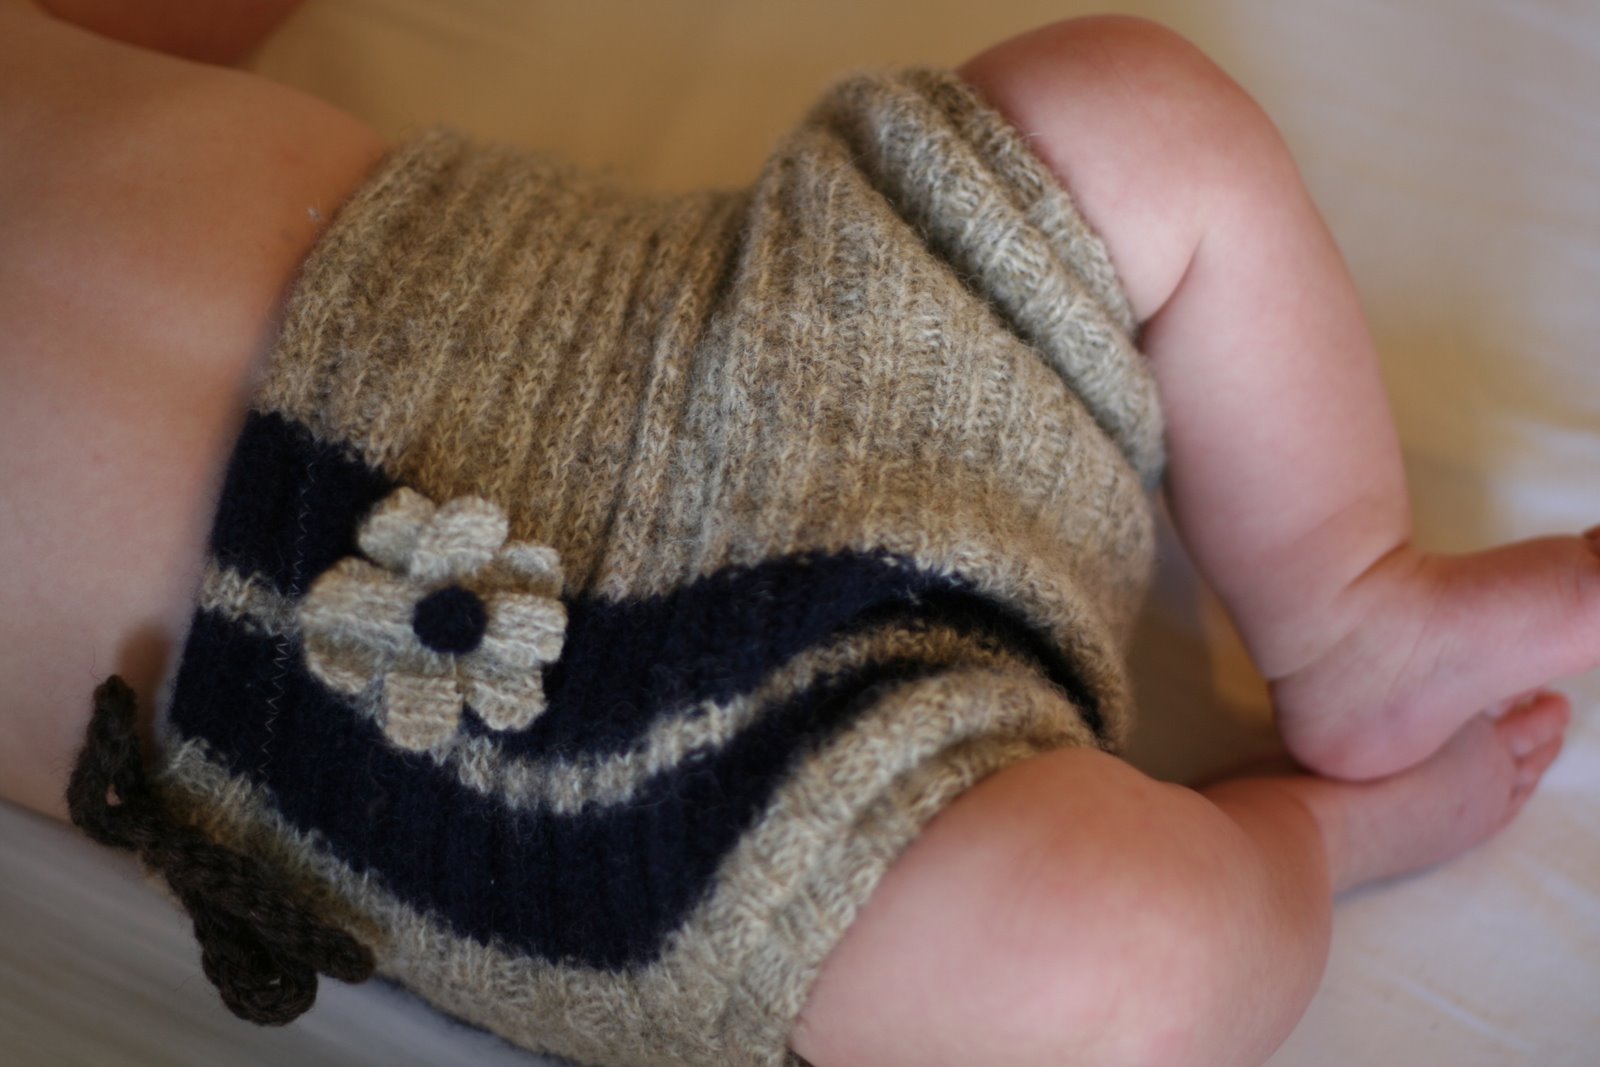
Or a very sweet flower for a little girl!
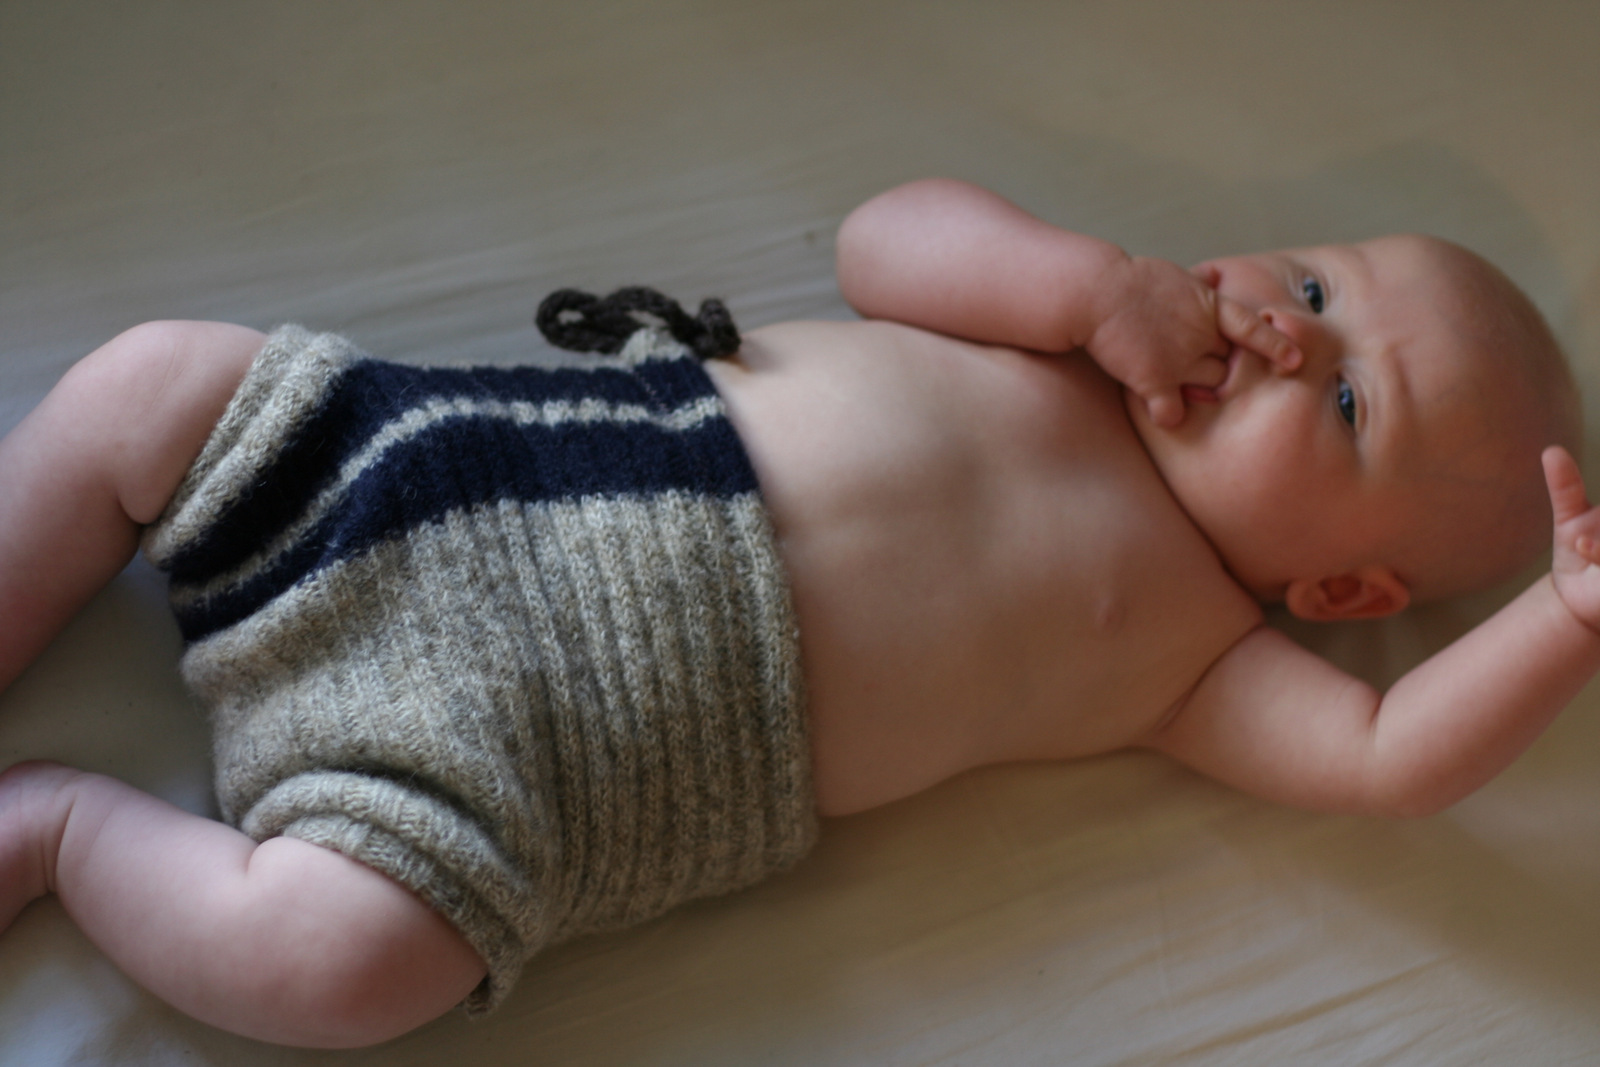
She’s looking at me like: “Mom, it’s not time to sleep! Why am I in my crib?! It’s time to eat!” But she’s a very good little girl and humors Mama and sucks on her fingers while I use her as a model. Adorable! Now I’ll really go feed her. 🙂
that is really cute! you are so creative. i love how you just go make your own patterns when you can’t find one you like.
my recent post: you cannot have it all
This is so sweet! I use the crochet pattern that inspired you too, and I love it. Your pattern is a clever adaptation, thanks for sharing it.
I made three of these this morning after I saw your post in the yahoo group. I LOVE them. So, so cute, two are cashmere and one is just plain wool. I also took the flower idea and made some fun flowers for the rump of one. 🙂 Thanks so much for sharing!
@Ash- so good to hear! Glad it worked so well for you!
@Charis- Thanks I love doing it.
@Brandy- You are welcome. 🙂
Genius. Pure simple genius. I know what you mean about some of the fancy patterns. I’ve wasted alot of fabric trying to find a pattern that fits my daughter. I’ll definitely give this a try.
@afwife- Thank you! That is so sweet. Glad it helps!
I am going to give this a try this afternoon! This looks so simple – thanks for posting 🙂
Is anyone else confused on how she had the fabric a 15 x 19 and the material is not even close to those measurements. Look at how thinone side is… can someone help on how she came up with those numbers and the fabric is.not even close to the same ratio
I’d love to help you out. Looks like my error. You’ll want to do 1/2 of the hip measurement + 1 inch by the rise measurement + 3 inches. So it was 8″ by 19″. I’ll change it. Thanks.
This is so cute! I love the idea! It is so much more fun than just having a normal diaper hanging out! And this really does look easy enough to make! I am always looking for a diaper cover sewing pattern to make for little children and this really is adorable!
So cute! Going to bust out the sewing machine this weekend!
I would love to do this but i don’t have a sewing machine and the last time someone graciously let me borrow theirs I jammed it up pretty bad 🙁 How much would you charge for a few of these?
I have been making upcycled woolies and I followed your pattern for my son. Thank you!! Could I use the pattern for my business?
Alaina, that is fine with me for this pattern. Most everything else I make and sell myself but not these yet. Glad you are enjoying the pattern.
Do you find that unfelted covers like this are absorbent enough? I have some felted sweaters I would like to make a cover with, but I wasn’t sure if they would be stretchy enough to use with a pattern like this. Thanks!
It depends on the thickness of the yarn and tightness of the stitching. This one was somewhat felted already and worked fine. If I was using one that was very felted and not stretchy, I would make it a little big and maybe use a light elastic for the legs.