
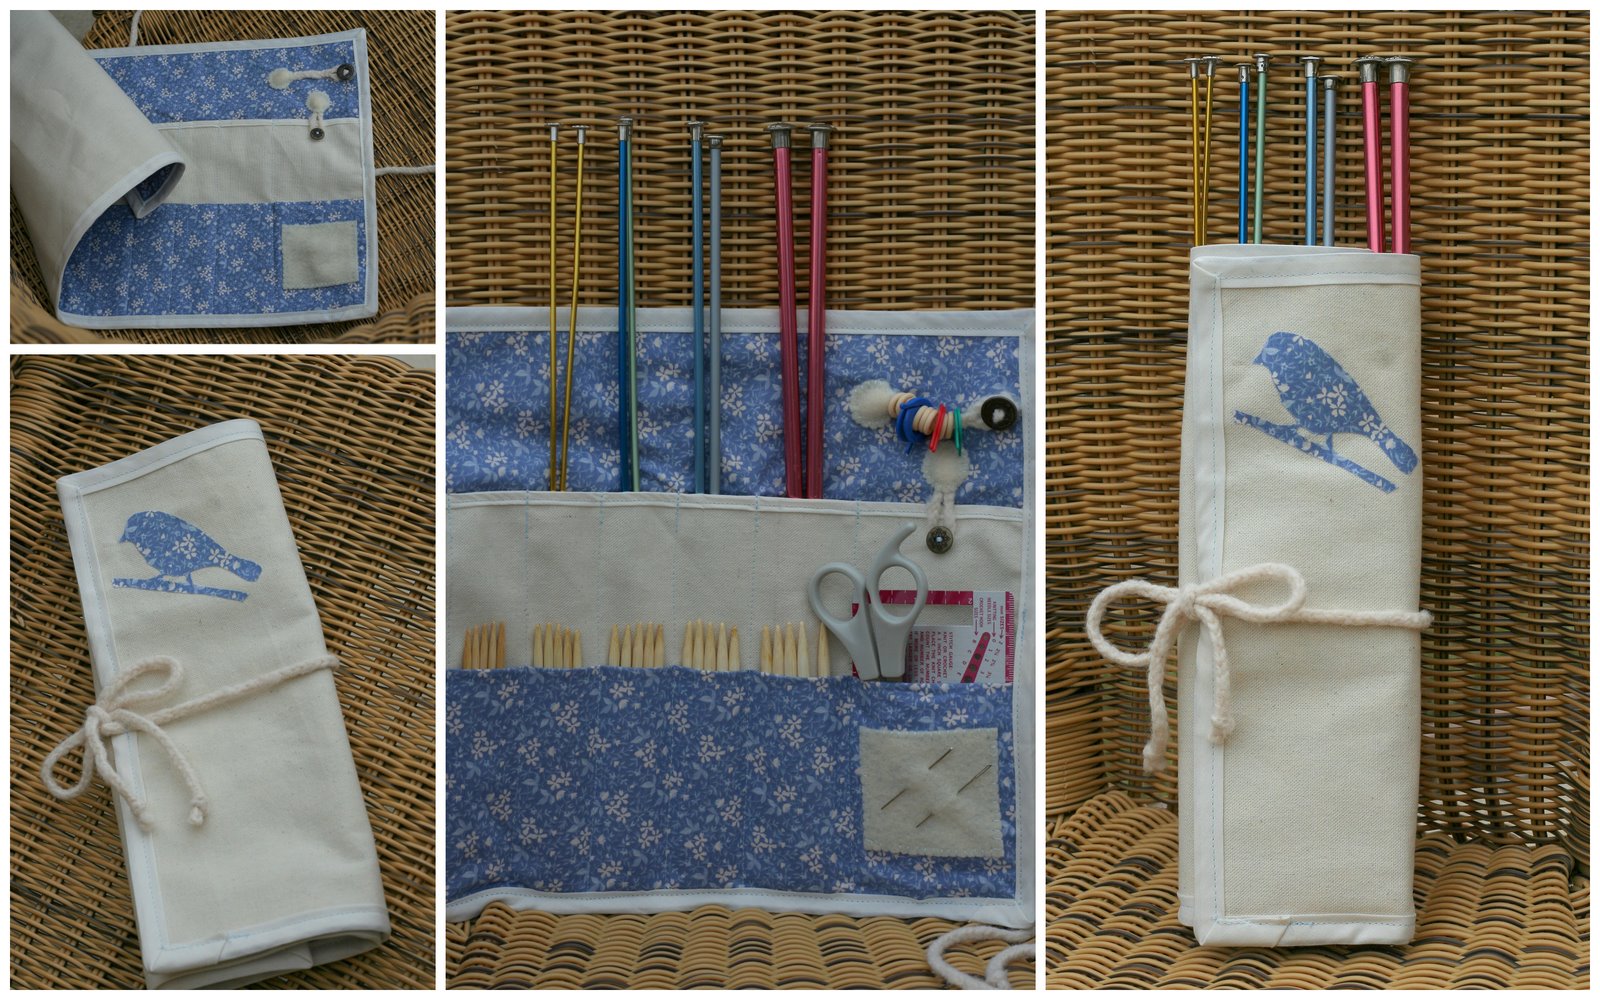
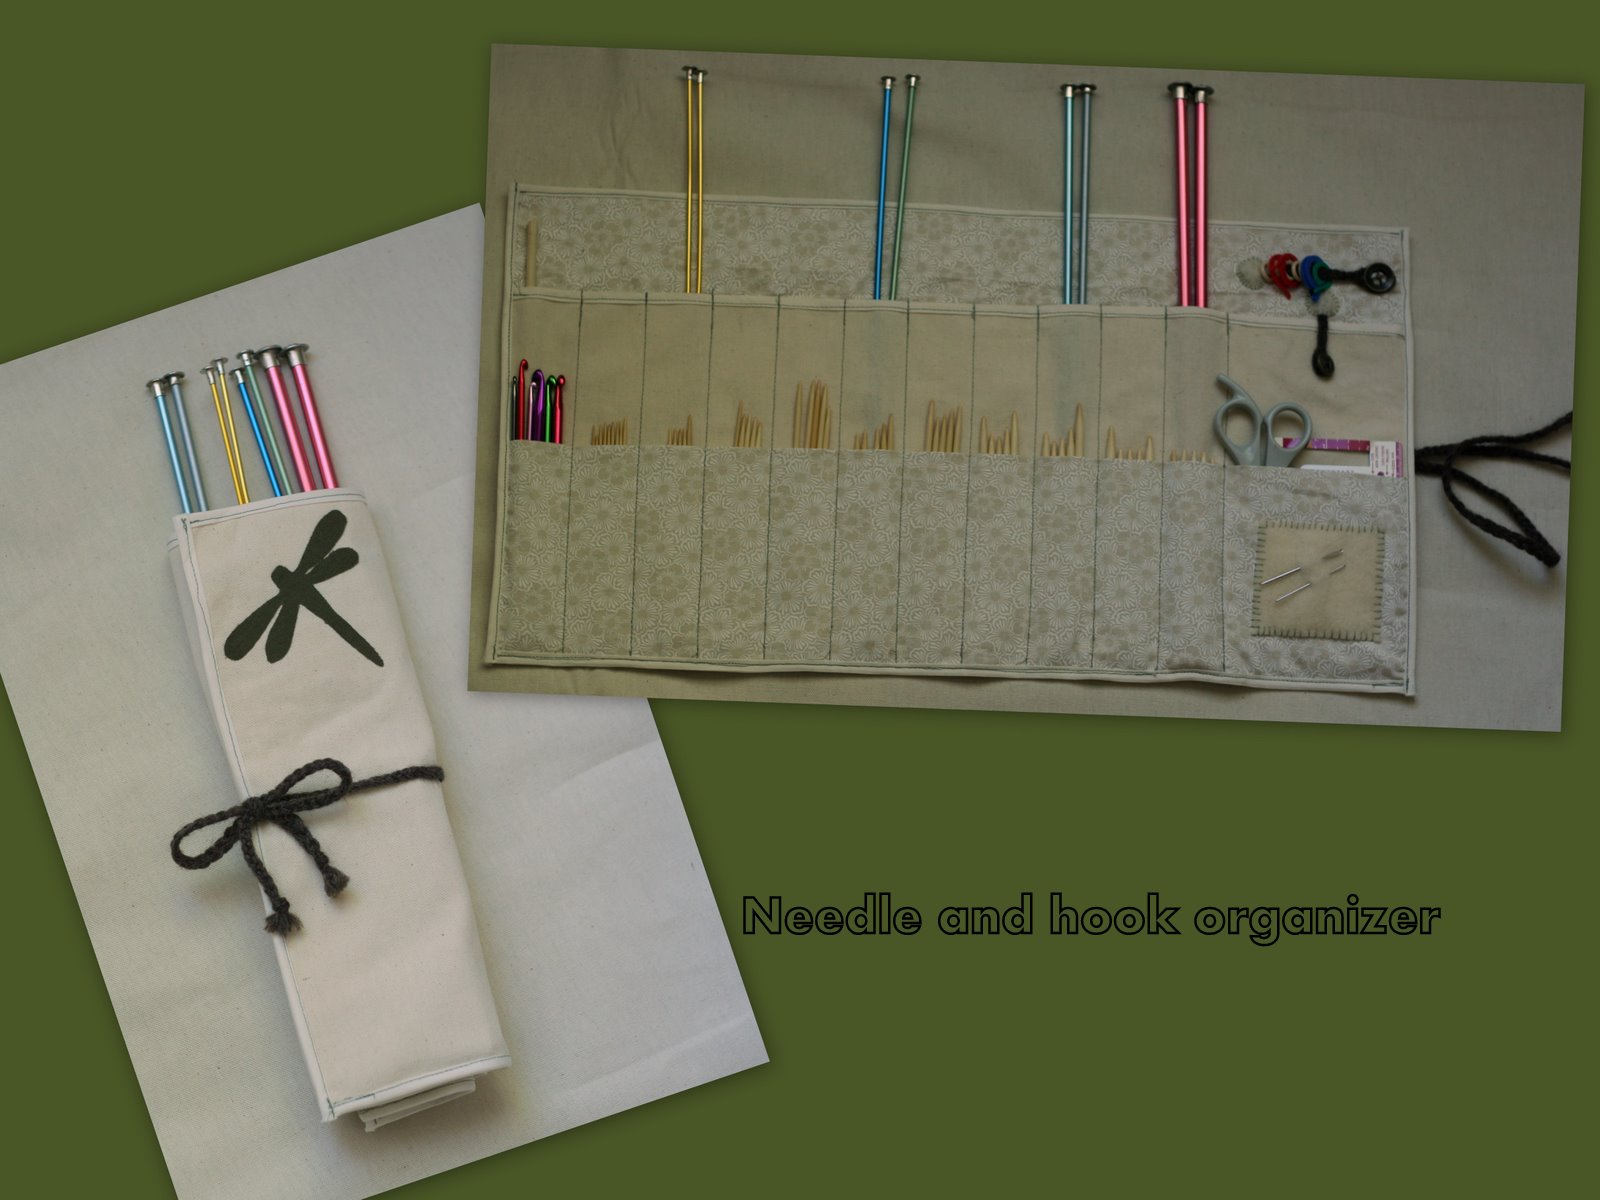
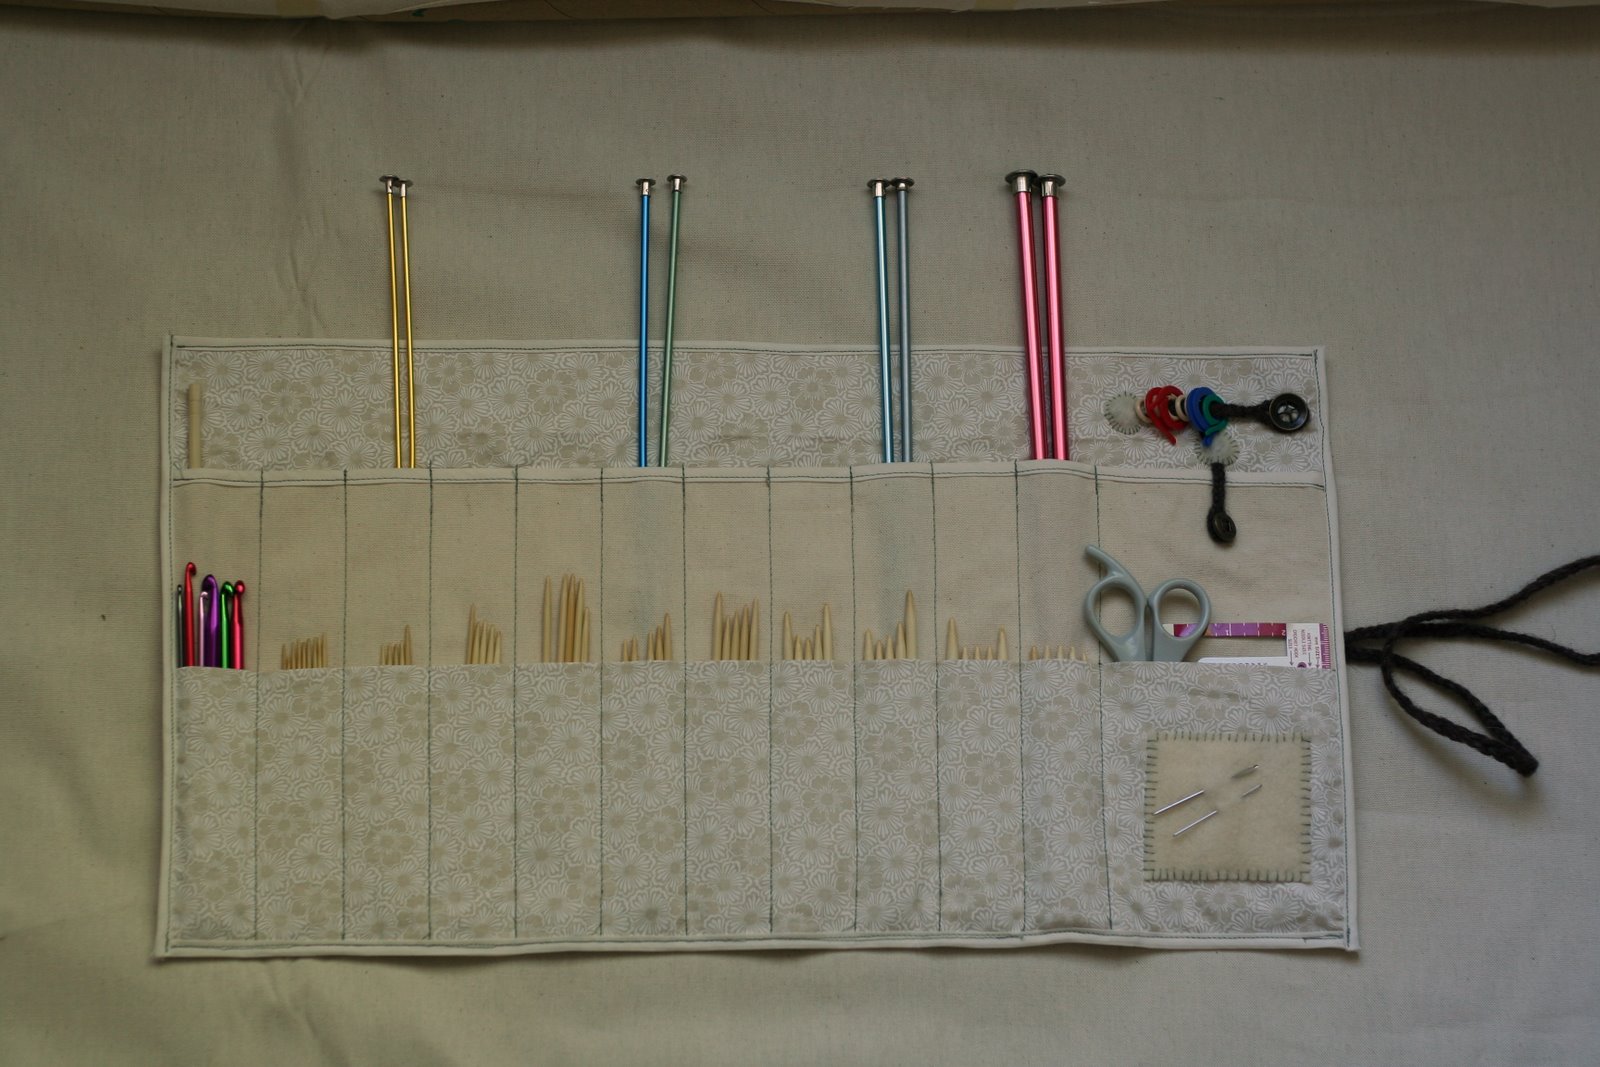
What could make me happier than merging 2 of my loves… oh, wait 3… ok, make that 4… together. Try sewing a organizer for knitting needles and crochet hooks. Ah… knitting, organizing, sewing, crocheting… bliss. 🙂 The ladies in my family, my mom, sister, and I, all have summer birthdays and this year I made them each organizers. That’s right. The craftiness runs in the family and both of them crochet, knit, (and sew) as well. I took the basic idea from this blog post I found. Hers is so beautiful but I wanted to add a little color/texture/something for more character. Plus, I added a space for yarn needles, a larger pocket for scissors and a gauge swatch/tip measure. I also added a small pocket for little things like tip protectors, and a place for stitch markers. If you want to make one of your own check out the how to below.
By the way… my mom’s organizer, the blue bird one, was my first project with my vintage sewing machine. It did a splendid job and sewed through 3 layers of canvas, binding, and 3 layers of lining material (in some spots) like butter. Ah. My sister’s organizer, the dragonfly one, was my last (fingers crossed) project on my, now shunned, 8 year old machine. The stitching on it is was less than perfect and inspired me to look for my new, very old, machine. 😉
Now for the how to…
Needle and Hook Organizer
TutorialThe beautiful thing is you can make this as long as you want to accommodate the hooks, needles, etc that you have. I made mine 22″ by 11.” The other thing I like about this project is there are no seams to fold or allow for… really. You just count the 1/2″ or 1/4″ edge for the binding. So, to get on with it. You need 3 pieces of fabric.
Lining: 22″ by 21″
Canvas backing: 22″ by 11″ (Wait to cut this out until step 9)
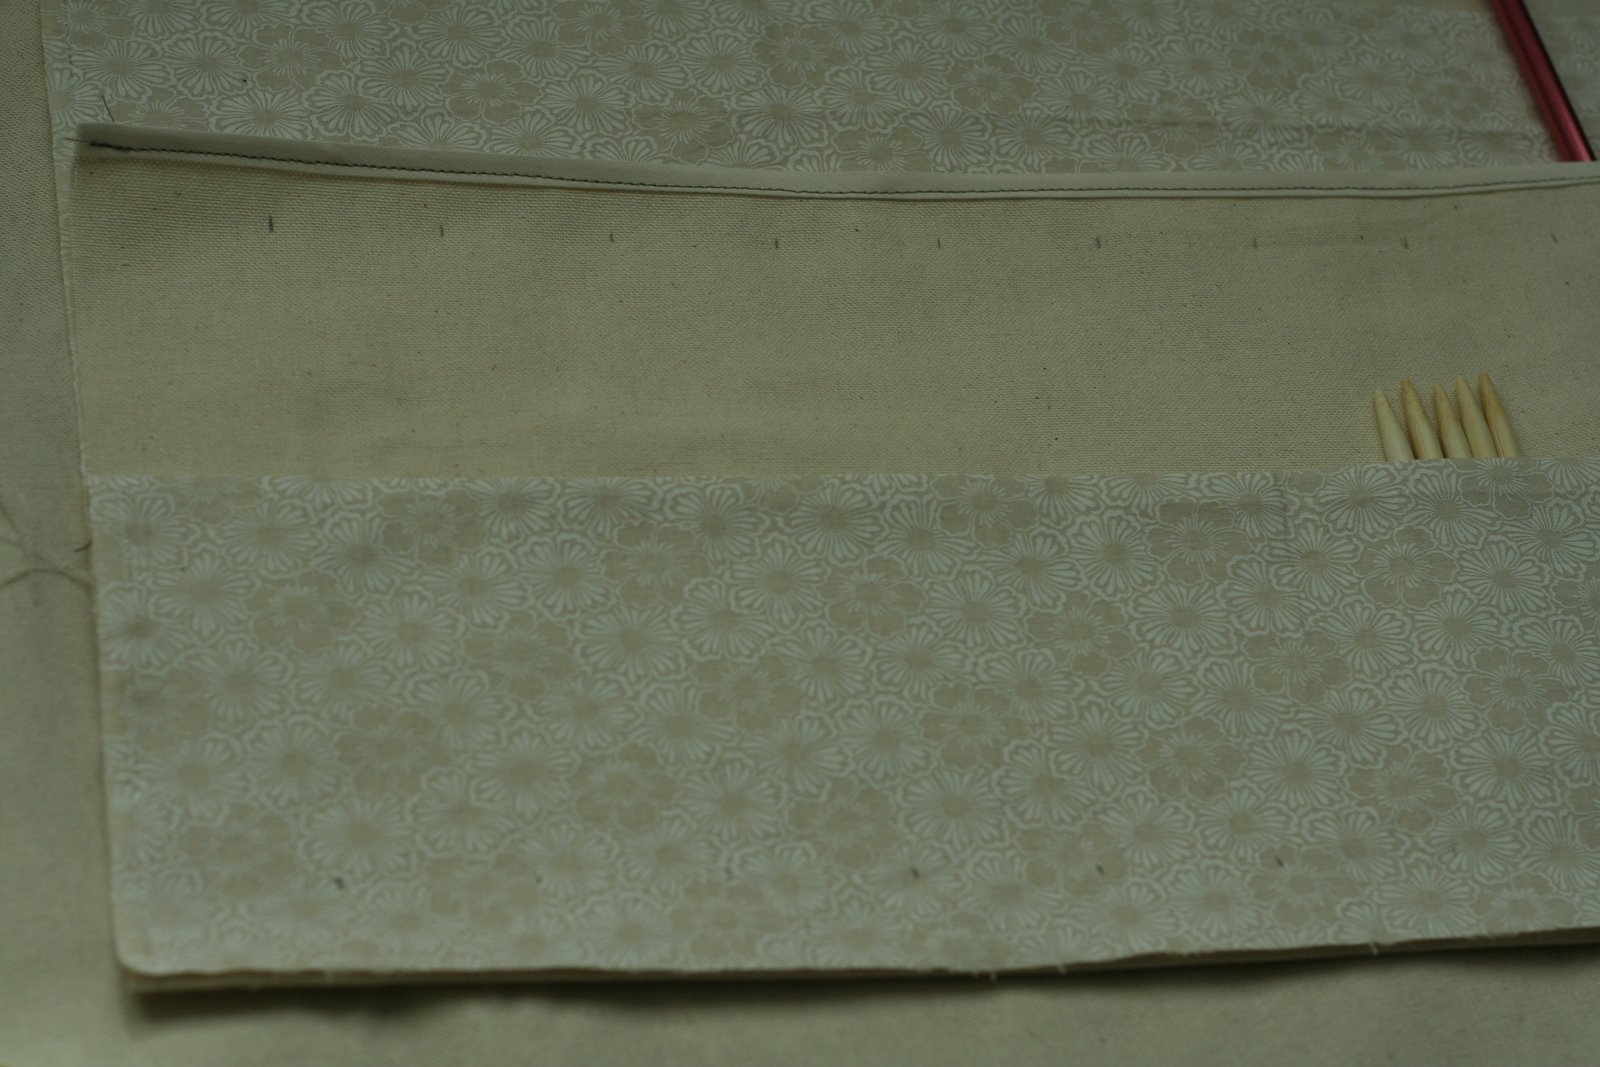
Canvas for 2nd tier of pockets: 22″ by 8″
(Another material than canvas would work fine. I love the look and stiff feel of the canvas for this project.)
You will also need contrasting thread, yarn, felt, and 2 buttons.
1. Fold lining fabric. Fold up 10″ then fold down 5″ of the fabric and iron to crease. After the folds it should be 11″ tall and have a 5″ pocket along the bottom.

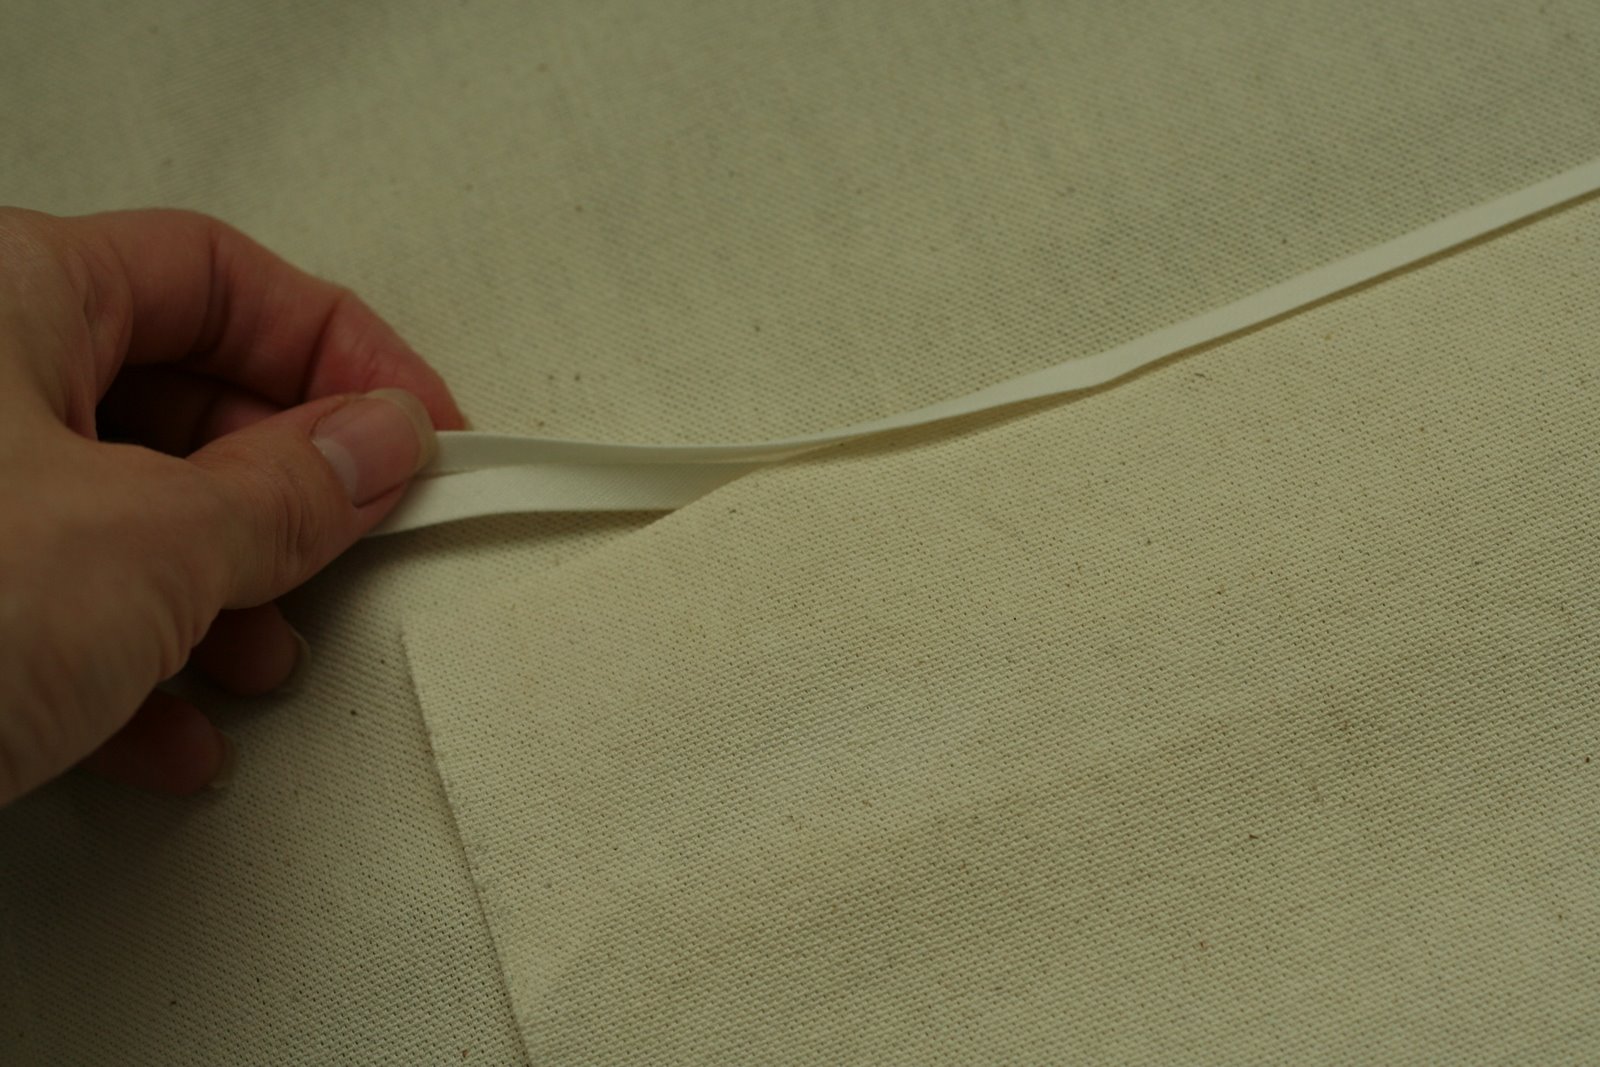
2. Pin binding on the 22″ edge of your 22″ by 8″ piece of canvas and sew in place. (Or just hold it in place like lazy me. Or, better yet, have a binding foot like came with my vintage sewing machine.)

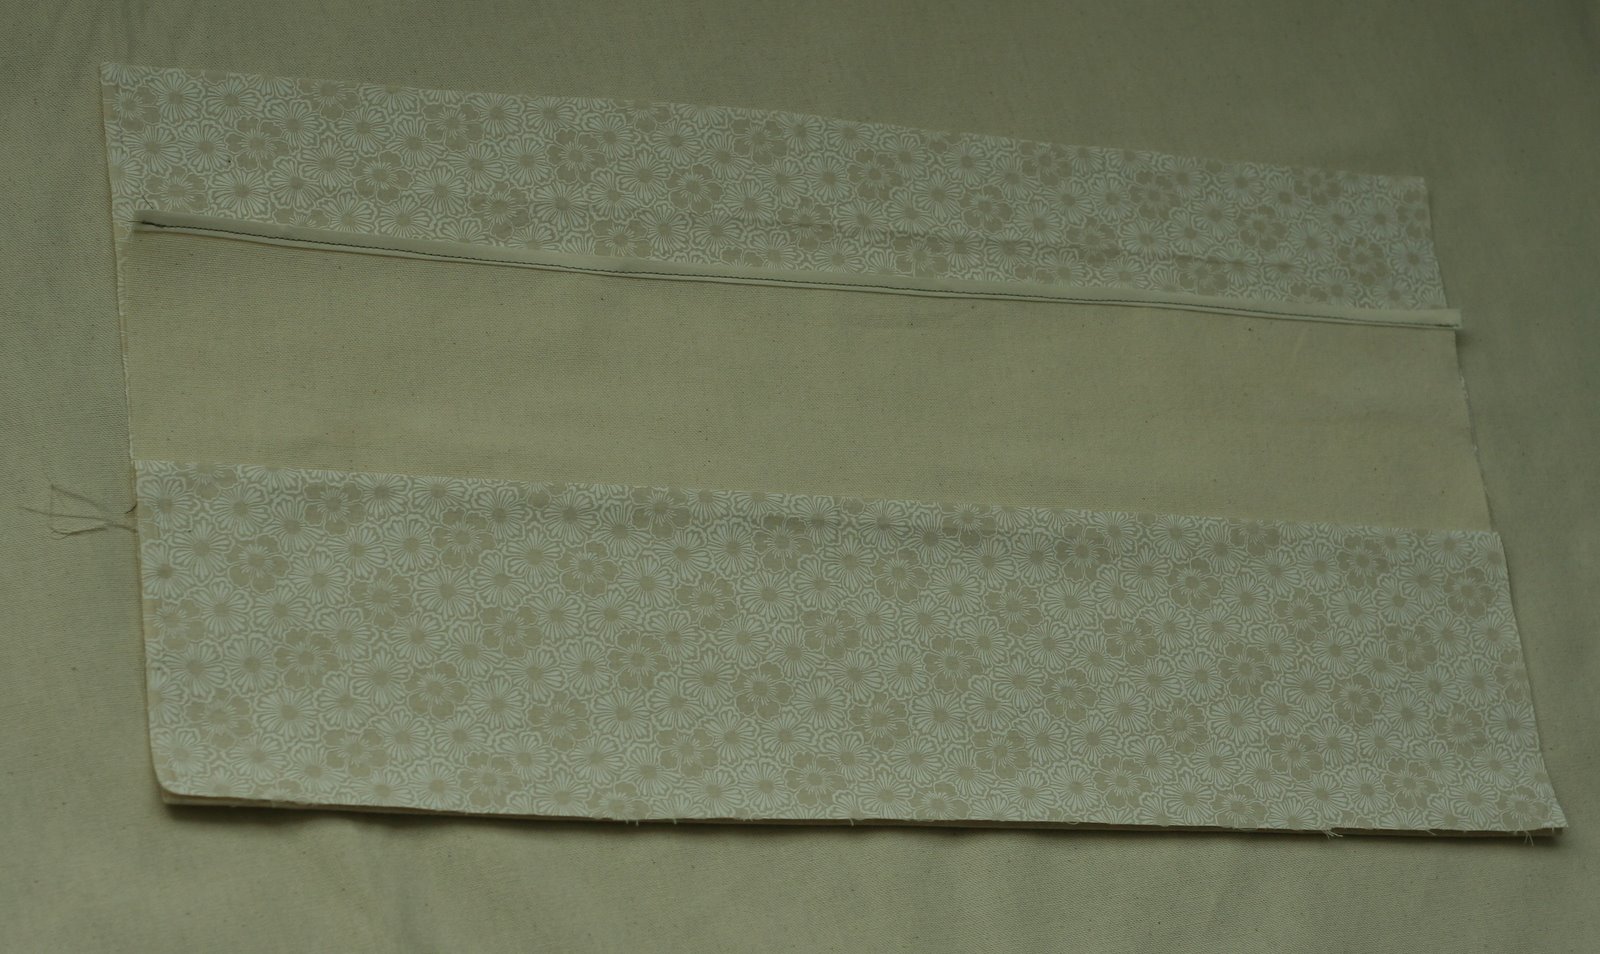
3. Tuck the canvas piece all the way into the fold of the liner.
4. Lay out your items how you want them. Measure and mark then draw guide lines. Remember to leave that 1/4″ or 1/2″ extra on either side for the binding to cover. You can draw the guide lines on the back of your fabric. My dark thread covered mine up. By the time I did my mom’s organizer though I was using a quilting attachment that came with my vintage machine and it made the job much easier and faster. Can you tell I like my sewing machine? I’ll stop talking about it now…
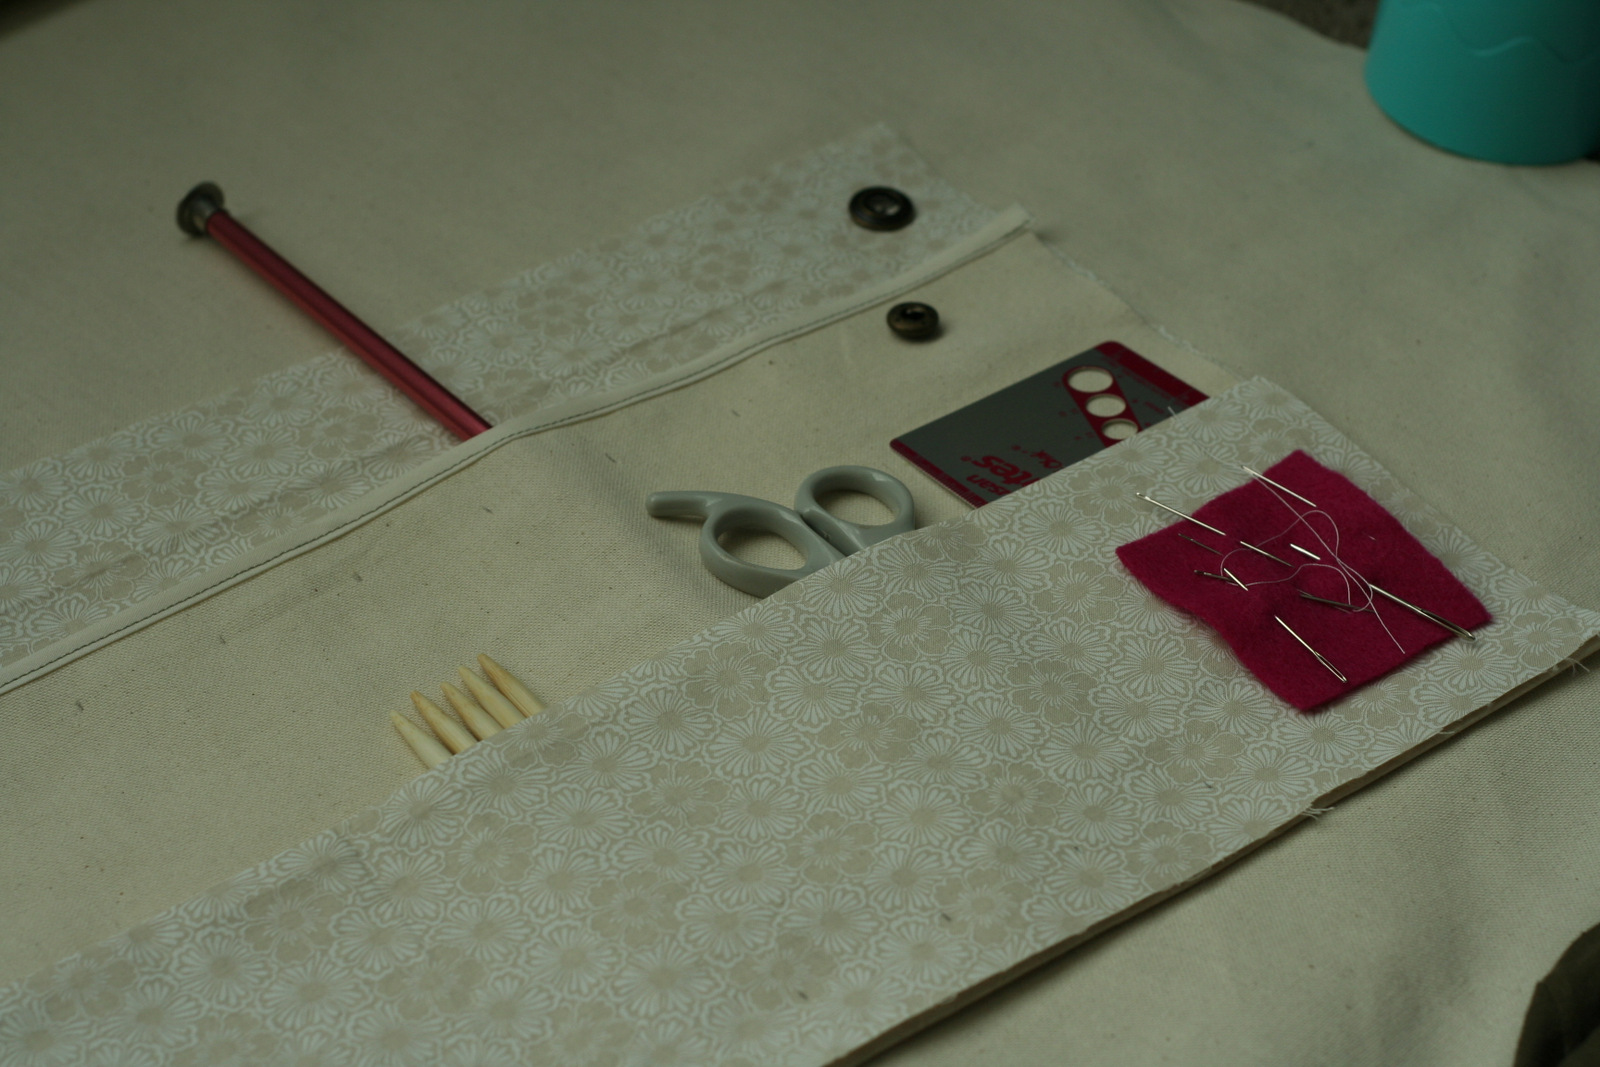
5. Sew up the bottom of the pocket so your tip protectors can’t fall all the way down and get lost. Sorry, horrible resolution cringe! But you get the idea…
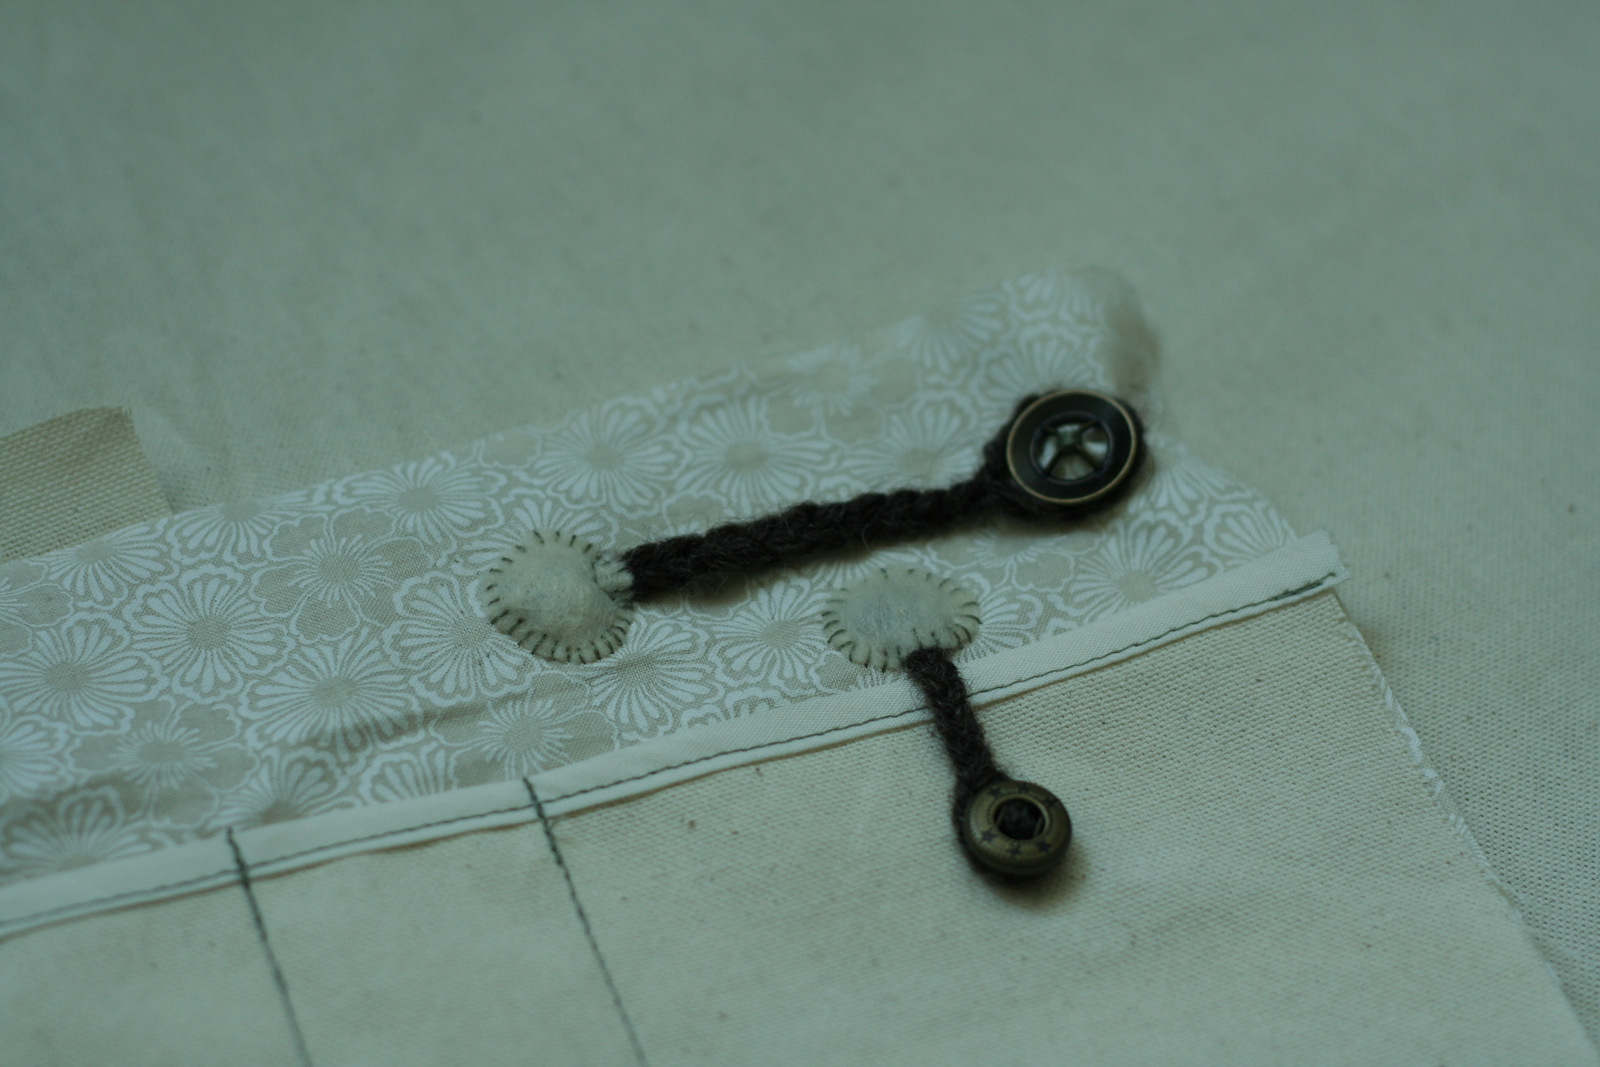
6. Braid yarn to make a loop for the pocket and the space marker holder you’ll want a braided pieces with a loop on one end for the button to go through. Here’s how to make it.
(1) Start with 3 strands of yarn held together. Tie a knot off center a bit.
(2) Braid toward and past the center of the strands until it makes a long enough loop for your button to fit through nicely.
(3) Untie the knot you made in step 1 and holding both ends carefully bring them together.
(4) Separate into 3 parts (2 pieces of yarn in each)
(5) Braid those 3 sections until it is long enough then knot.

7. Lay out your yarn loops and sew the knot firmly in place. I used felt circles over the knots and hand sewed them in place to give it a more finished look. Sew your buttons in place.

I was trying out brown circles (above) but then decided to go with cream (below.) Just in case you’re attentive to details and wondering. 🙂
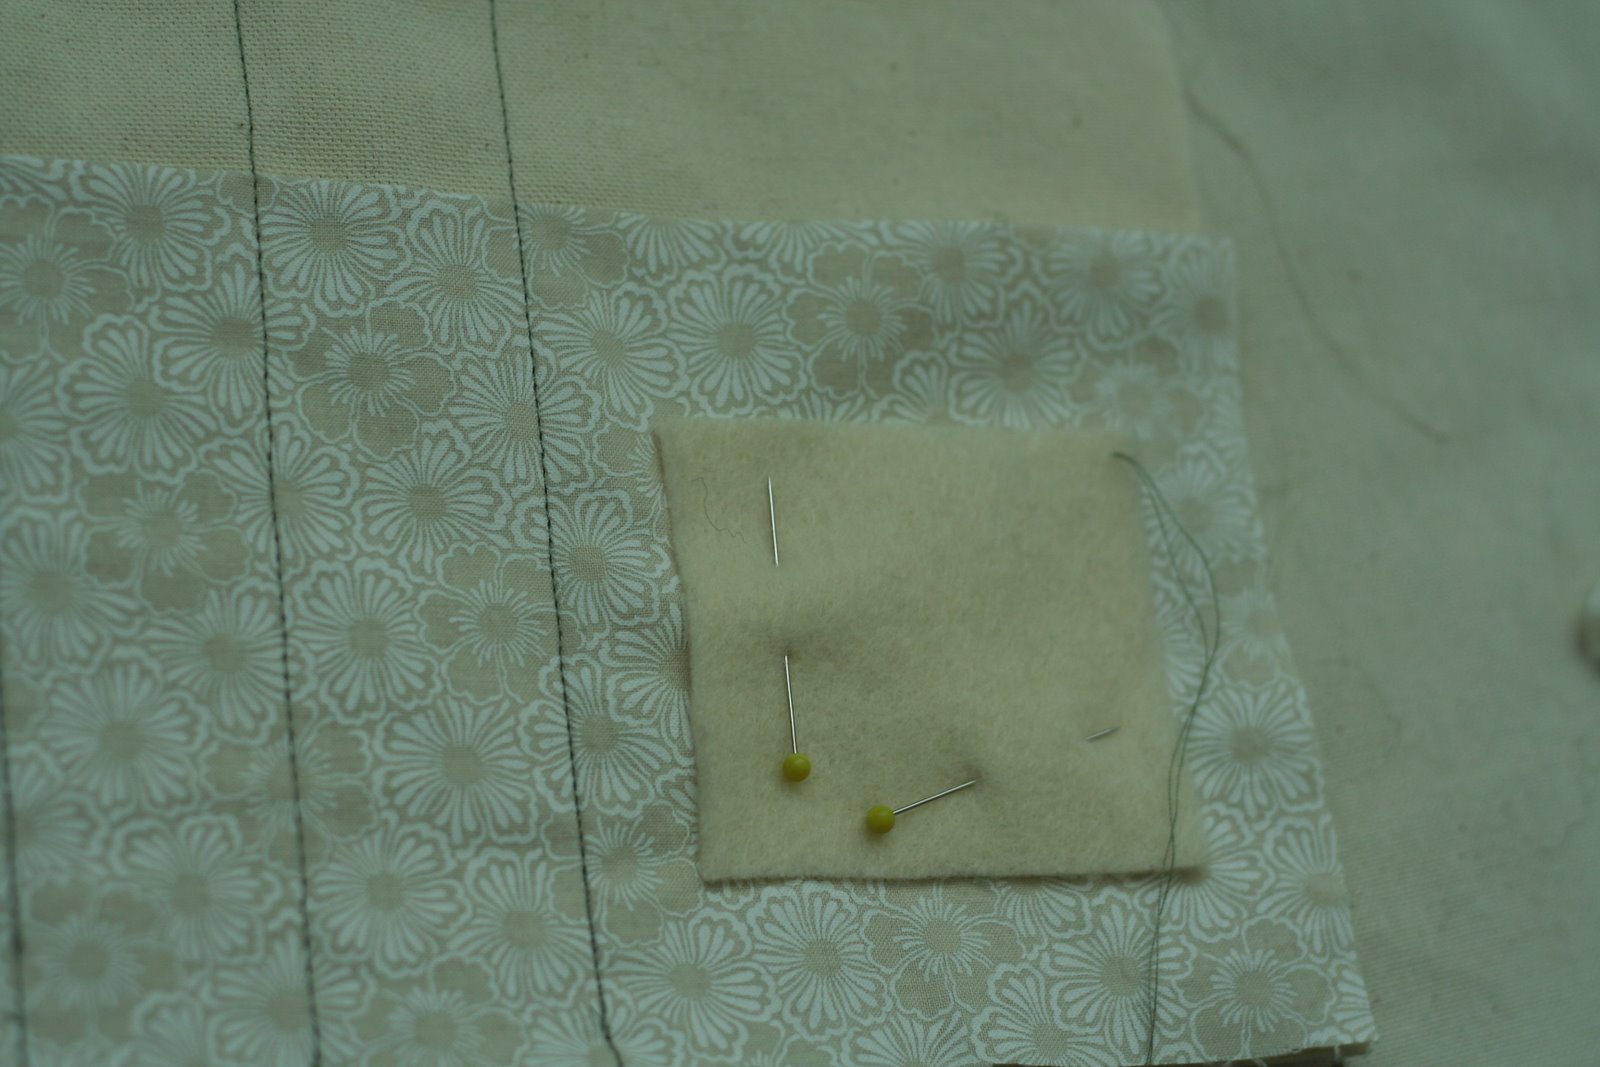
8. I added a square piece of felt for yarn needles. Just pin it in place and hand stitch it just to the outside of the pocket.
9. Almost done! Really! You will cut that last piece of canvas now. You want it to be the exact size of your lining. So cut it to size and lie it down and lie the lining on top of it. Just pin the binding around the edges fastening it all together and sew. Sorry I don’t have any pictures of this. My camera was acting up, night had fallen and there was no natural light, and I was a little eager to finish.
10. Braid a long piece of yarn for the tie and sew it to the edge of the organizer. And roll it up…
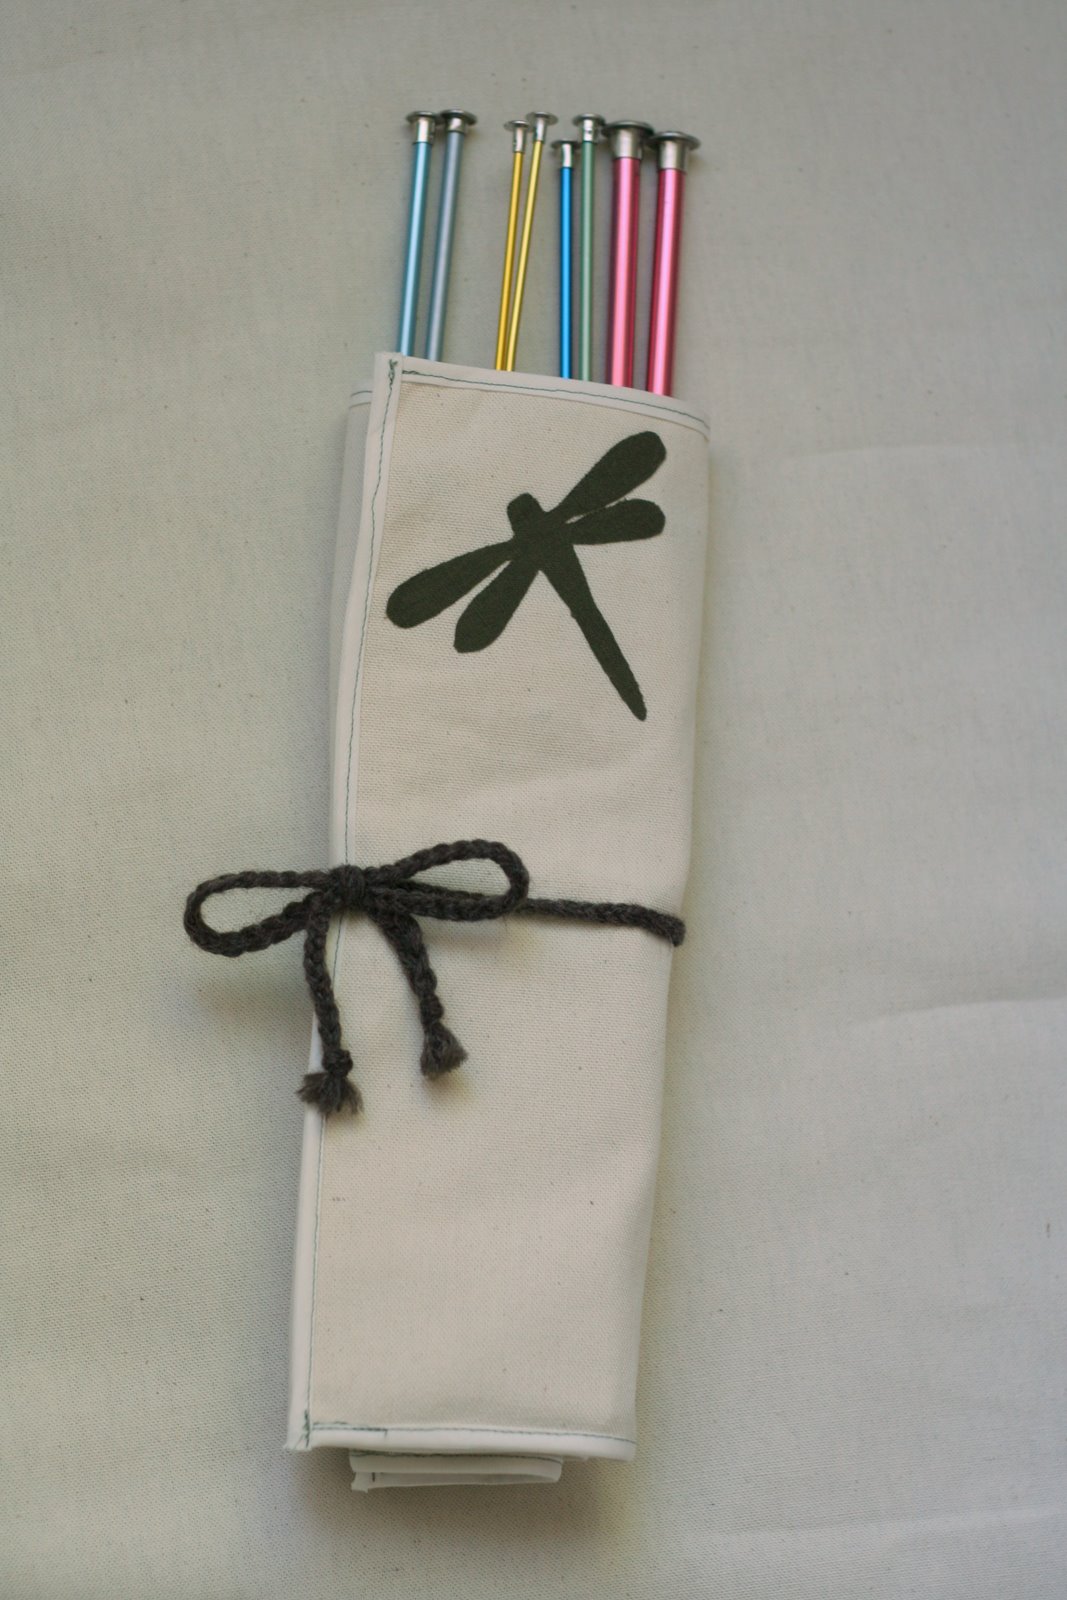
Optionally, cut out a design in the same fabric as the lining or a contrasting fabric and applique it to the outside corner of the organizer. Never appliqued before? Well, it’s super super easy. Just get some double sided applique.. stuff. And follow the directions.
I hope that all made sense… Let me know if not. 🙂