Shrug is such a great word. It instantly brings to mind a motion of indifference that is so expressive. Plus it’s just fun to say. Shrug. And then, of course, the garment can be useful and fun as well.
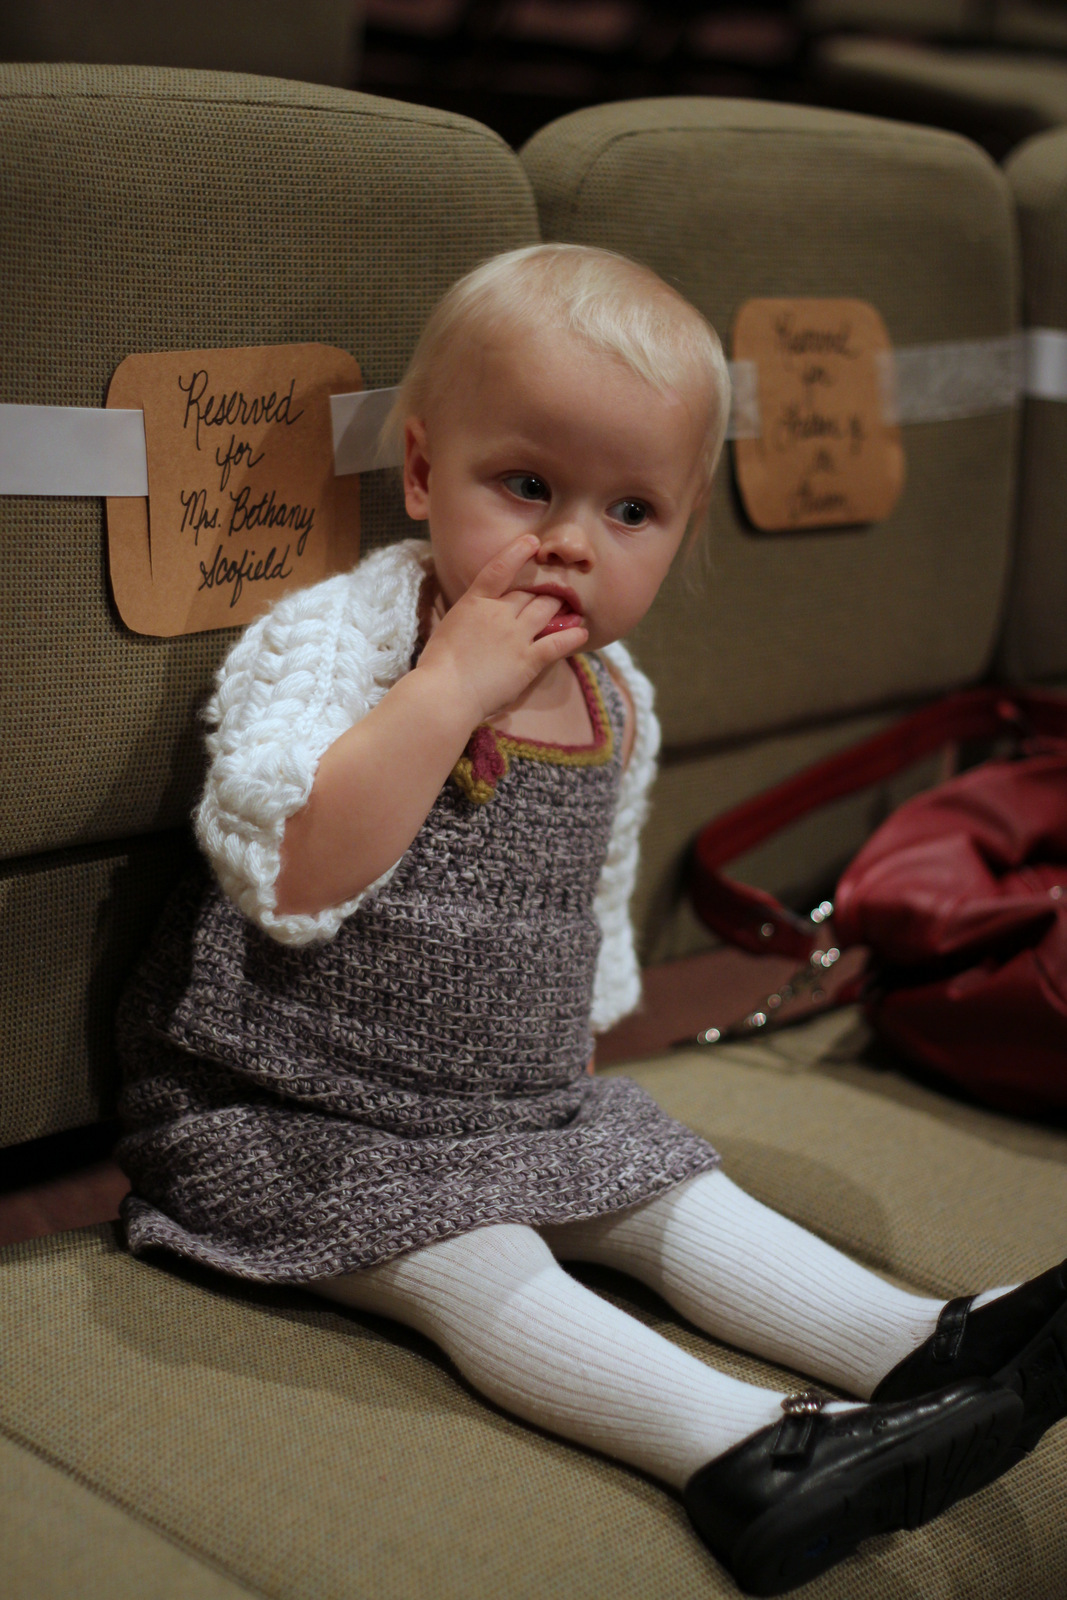
I learned a trick long ago that a simple shrug can be made with a rectangle of fairly stretchy material. When my oldest was 4, she got to be a flower girl and I crocheted a shrug for her in that manner. It was long ago, and I don’t have the pattern. But, I took my 1 1/2 year old to my brother’s wedding this fall and wanted to make one for her to wear with her little dress I crocheted. So I began to play with different stitches until I found one I liked. It’s stretchy enough but very warm.
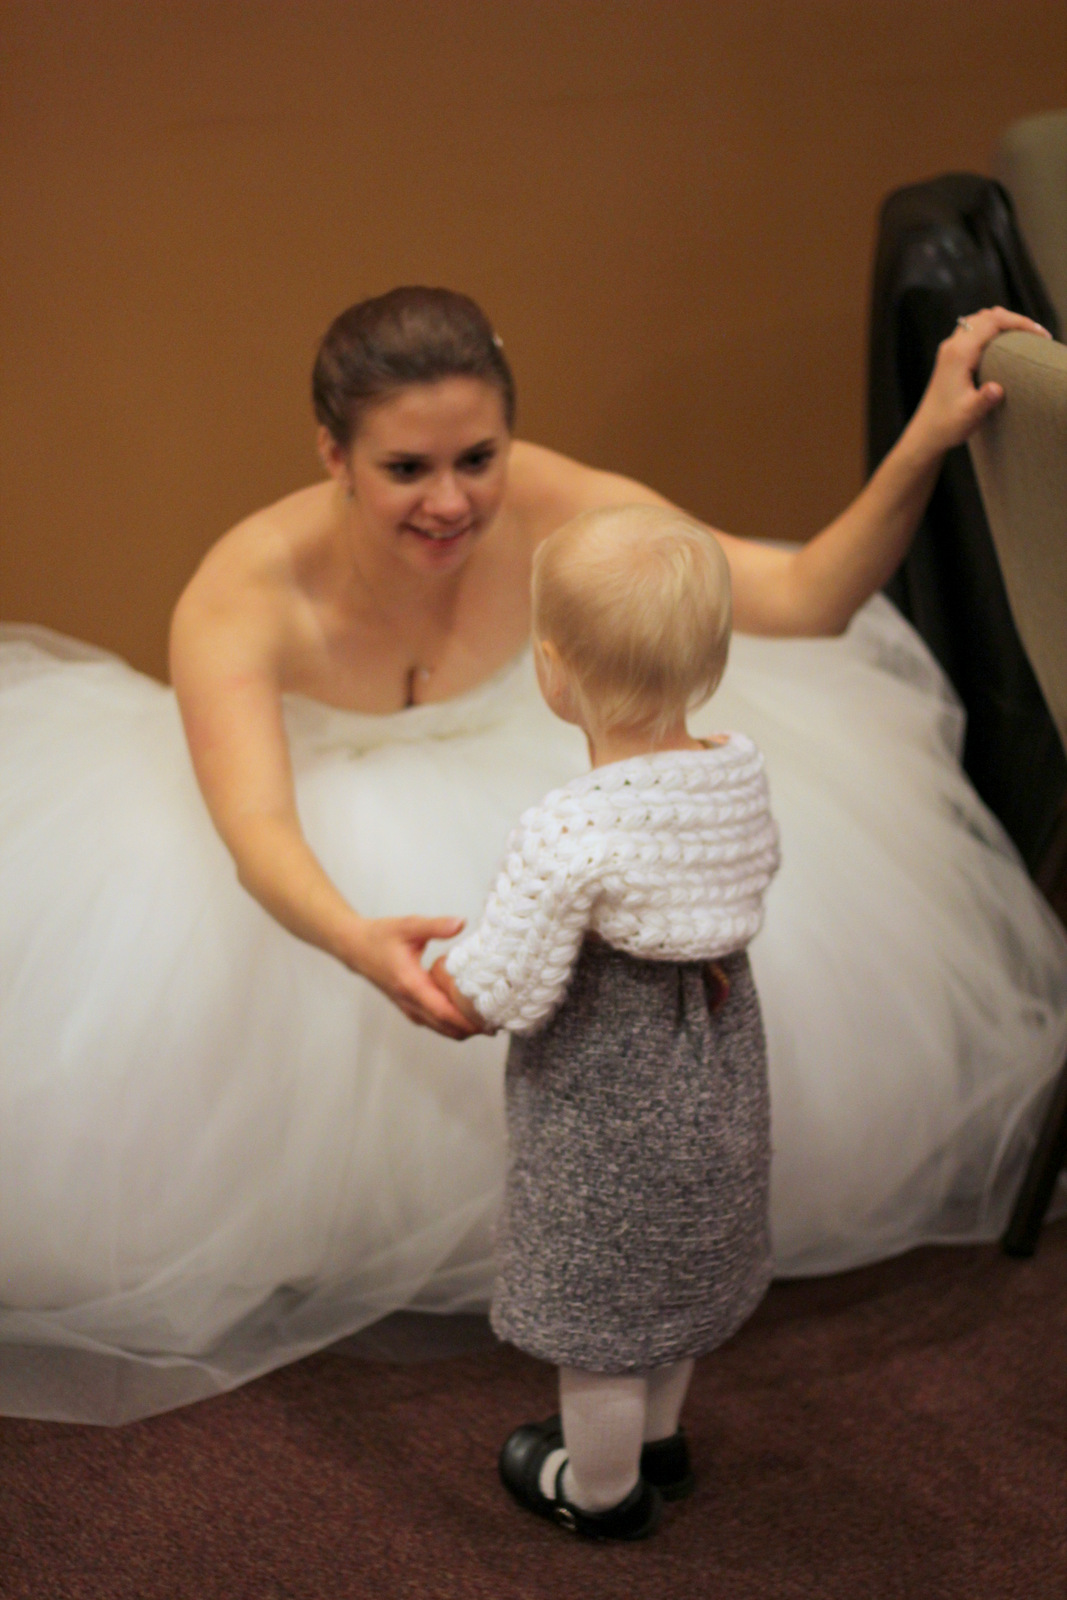 |
| Saying hi to the beautiful bride |
 |
| What 1 1/2 year olds do at weddings… or anywhere else they might happen to be. |
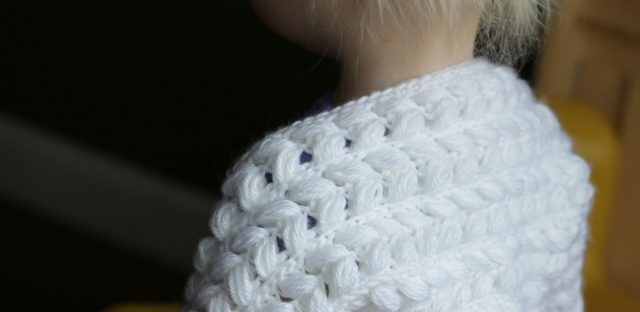
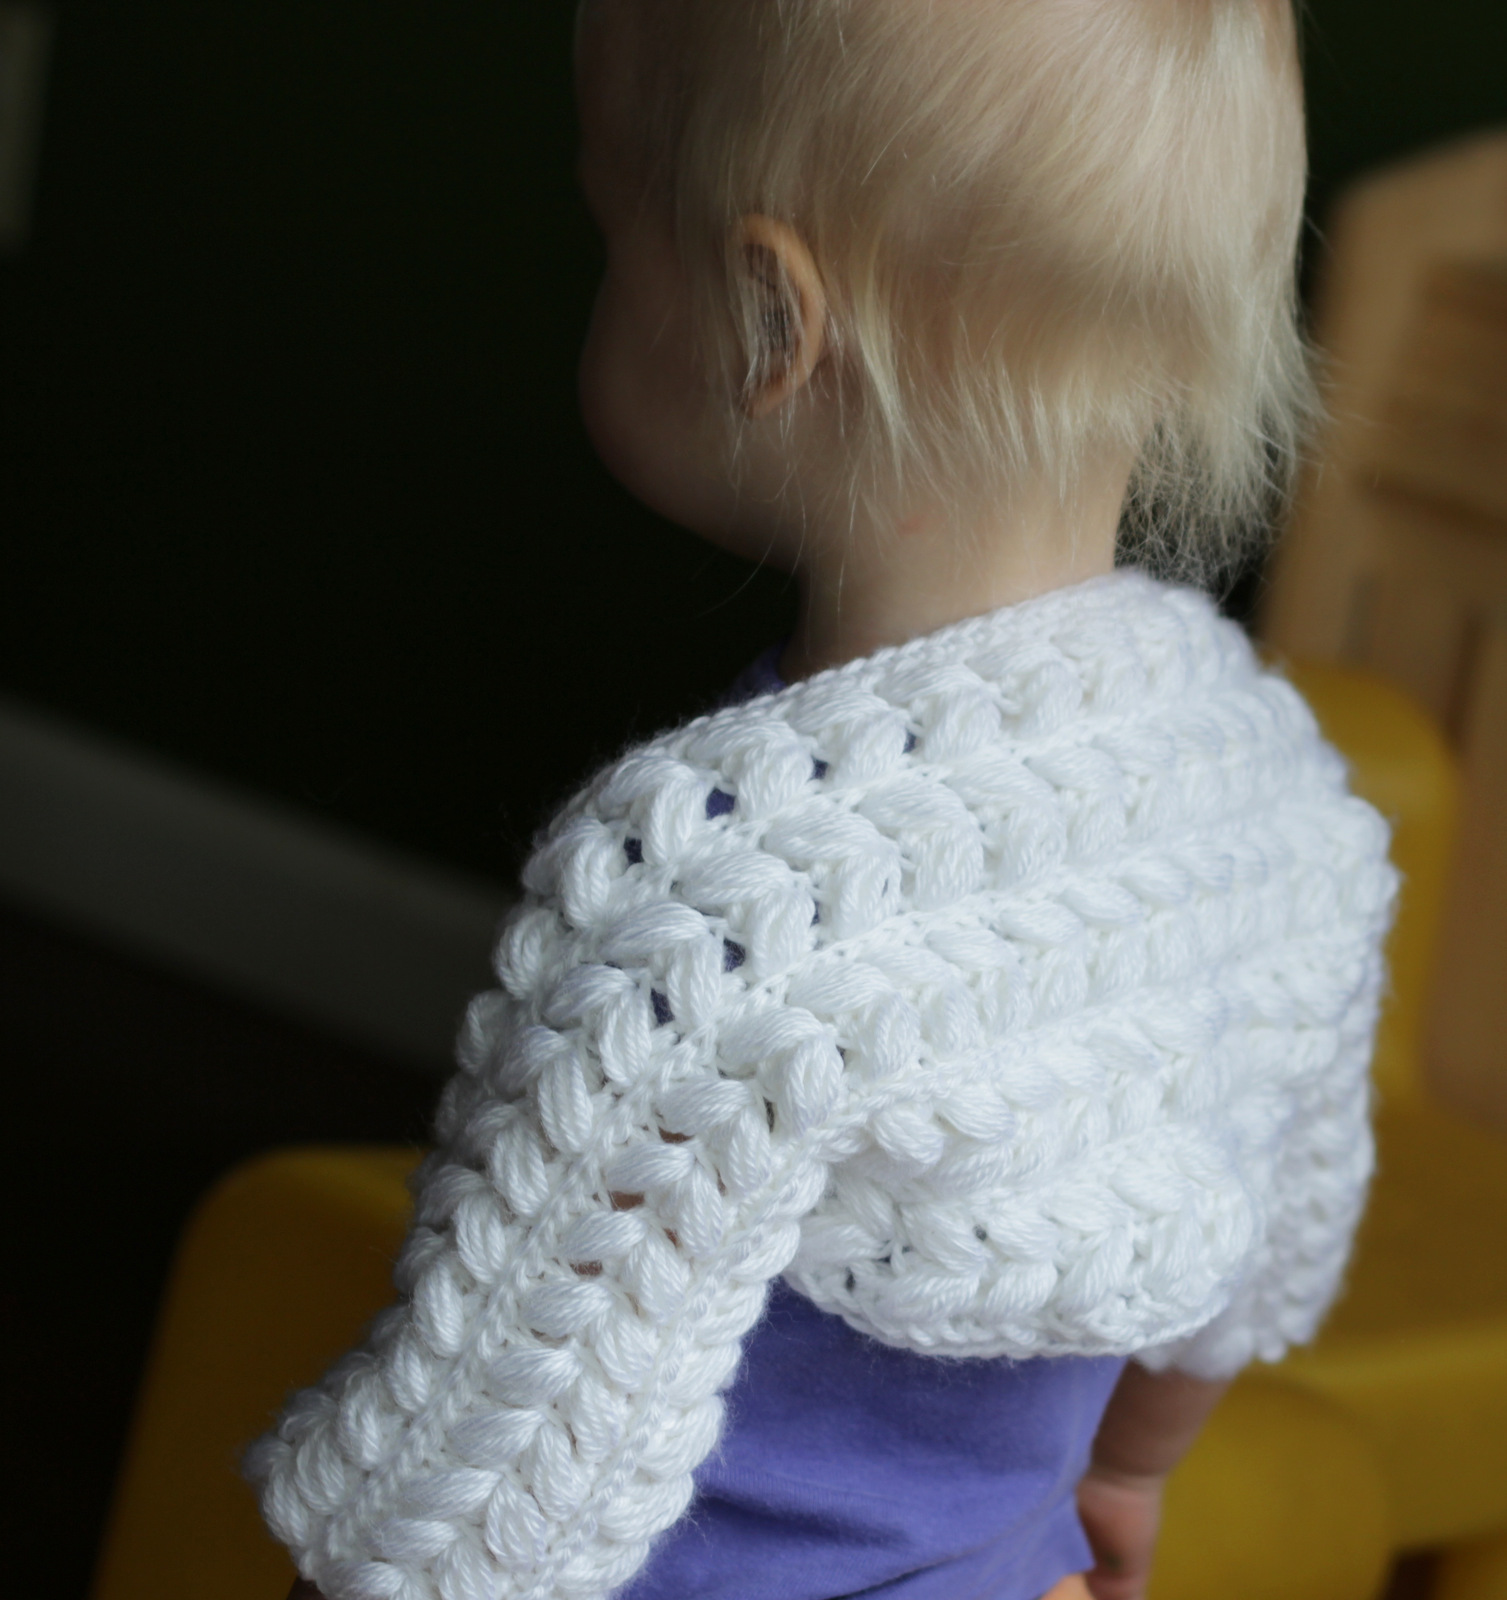
Chevron Shrug
PatternI tried to be really thorough with this so even if you aren’t familiar with foundationless sc, bobbles, twisting stitches, etc. you should be able to figure it out. Let me know if you have any questions.
It’s easy to make this shrug to fit. When making a shrug from a rectangular shape, I start with the long side of the rectangle. It should be the length from one arm (at the end of the sleeve) to the next (at the end of the sleeve). I decide if I want it to be long sleeve, 3/4 sleeve, or short sleeve. You can use a shirt that fits well to get your measurement if you want. Otherwise, start from how long you want the sleeve to be on one arm, go up the arm, across the top (widest part) of the back, down the other arm, and to where you want the sleeve to end on the other arm. This measurement is what you want to start with in row 1.
I used foundationless sc to start my work instead of chaining. It makes it more stretchy at the starting edge. If you don’t know how to do foundationless sc, you can youtube it. It’s very fun to learn. Or, if you don’t want to learn it, you can chain as usual, just don’t make it too tight or it could end up biting into the armpit area.
blo= back loop only. This means when inserting your hook into a stitch, do not go under both loops of the stitch below. Only go through the back loop, the one furthest from you.
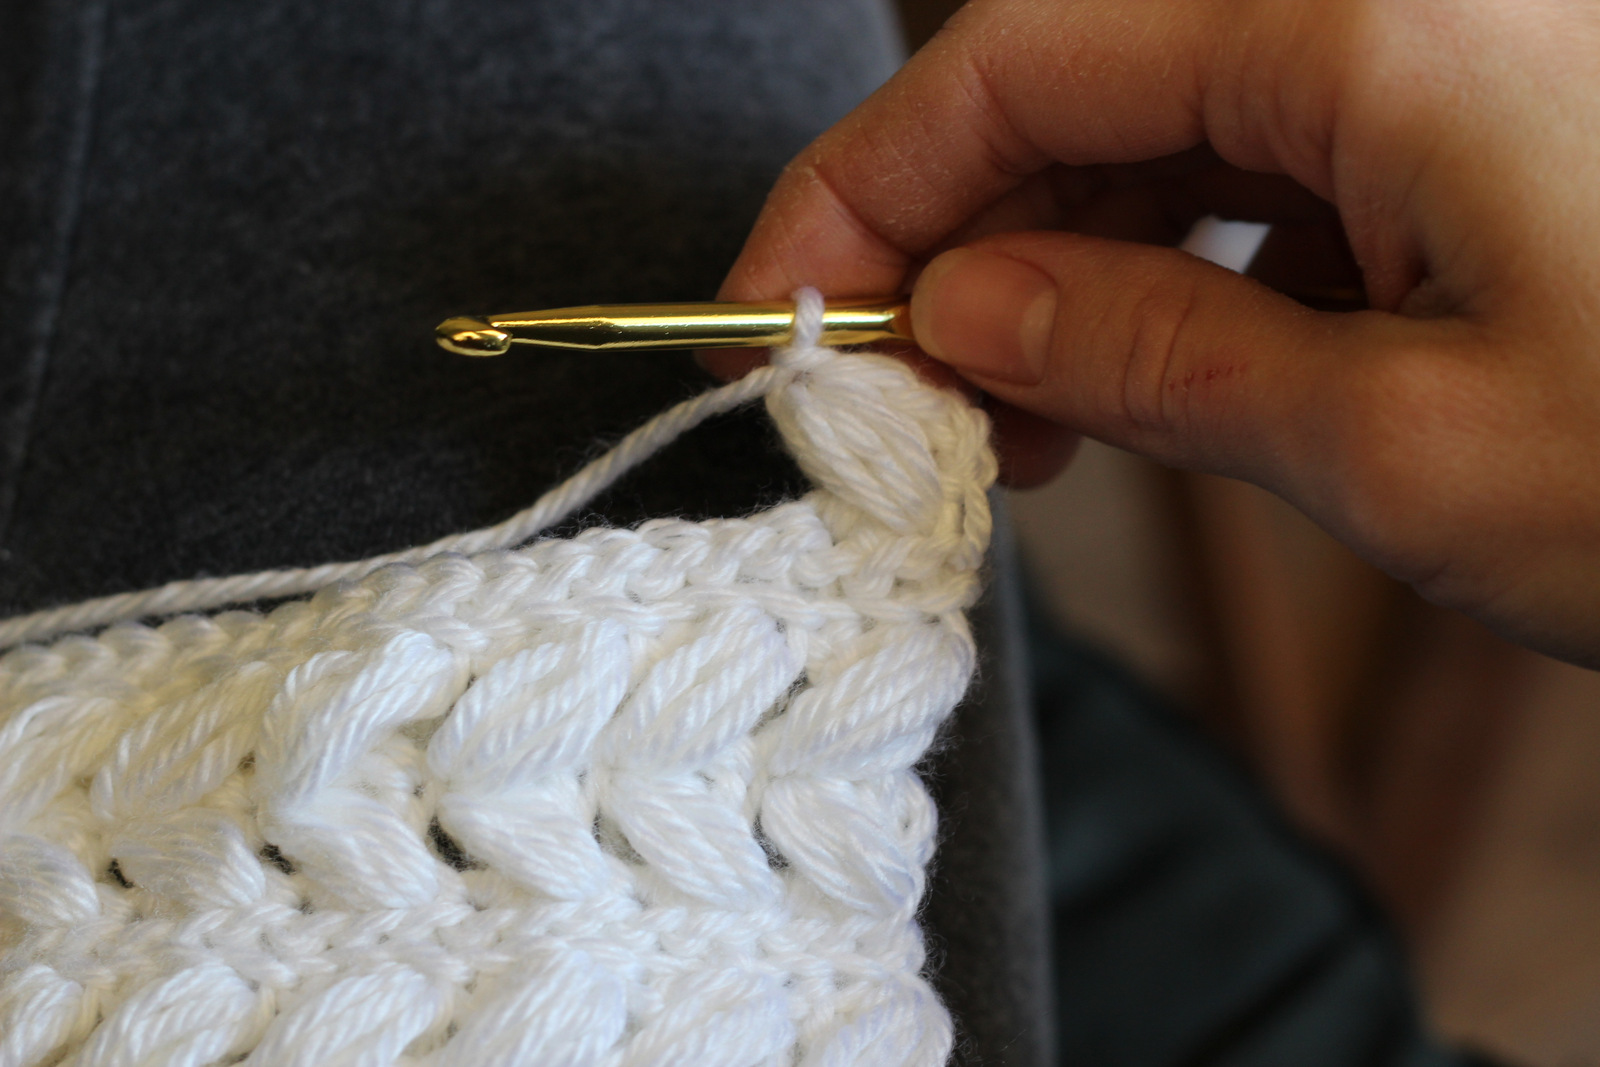
To bobble (also, see pictures below): *yo, insert hook into space, yo, pull up long loop* repeat this 3 more times then yo and pull through all 8 loops on hook, ch 1
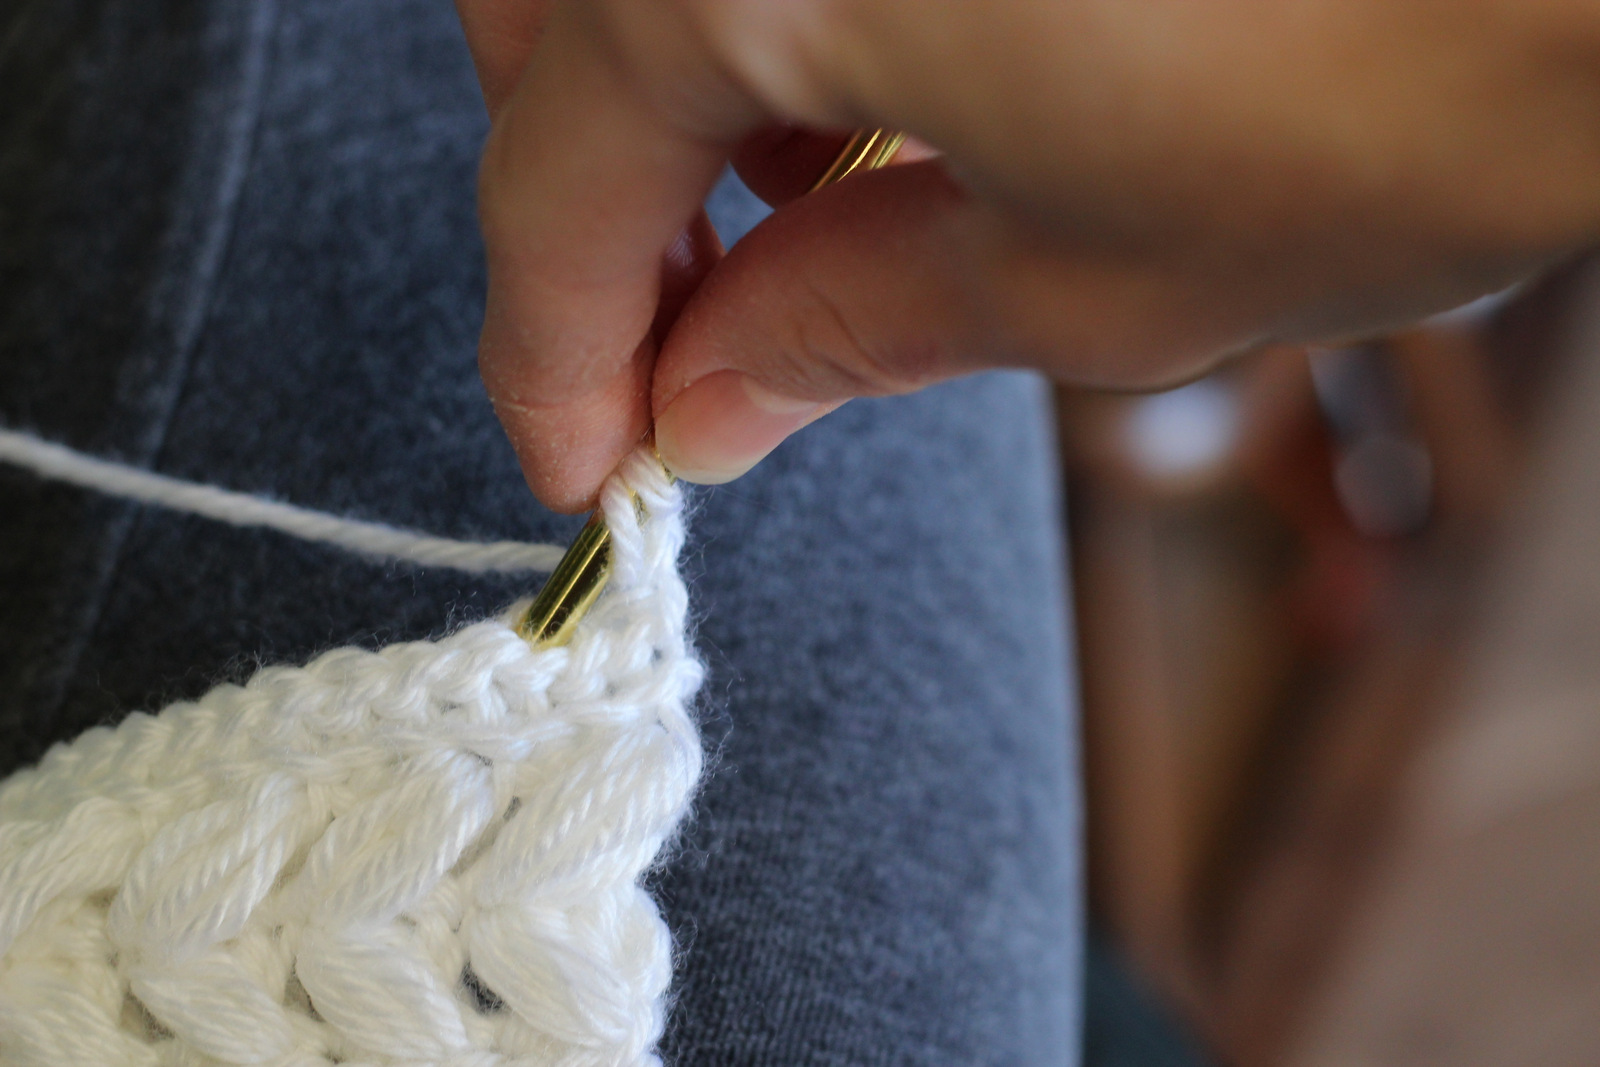
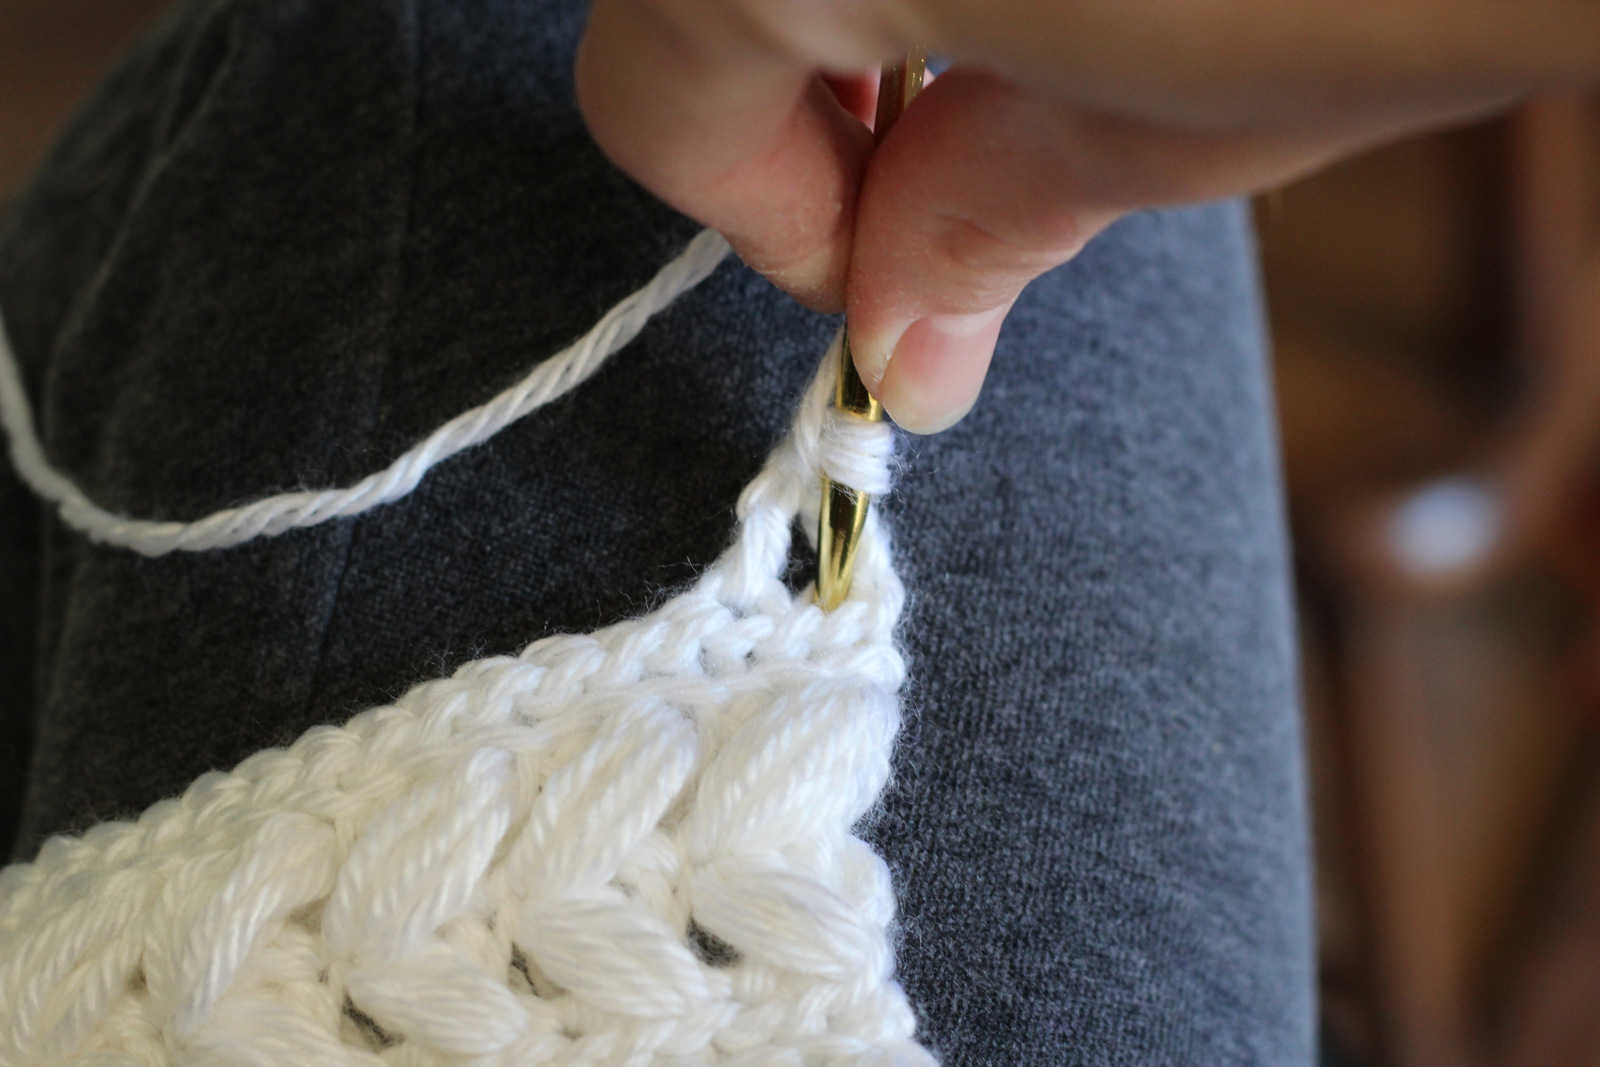
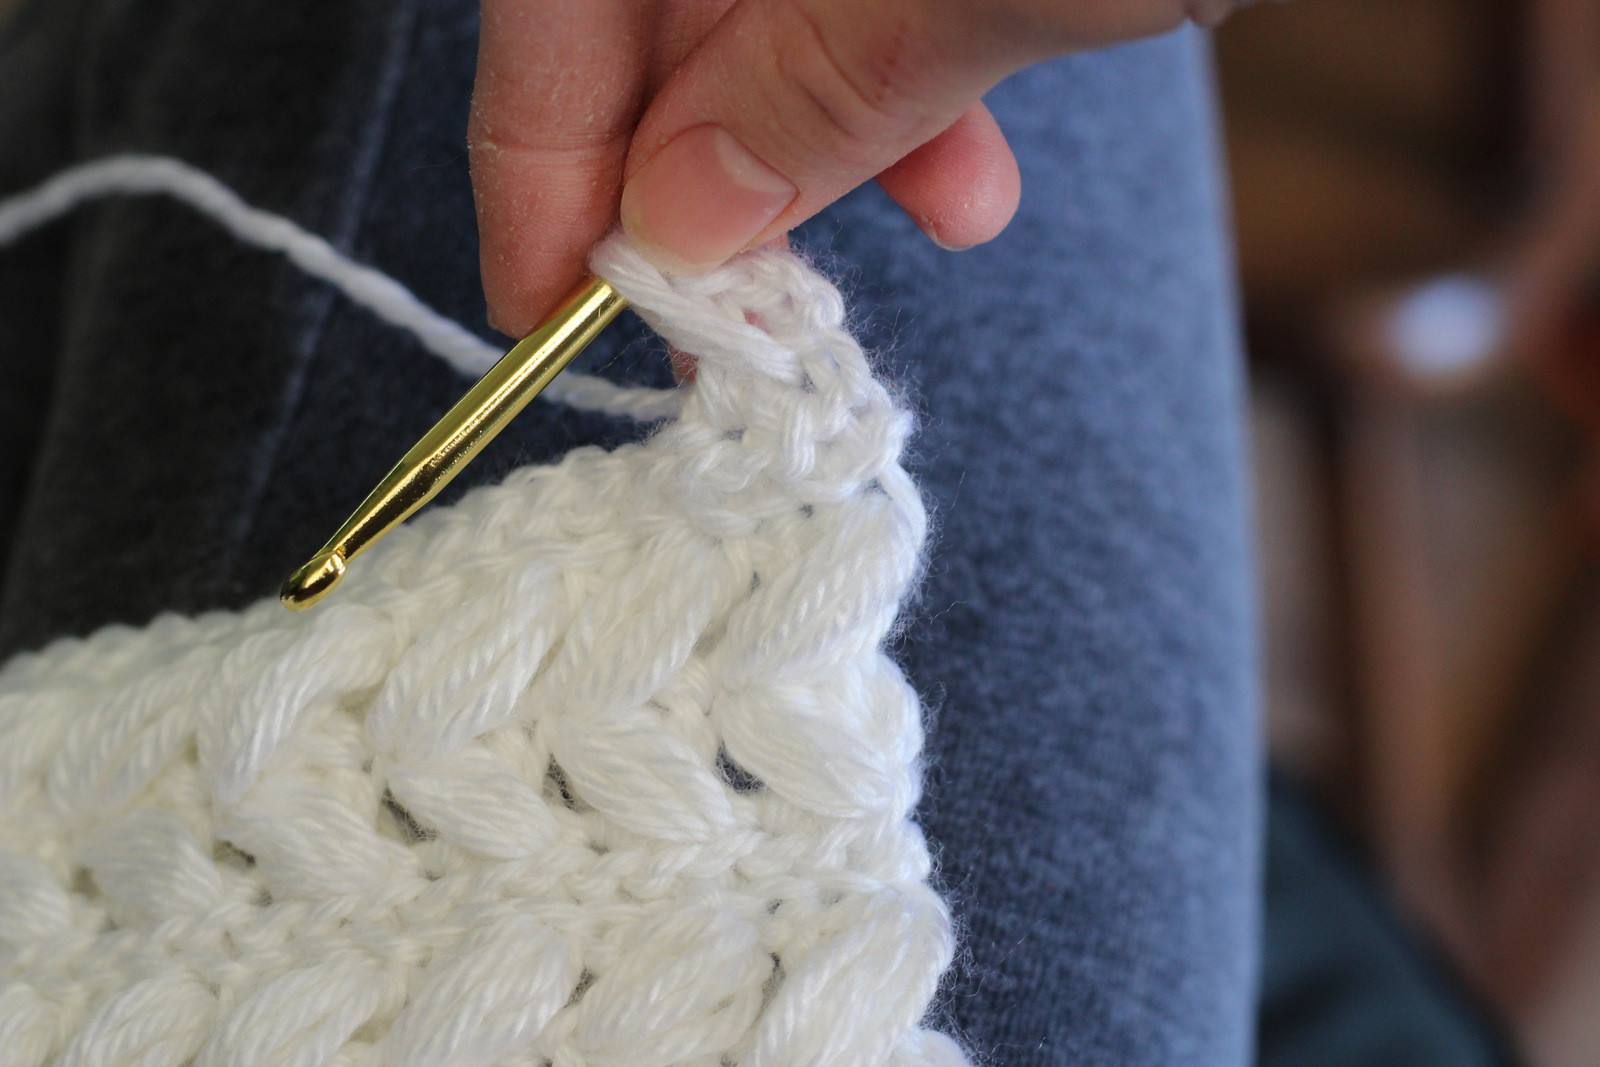
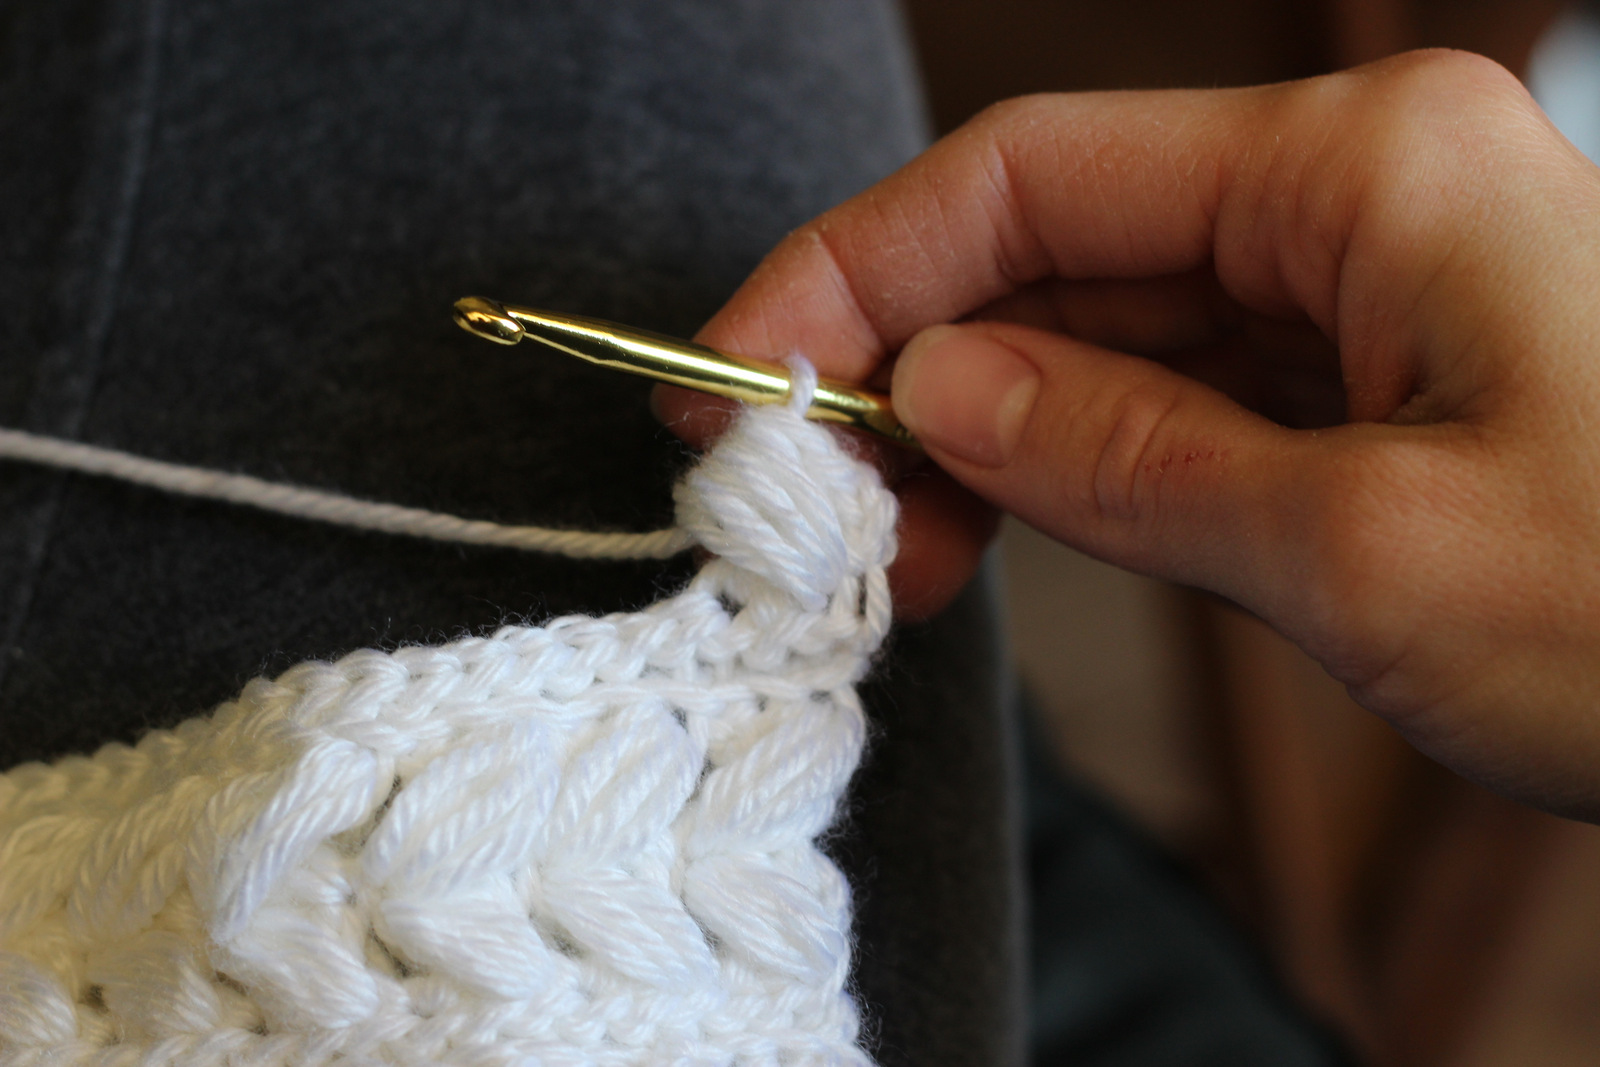
Row 2 is a little tricky so I’ll give you a photo tutorial here on it. The pictures are taken when I was further into the project but pretend you just see a foundation row below it. 🙂
 |
| ch 3, sk 2, dc in next |
 |
| Here’s that dc done… you can see the skipped stitches behind it. |
 |
| yarn over and twist your crochet hook around to insert it into the 1st skipped stitch that you skipped earlier. It feels awkward but it is possible… and worth it. 🙂 |
 |
| Start your bobble… yo and pull up 1st loop |
 |
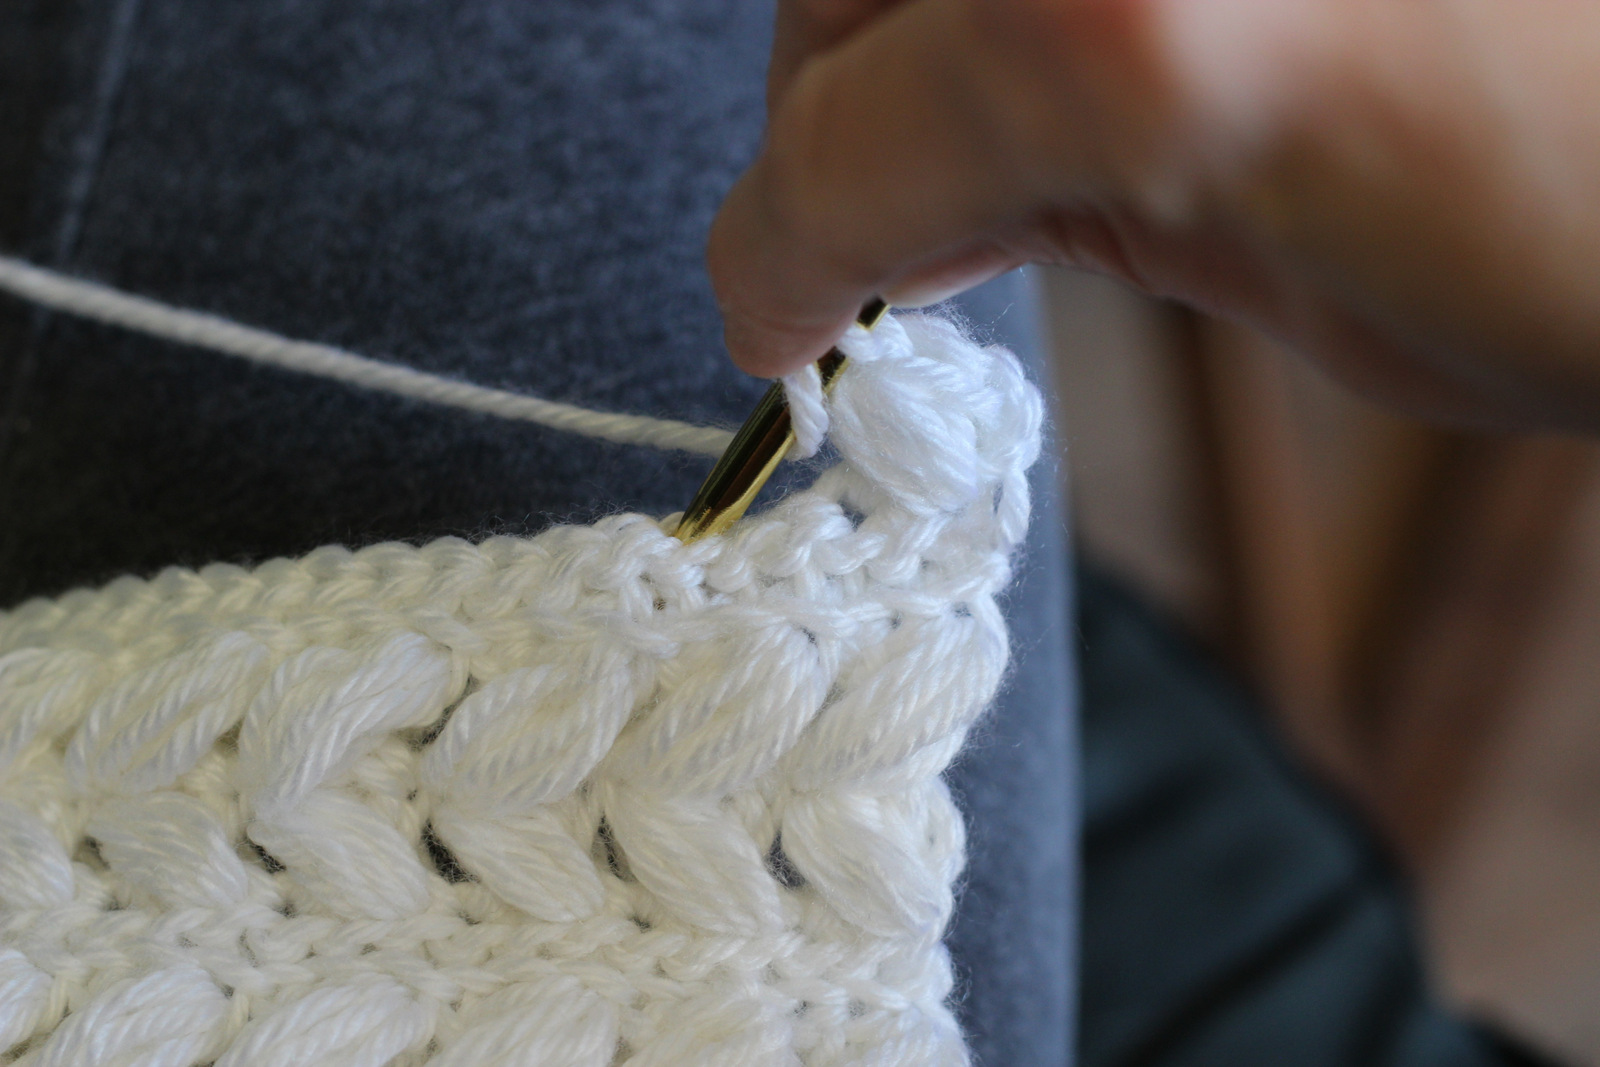
| Here all 4 long loops are pulled up… bobble almost done |
 |
| yo and pull through all 8 loops (4 yos, 4 long loops) on hook |
 |
| ch 1 |
 |
| repeat… this is the next skip 2, dc being started. |
I used Caron Simply Soft yarn and a H hook
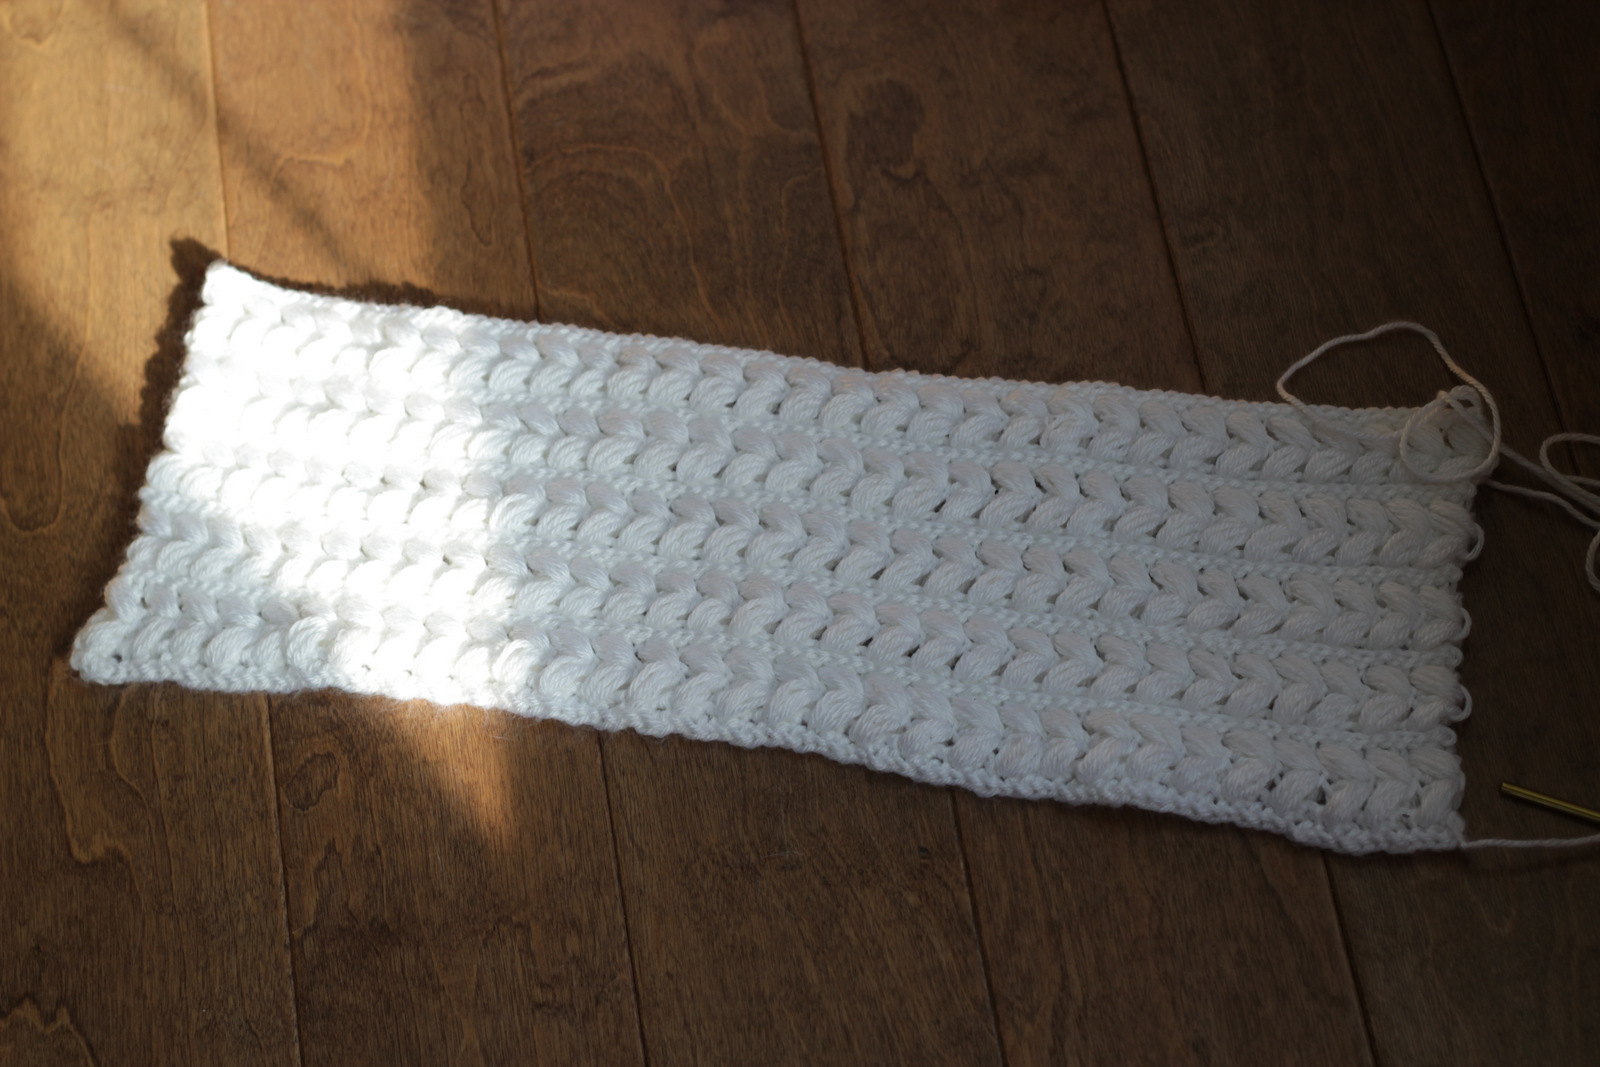
Row 1: foundationless sc a multiple of 3 until desired length (measurement from cuff of one arm, up arm, across back below the shoulders and down other arm to cuff.) I started with 93 stitches and it was about 22 inches long.
Row 2: ch 3, turn, *sk 2, dc next sc, bobble in the 1st skipped stitch (of the sk 2 just done)* repeat to end
Row 3: repeat row 2
Row 4: ch 1, turn, sl st blo even across
Row 5: repeat row 4
Continue working rows 2-5 in order until needed width is reached. The width should comfortably stretch around the arm at the widest point (the shoulder/armpit). If you’re using a well fitting shirt (it should be snug) to measure, use the shoulder seam. Mine was about 7 1/2 inches un-stretched and 11 inches stretched.
Fold the rectangle as shown and sl st through both thicknesses to make sleeves on each end. Leave the center open.


Next, I wanted to add a finishing row around the open area in the middle so I just did sc around.
You can easily add a more decorative trim on the edge of the sleeves or around the center. A nice flower also helps dress it up. Since her dress was colorful and had a flower already, I left the shrug simple.
…I am amazed. I never though about doing a shrug this way! I must try this!!! *(*´∀`*)☆
Adorable!!!
Just found your blog and I’m so happy I did! Loving all your content!
I’m just learning to crochet so really excited to check out your crochet posts.
Thanks (:
Thanks!:)
Hi Bethany! The shrug is absolutely adorable! I’m sure I’m missing something that should be blatantly obvious here, but could you please explain row 4 and what “blo even across” means? I so appreciate your making this pattern available@
Kellie
Thanks, Kellie! I explained blo now. It means back loop only. 🙂
Wonderful stitch and perfect tutorial! Thank you!
This is beautiful, and I try to make it. But, in 2.row I have a big hole under boby. What I doing wrong? Do you mean double crochet on English or American dc?
I use American terms. 🙂
Hi. Ive just started making this and in row 3 I am ending up with only half as many bobbles as if Im missing stitches on the top of row 2? Is the ch3 supposed to be done after every bobble???
Hi, Elkie. Do not ch 3 after each bobble. Only repeat the bit between *s. Count carefully the stitches you are skipping and make sure you are doing the ch 1 after each bobble… Let me know if you don’t get it figured out.
Very nice! What is the purpose of 2 rows of slst? Why not just 1 row of sc or hdc? I will be trying this pattern. thanks for the tutorial.
Hey, Trudy! Thanks for your comment. The 2 rows of sl st came about because I wanted this pattern to have some stretch to give a little better fit around the shoulder area. Also I like the look of rows of sl st. It gives it a knit look. You can try it with sc or hdc and see how it works out for you. Hope you have fun with it!
In order to get mine to look like yours, I have to do the bobbles, in row 3, around the back side of the dc. Is that correct?