There are a wealth of unused things in the world, that (with a little bit of tweaking) can be transformed into useful items. When I find something that catches my eye I have a habit of thinking about how it could be re-purposed. Sweaters seem particularly suited to re-purposing and I’ve made them into yarn, a footstool, a skirt, wool diaper covers, and a dress. But today, I just kept the sweater as a sweater and altered it to fit.
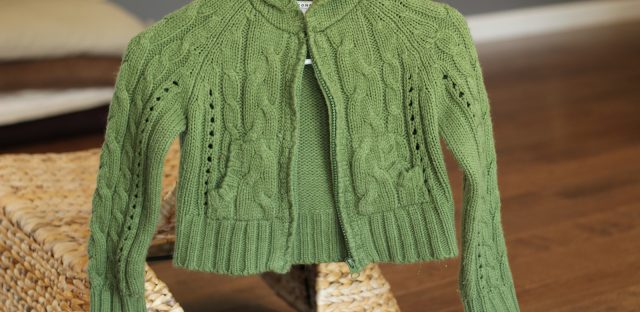
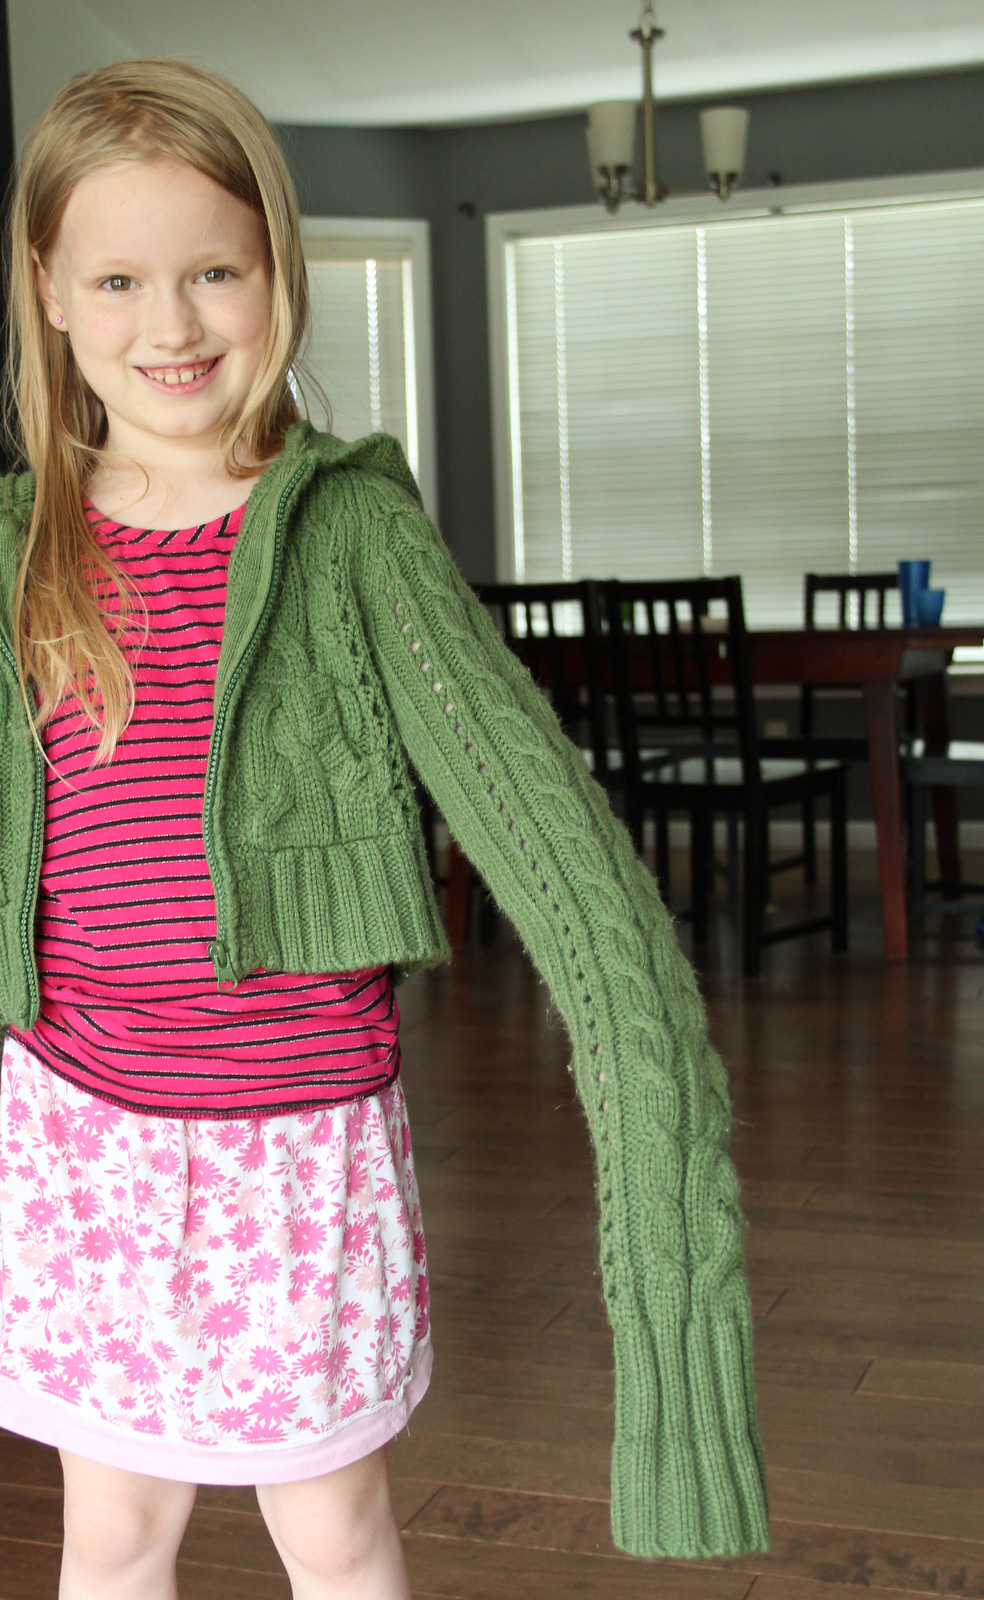
It was a few dollars at the thrift store and I love the lovely soft deep green which matches the flecks of green in my little girl’s eyes. The sleeve length make me think it must have been made for a monkey however and so I planned to unravel them and re-knit the cuffs. After a few rounds of knitting with size 2 needles and a tension so tight my hands ached, I gave up re-thought this strategy. After all, the other reason that I buy knit sweaters instead of knitting them myself is because I lack patience for projects that take forever.
 |
| Monkey arm sweater- BEFORE |
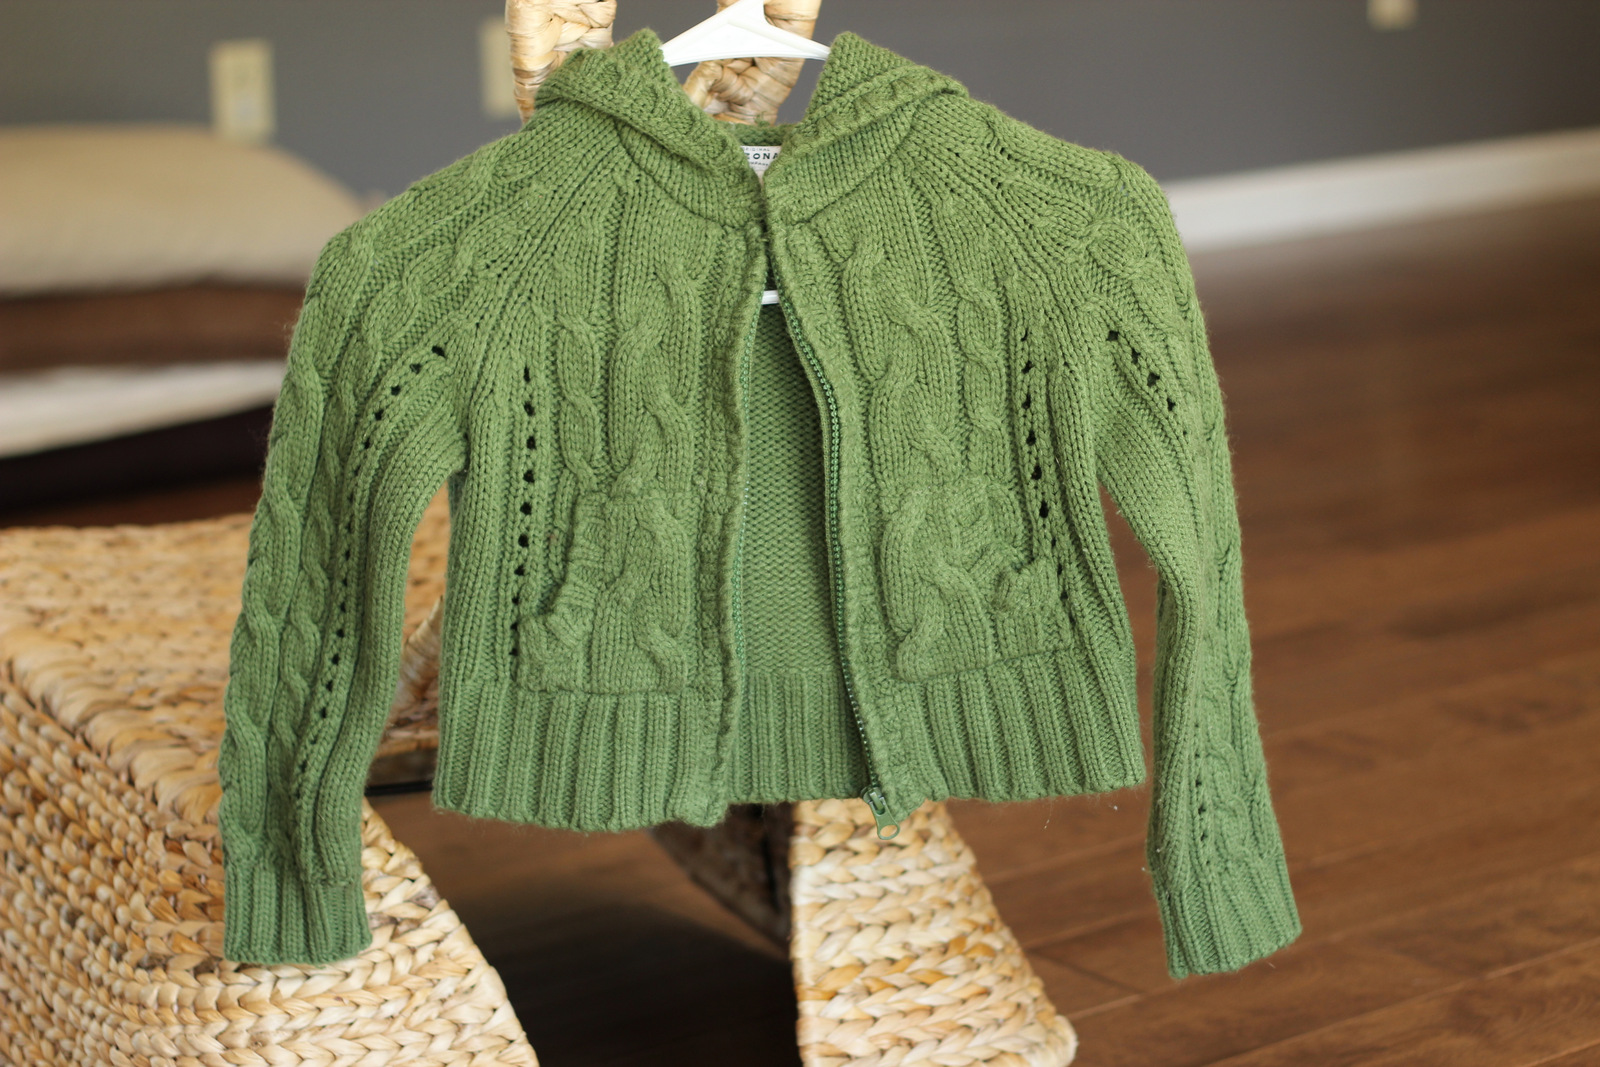 |
| AFTER |
I decided I should be able to cut off the existing cuffs and reattach them higher on the sleeve. Sewing thick knit sweaters can make a bulky seam so I decided to weave them on, mimicking the knit pattern of the cuff. It ended up being a lot of fun and I learned a lot about knitting. I love dissecting just how things work, and this was great for a thorough understanding of this craft. If you want to do it some time, here’s a bit of an instructional and some tips from my experience.
Shortening Knit Sleeves
Tutorial(Warning: This was a project and a half… Mostly taking the pictures and trying to make it all make sense. So there are about a thousand pictures here to illustrate and make it easy for you. If you need to, you can also double click any picture to make it bigger.)
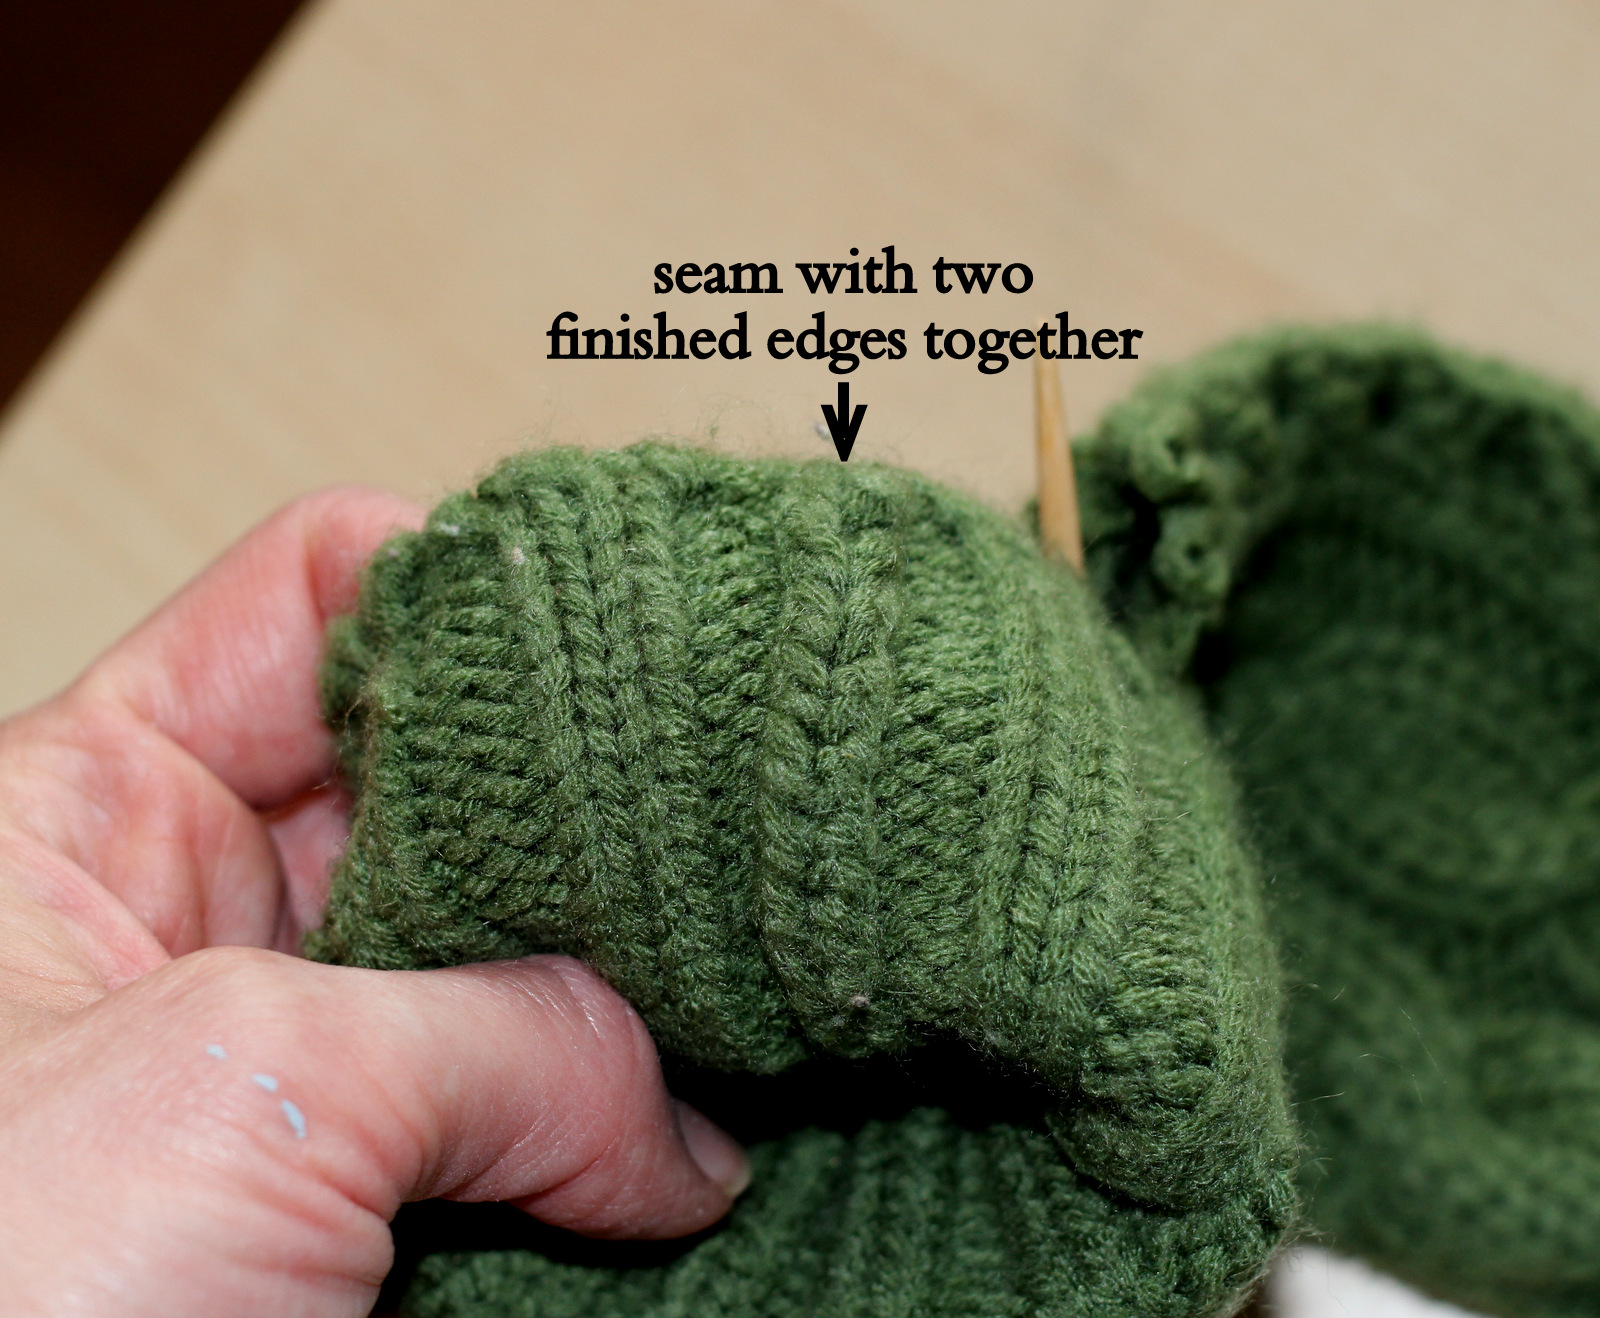
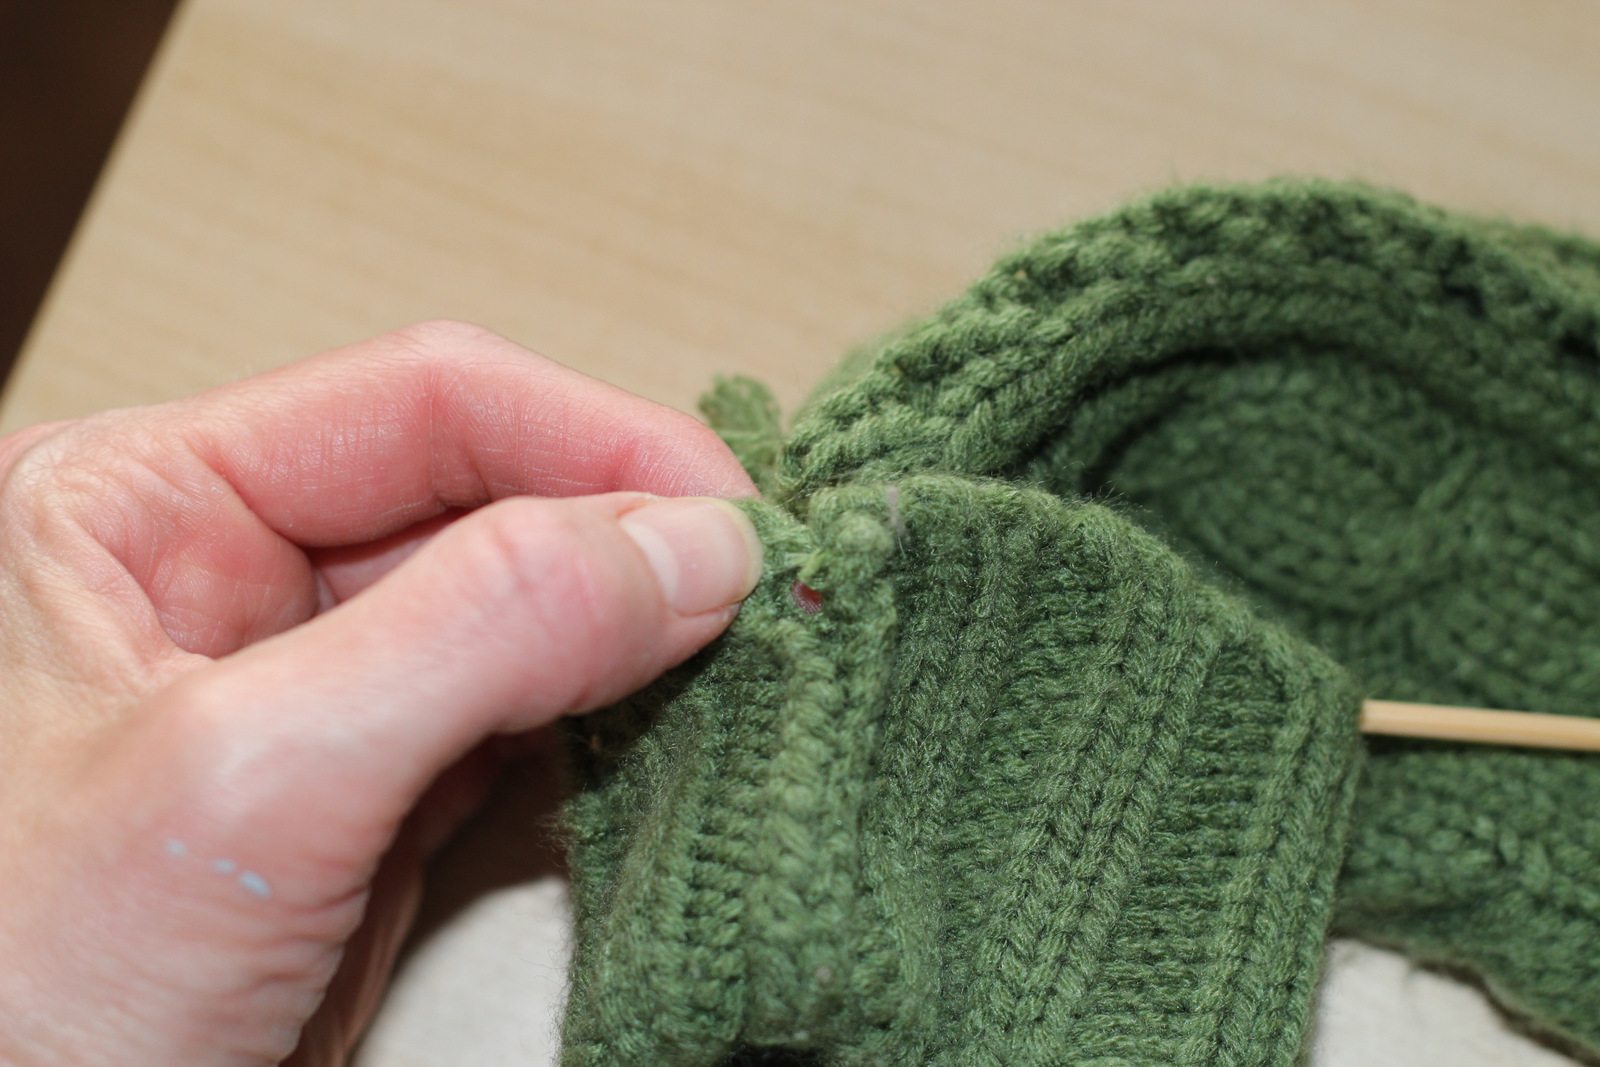
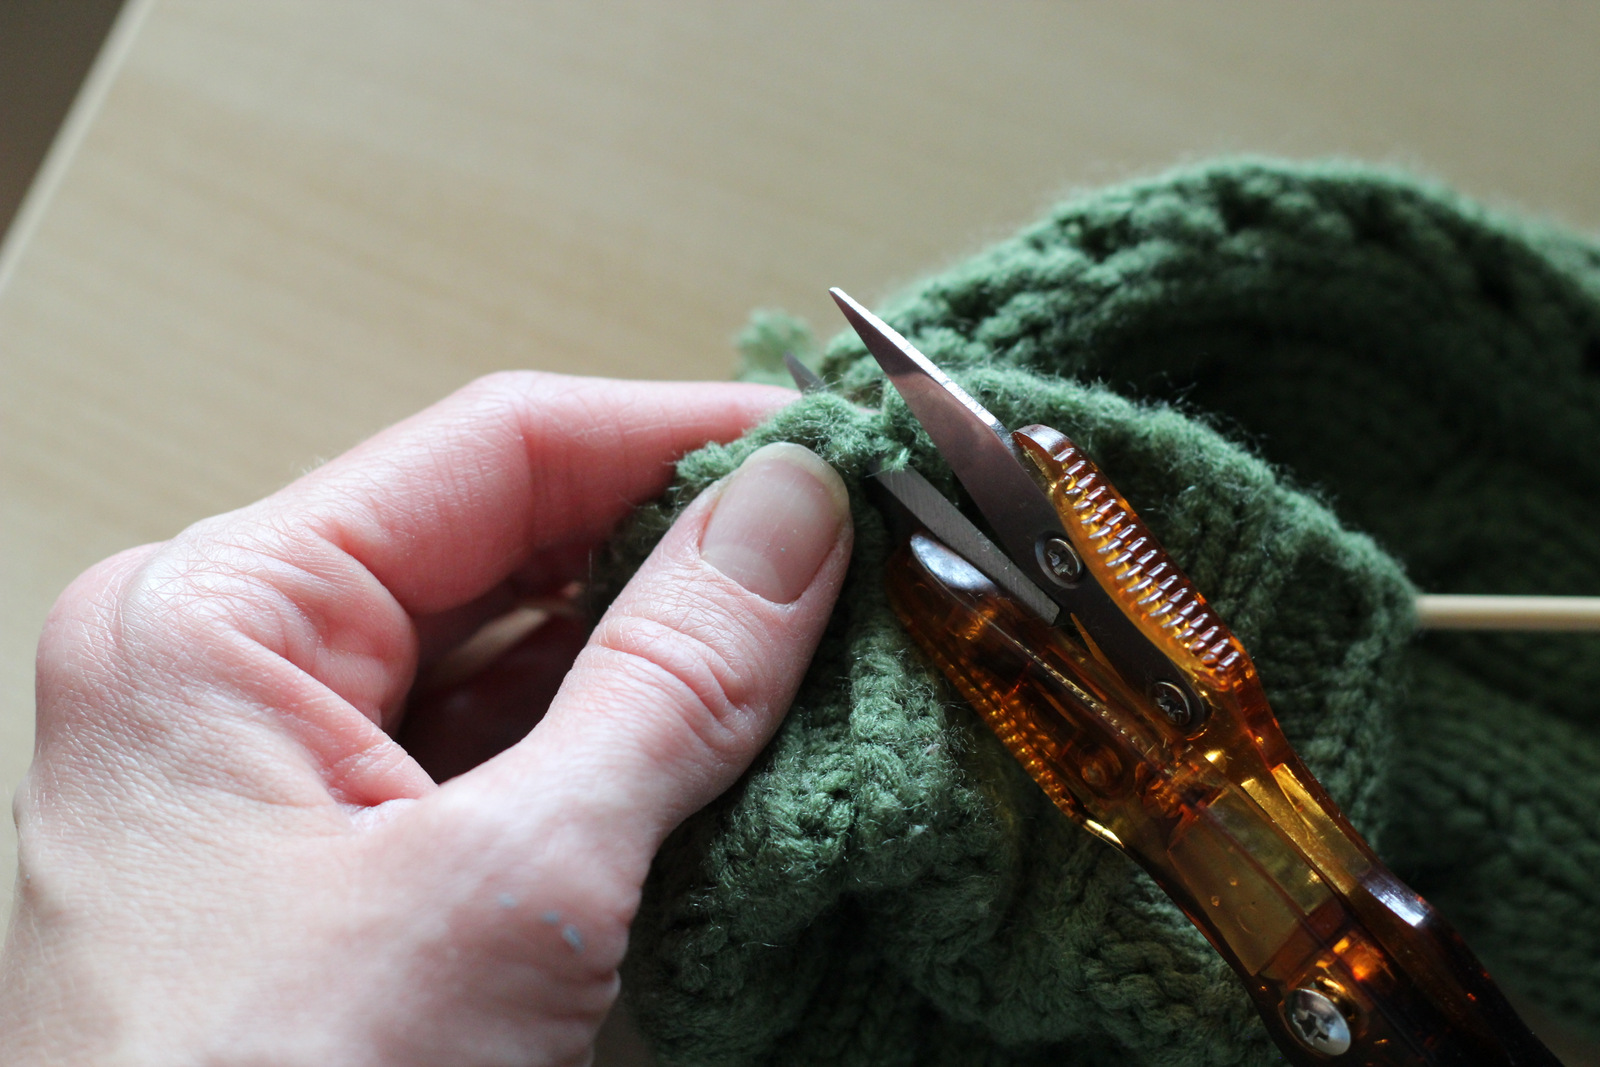
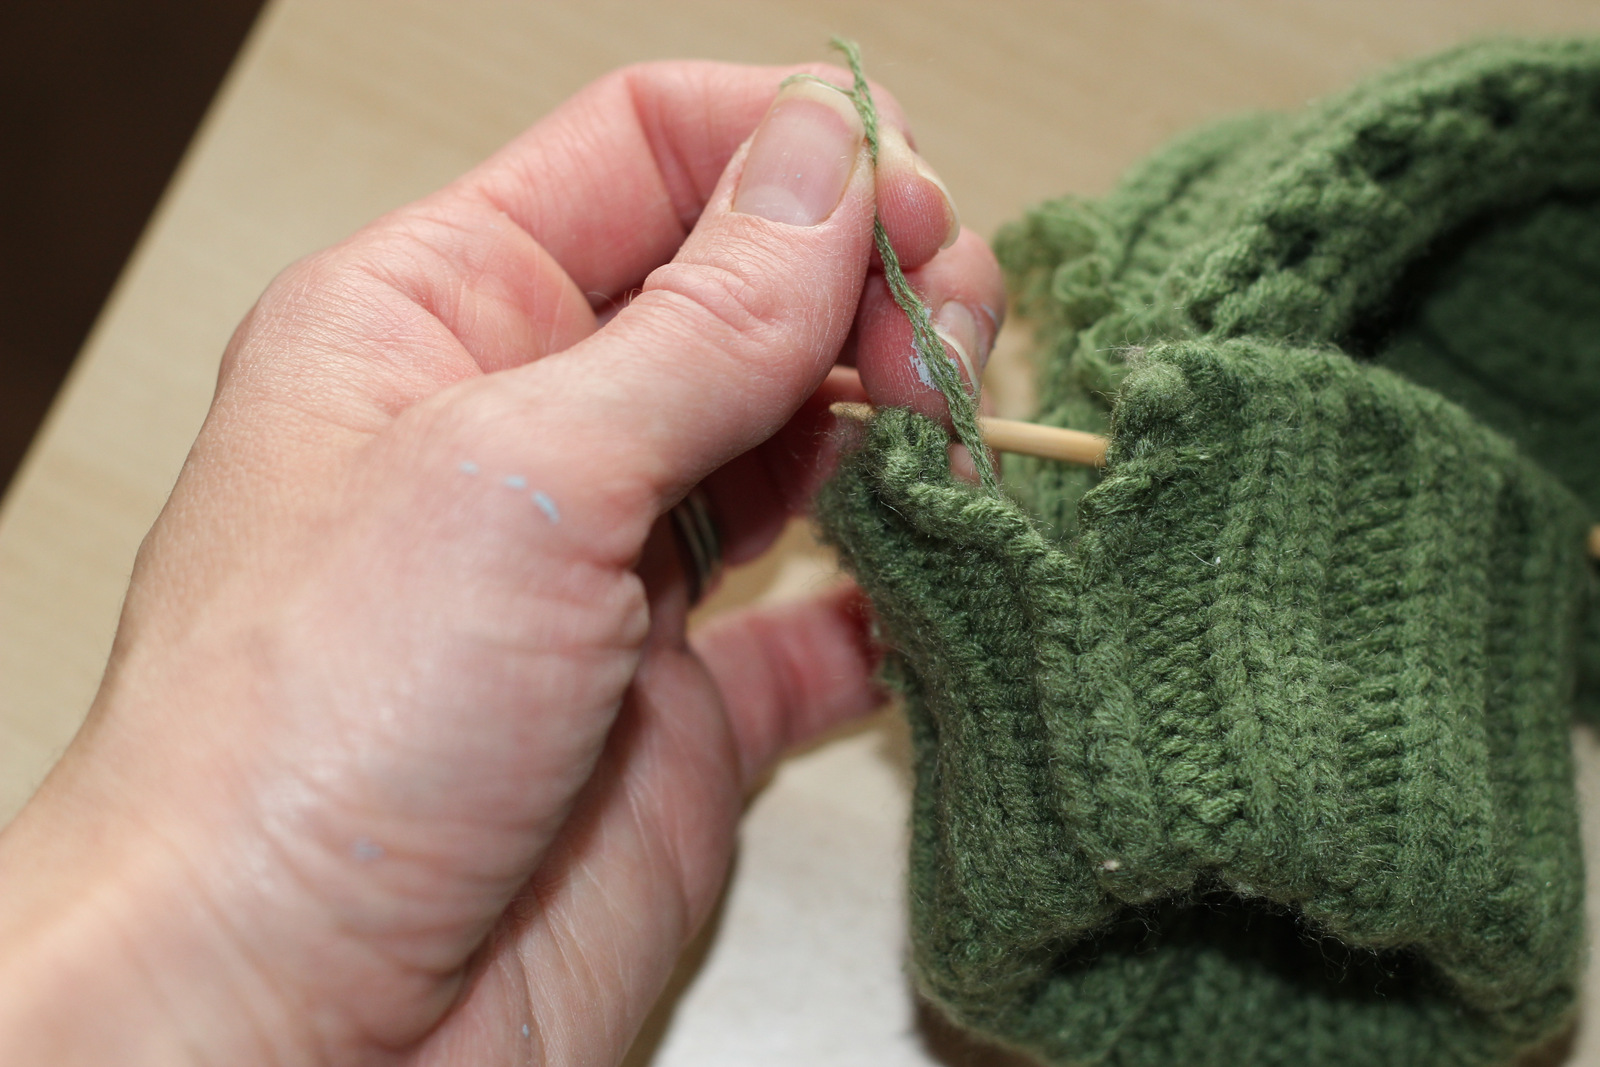
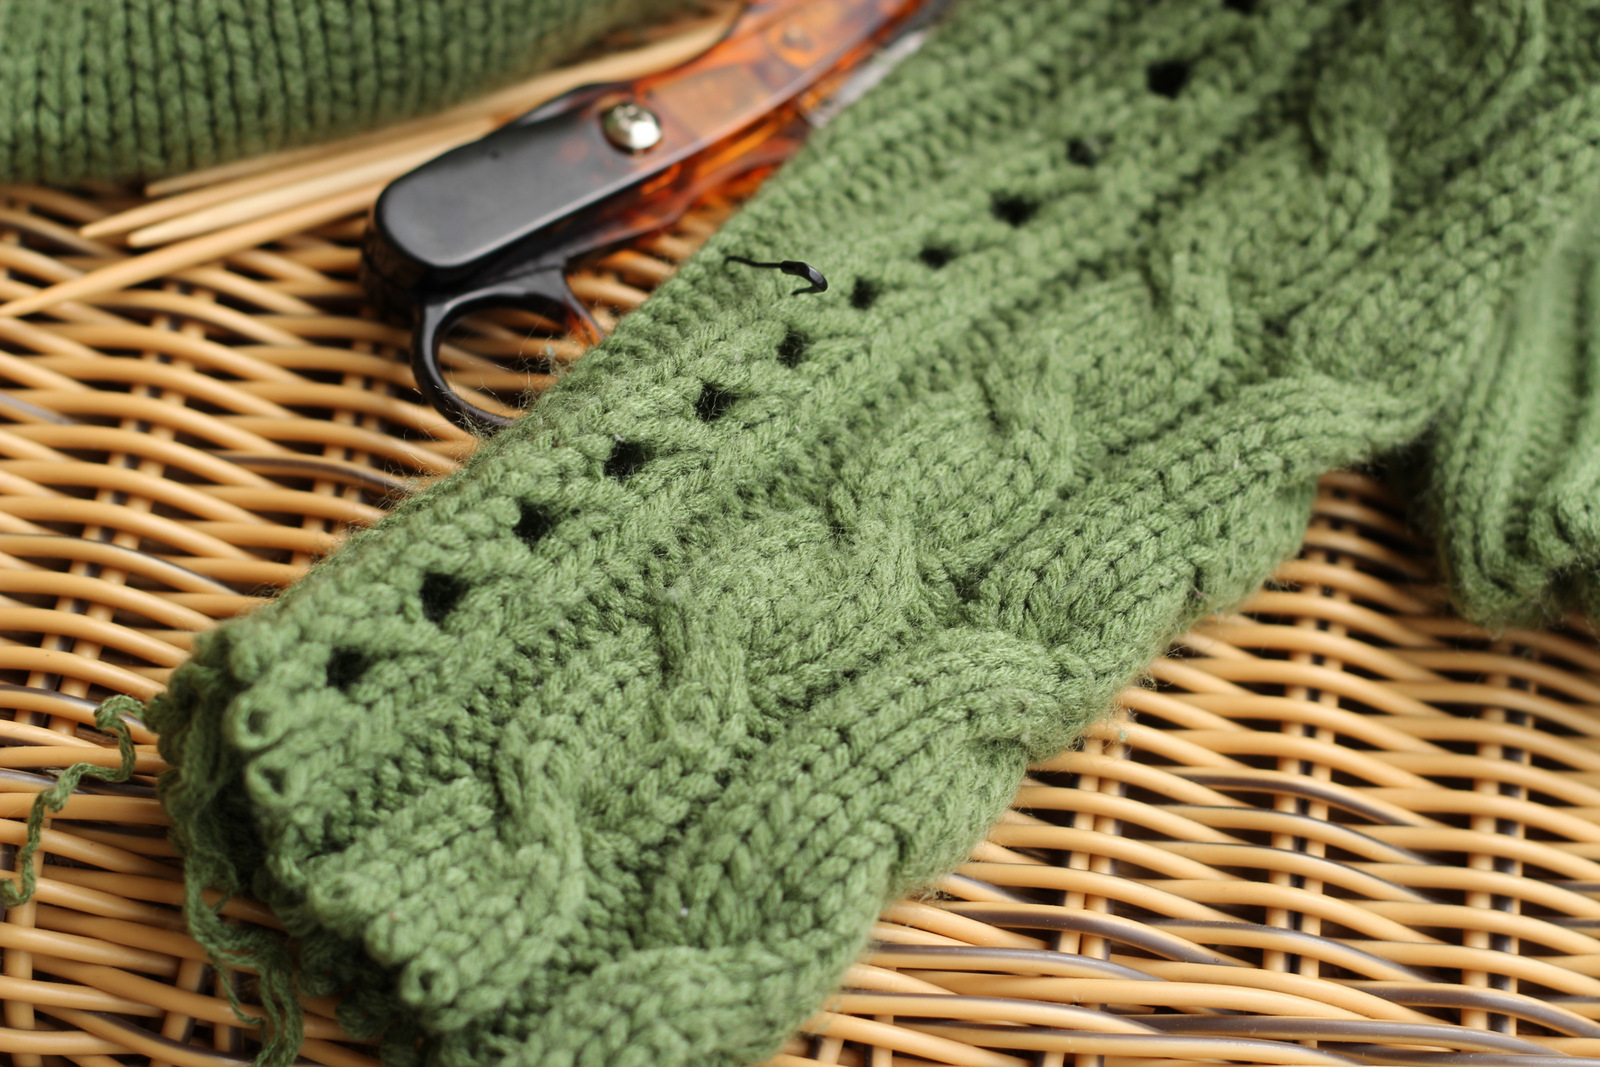
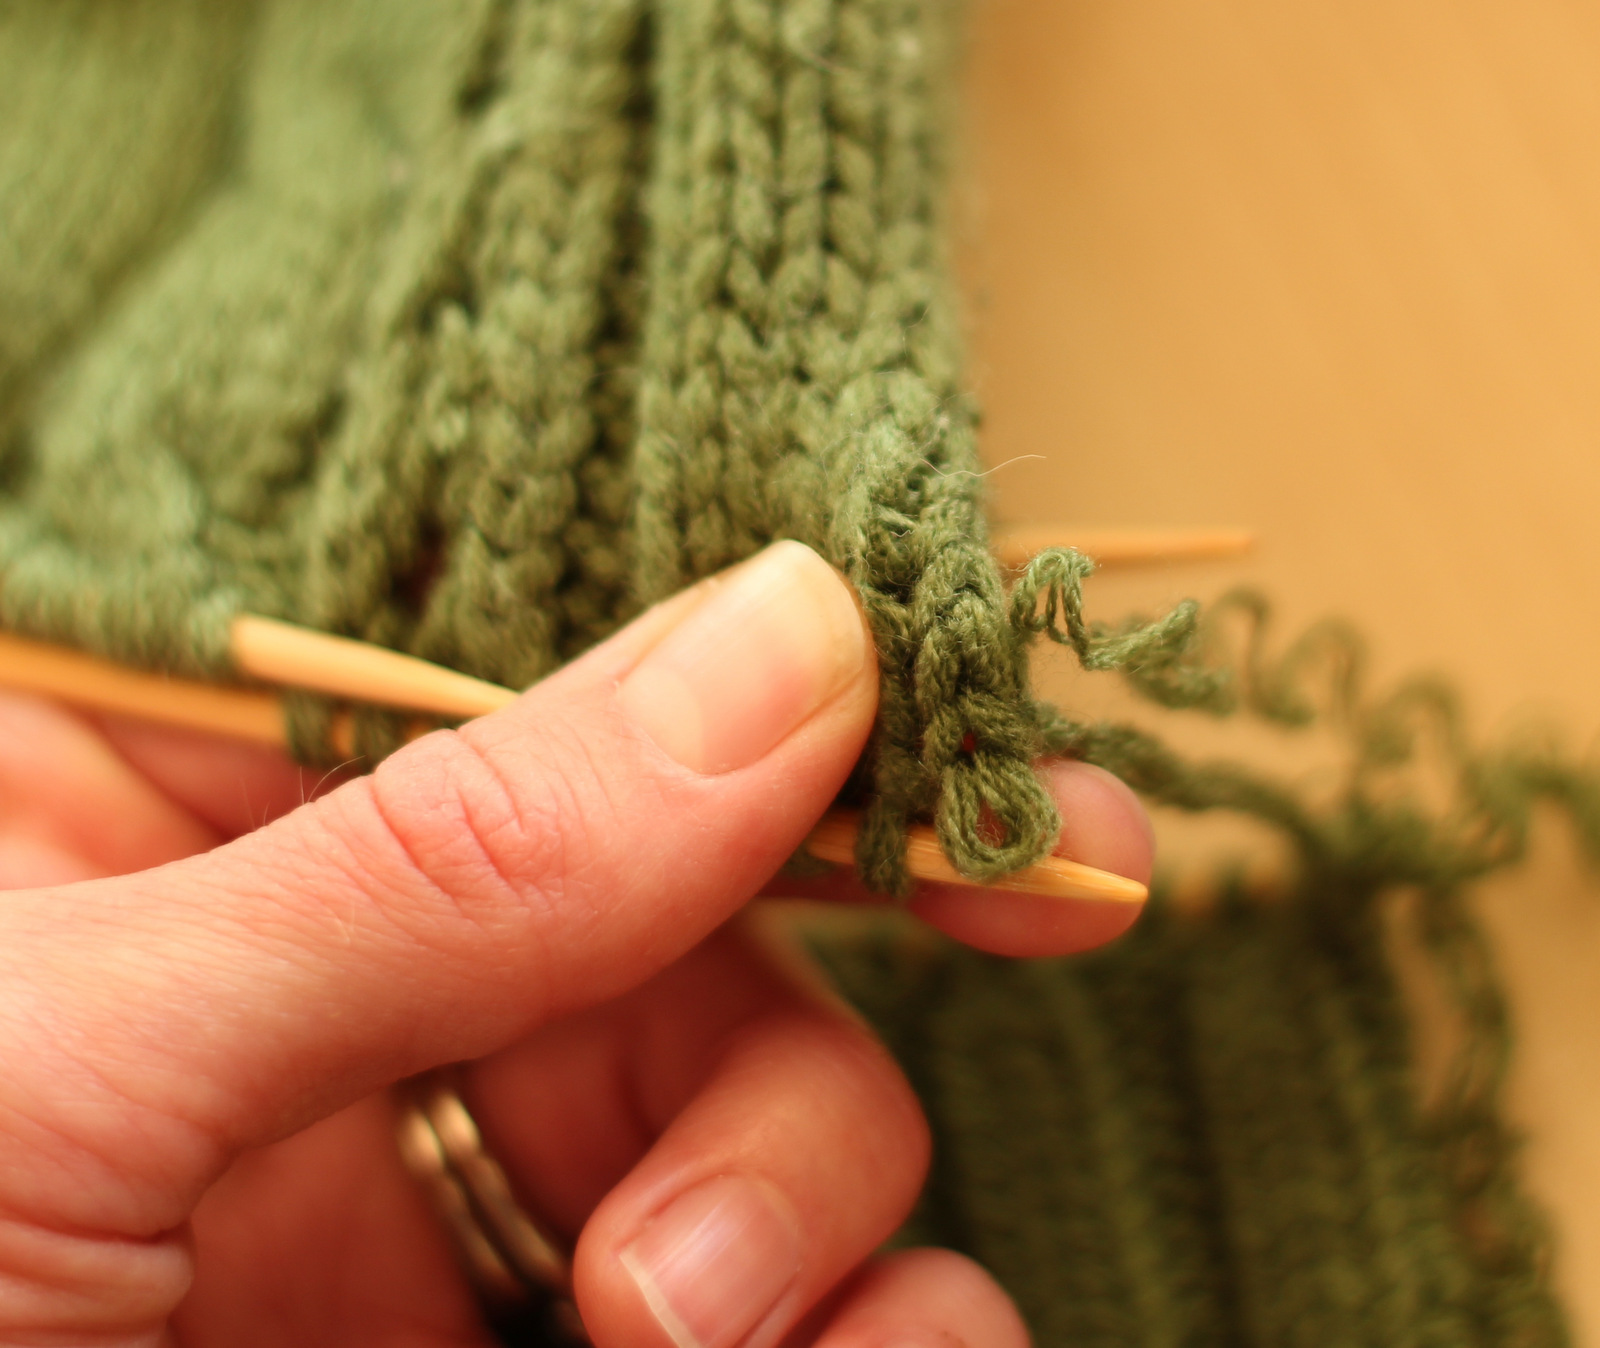
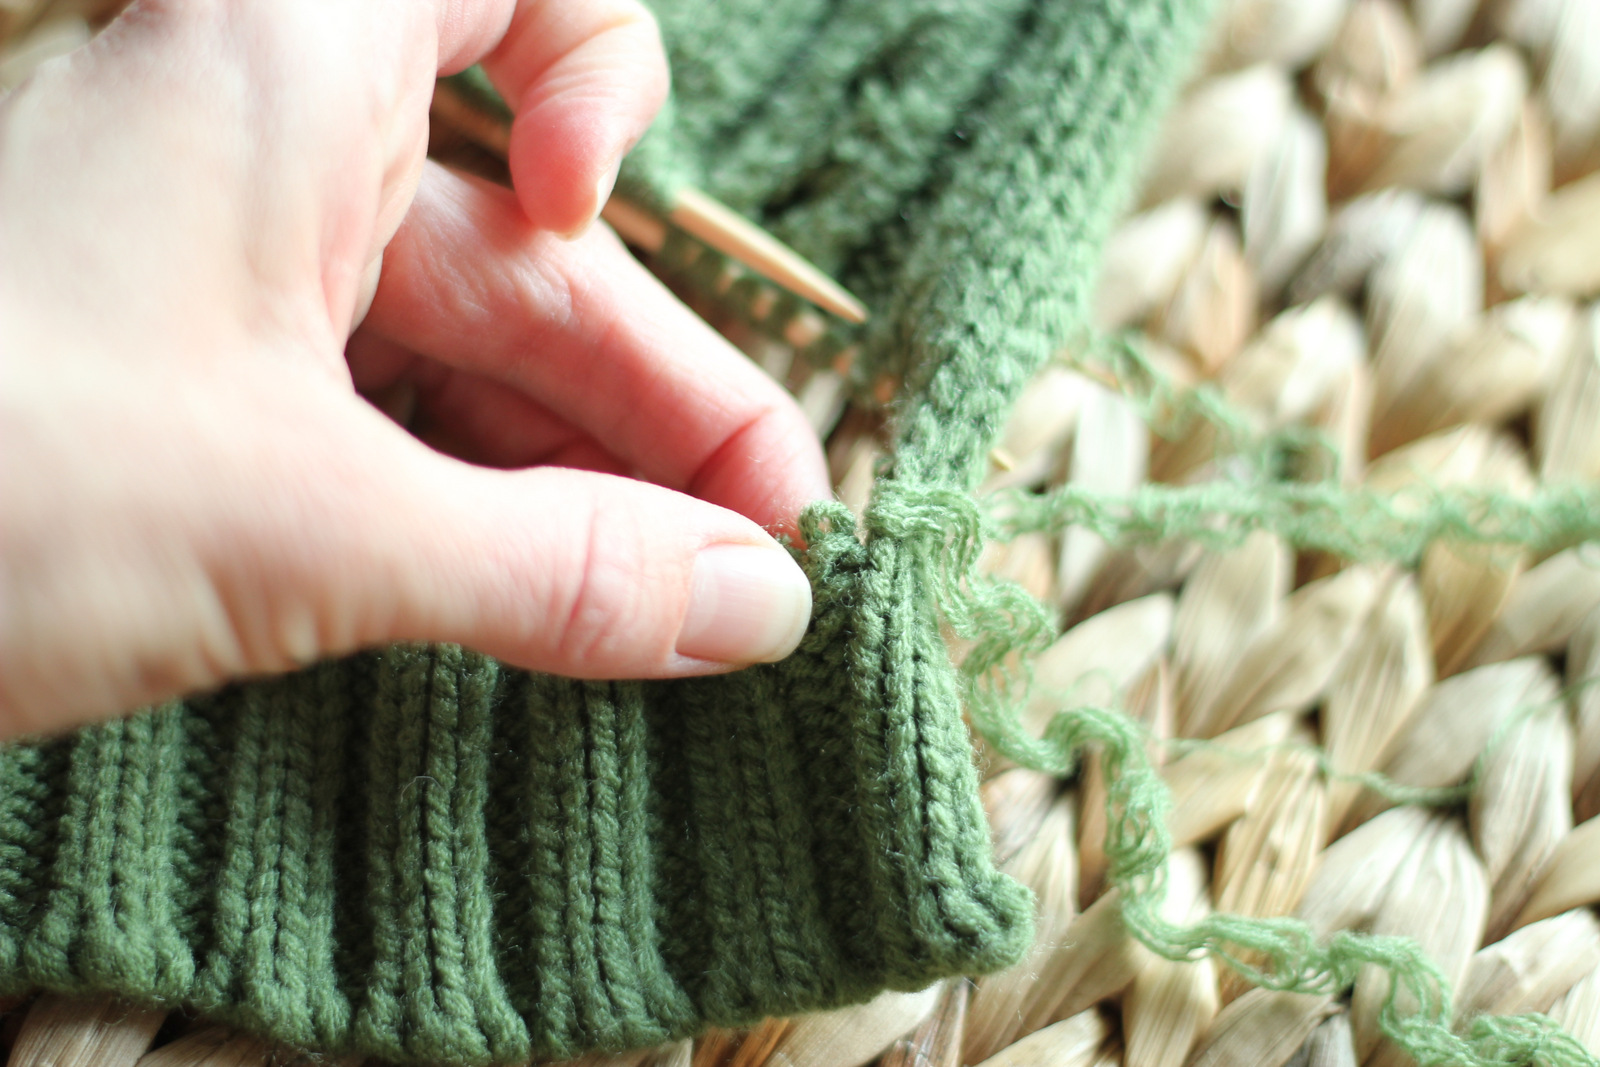
First thing, undo the seam of the arm, starting at the cuff. What you want to see at the seam is two finished edges of knit, joined together with slip stitch. If the seams are serged (sewn with masses of thread over a lot of loose edges of yarn) this method will not work, and the only option would be to cut and sew. I describe the specifics of taking apart the seam easily on this post where I took a sweater apart for yarn. Basically, though, I snip a few threads in between the seam at the cuff, then I un-weave it a little until when I pull on it, it magically unravels. Undo the seam to the base of the cuff for now and don’t cut or weave in this thread. You’ll use it to resew the seam later.
 |
| snipped some threads, pulling the seam apart… |
 |
| had to snip a little more… |
 |
| …and un-weave a little. (Yes, that’s paint on my hands. Too many projects…) |
 |
| …and I finally found it. The magic thread to undo it. |
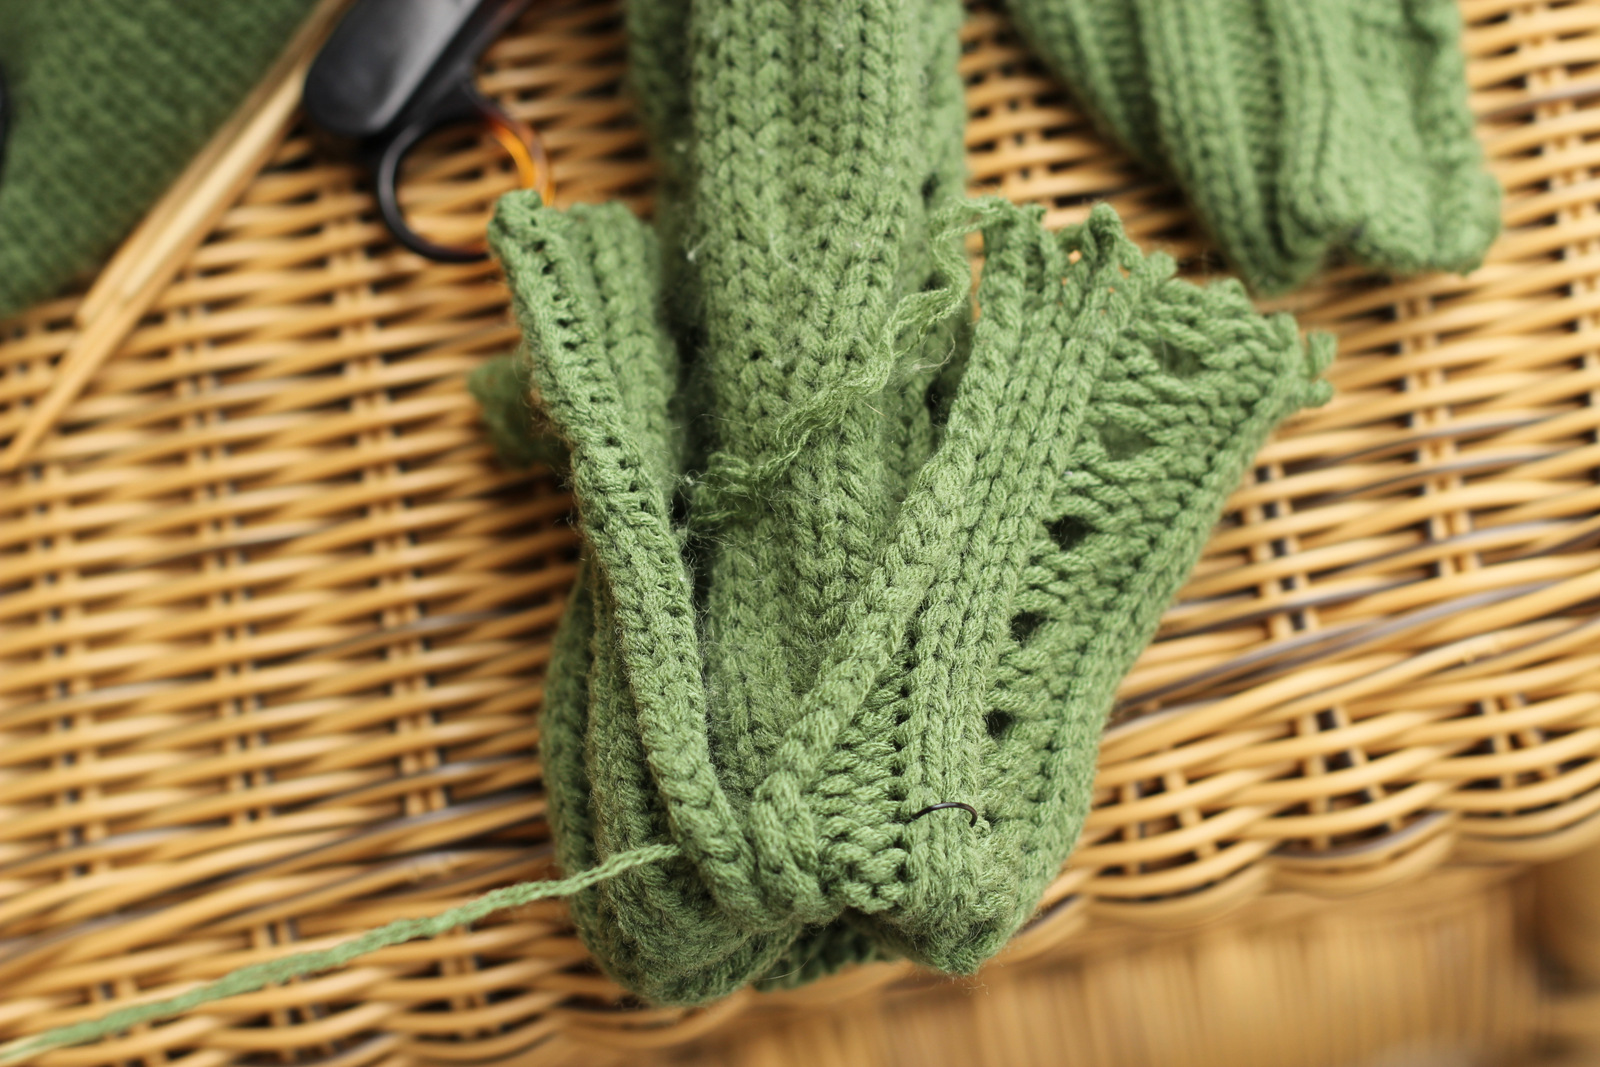
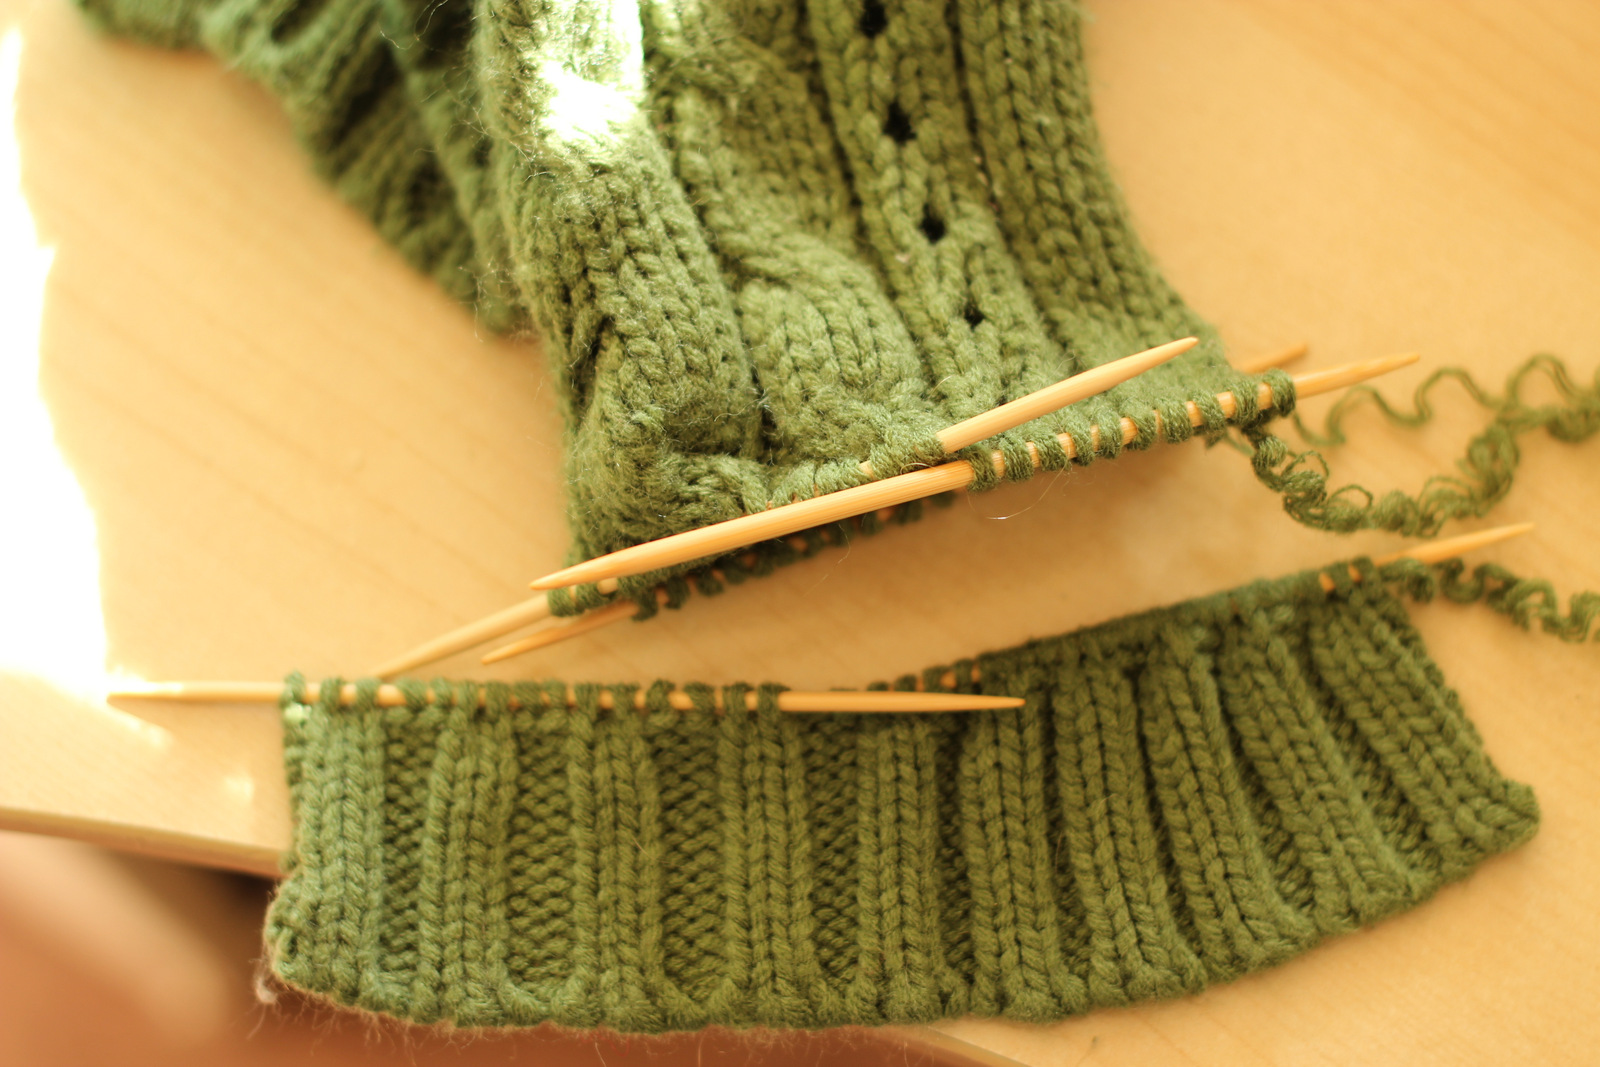
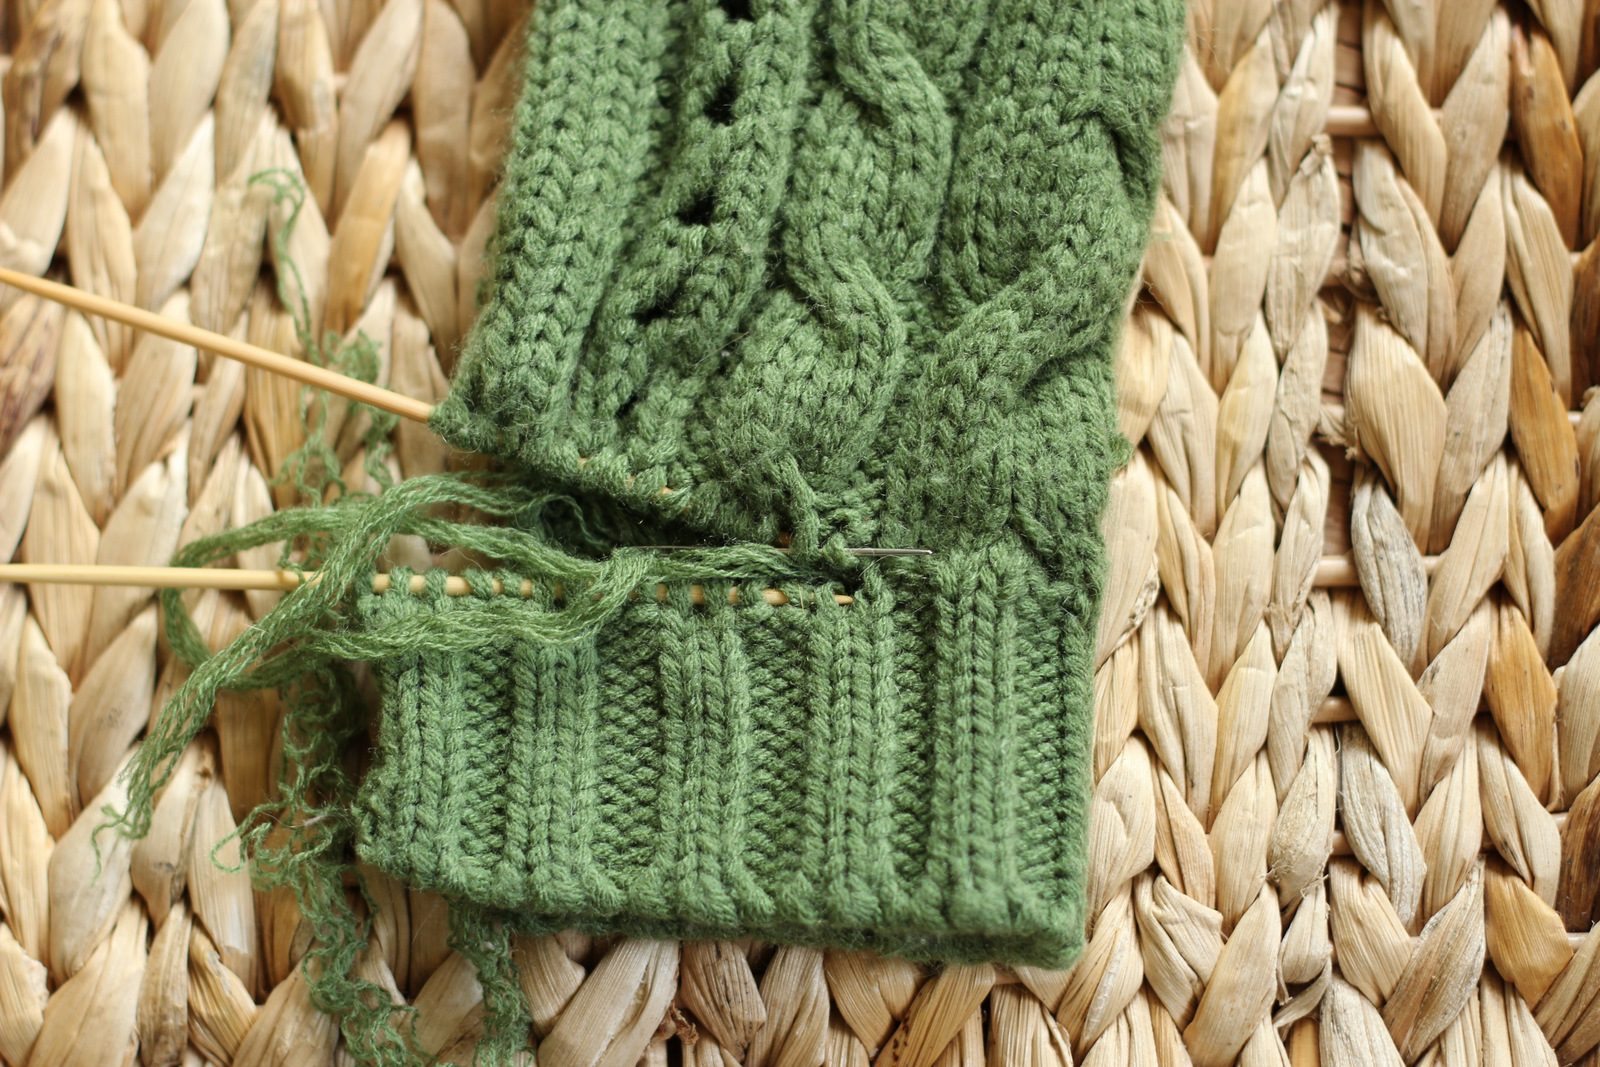
Then, detach the cuff. Pay some attention at this point just to get a better grasp at how that string weaves back and forth between loops. I used double pointed needles to put the loops on but circular or even straight ones (if you have a few) will work. When this is done, you’ll end up with the cuff detached and on needles, and a tail on one side.
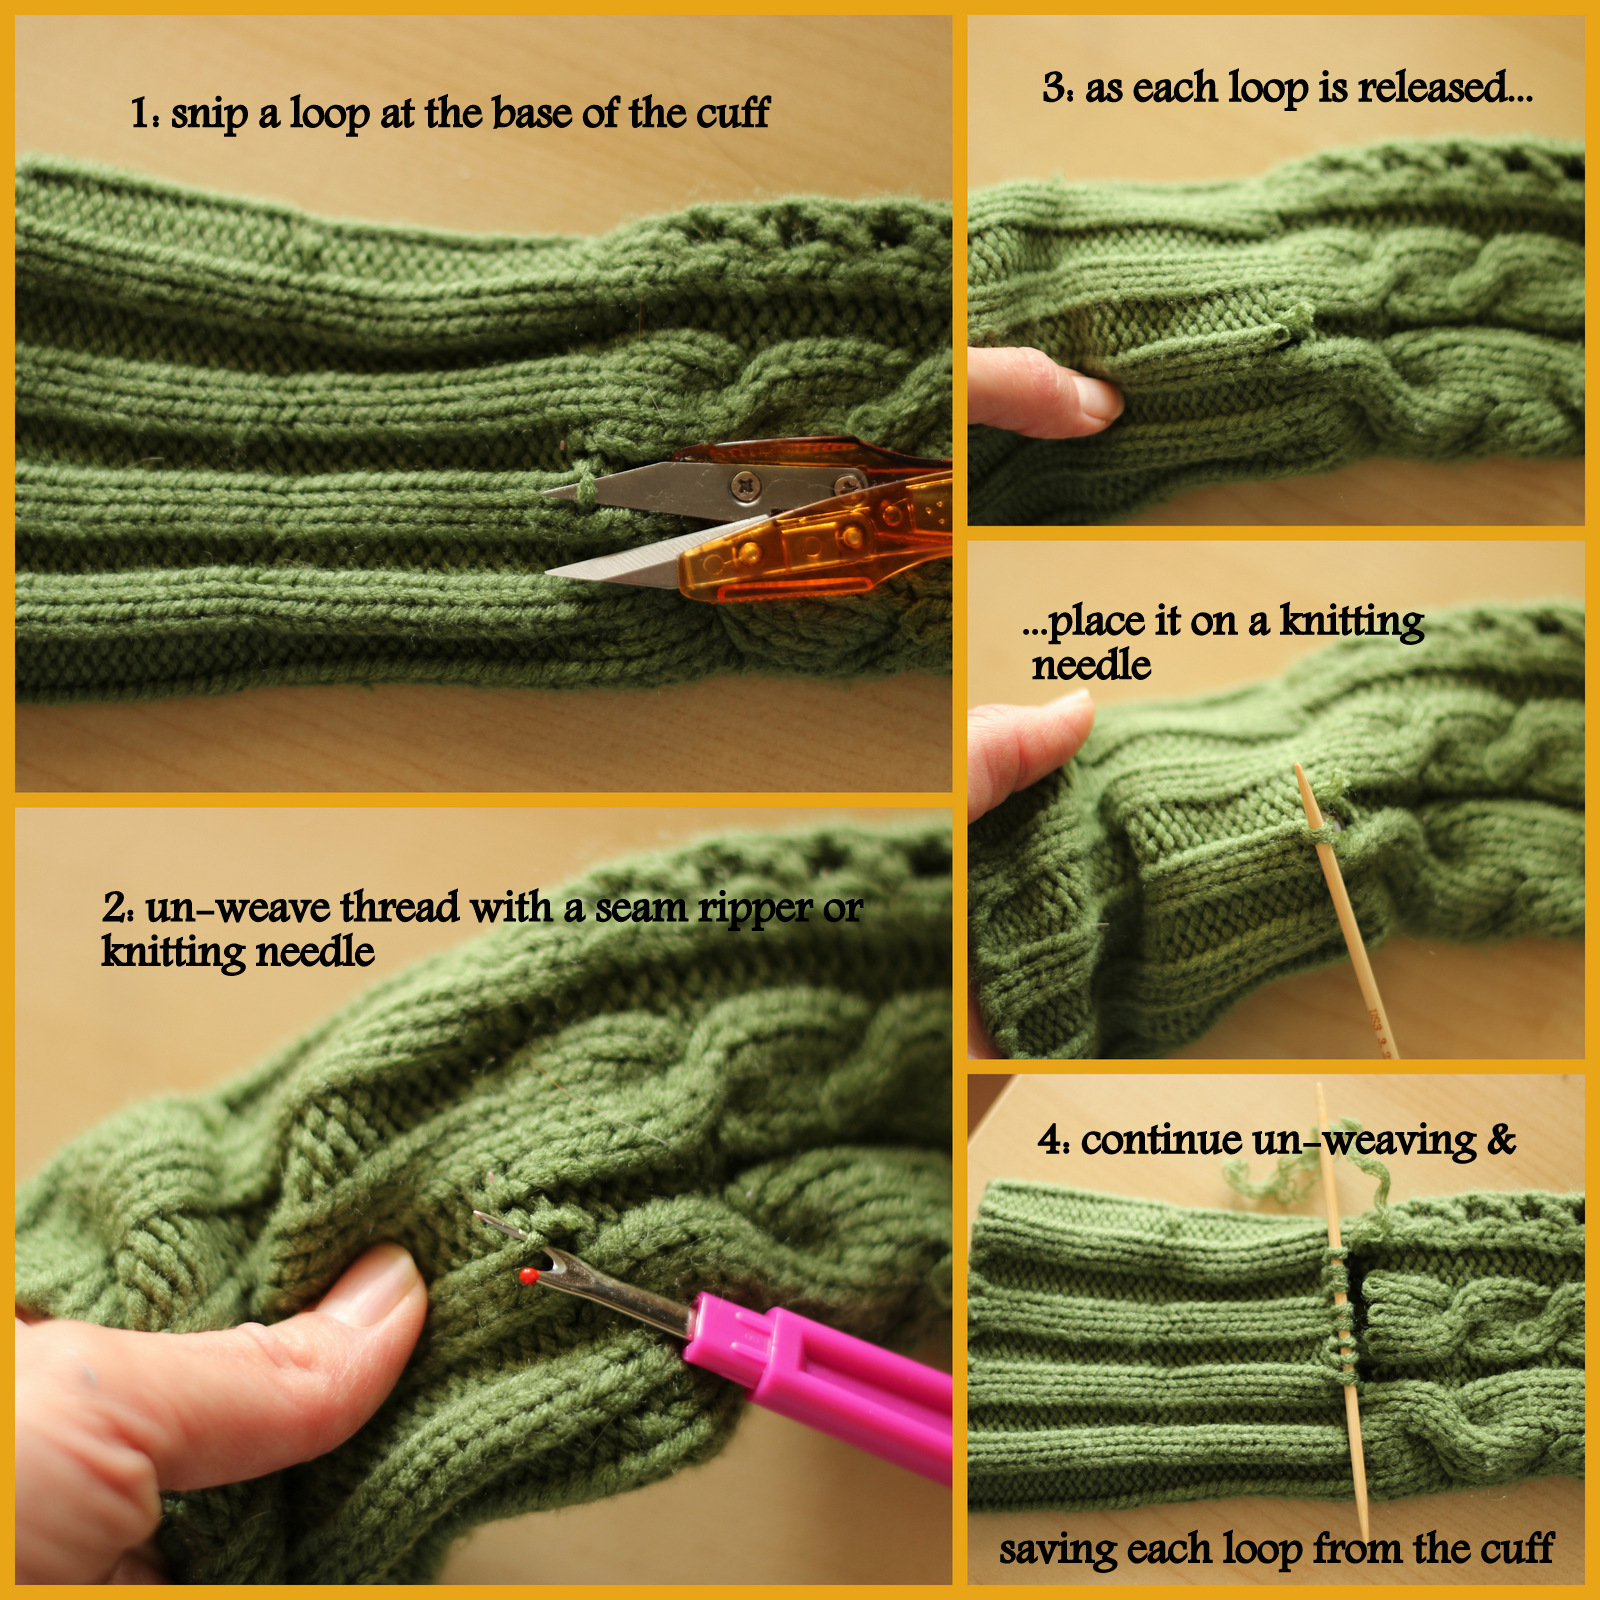
Next, have your model try on the sweater and mark how long the sleeve should be. Then account for the length of the cuff and undo the seam to that point. Snip a loop of yarn at that same mark. Just as you did at the cuff, un-weave the thread and slip the sleeve loops onto needles.
 |
| the black safety pin was marking my length |
 |
| seam undone to mark. |
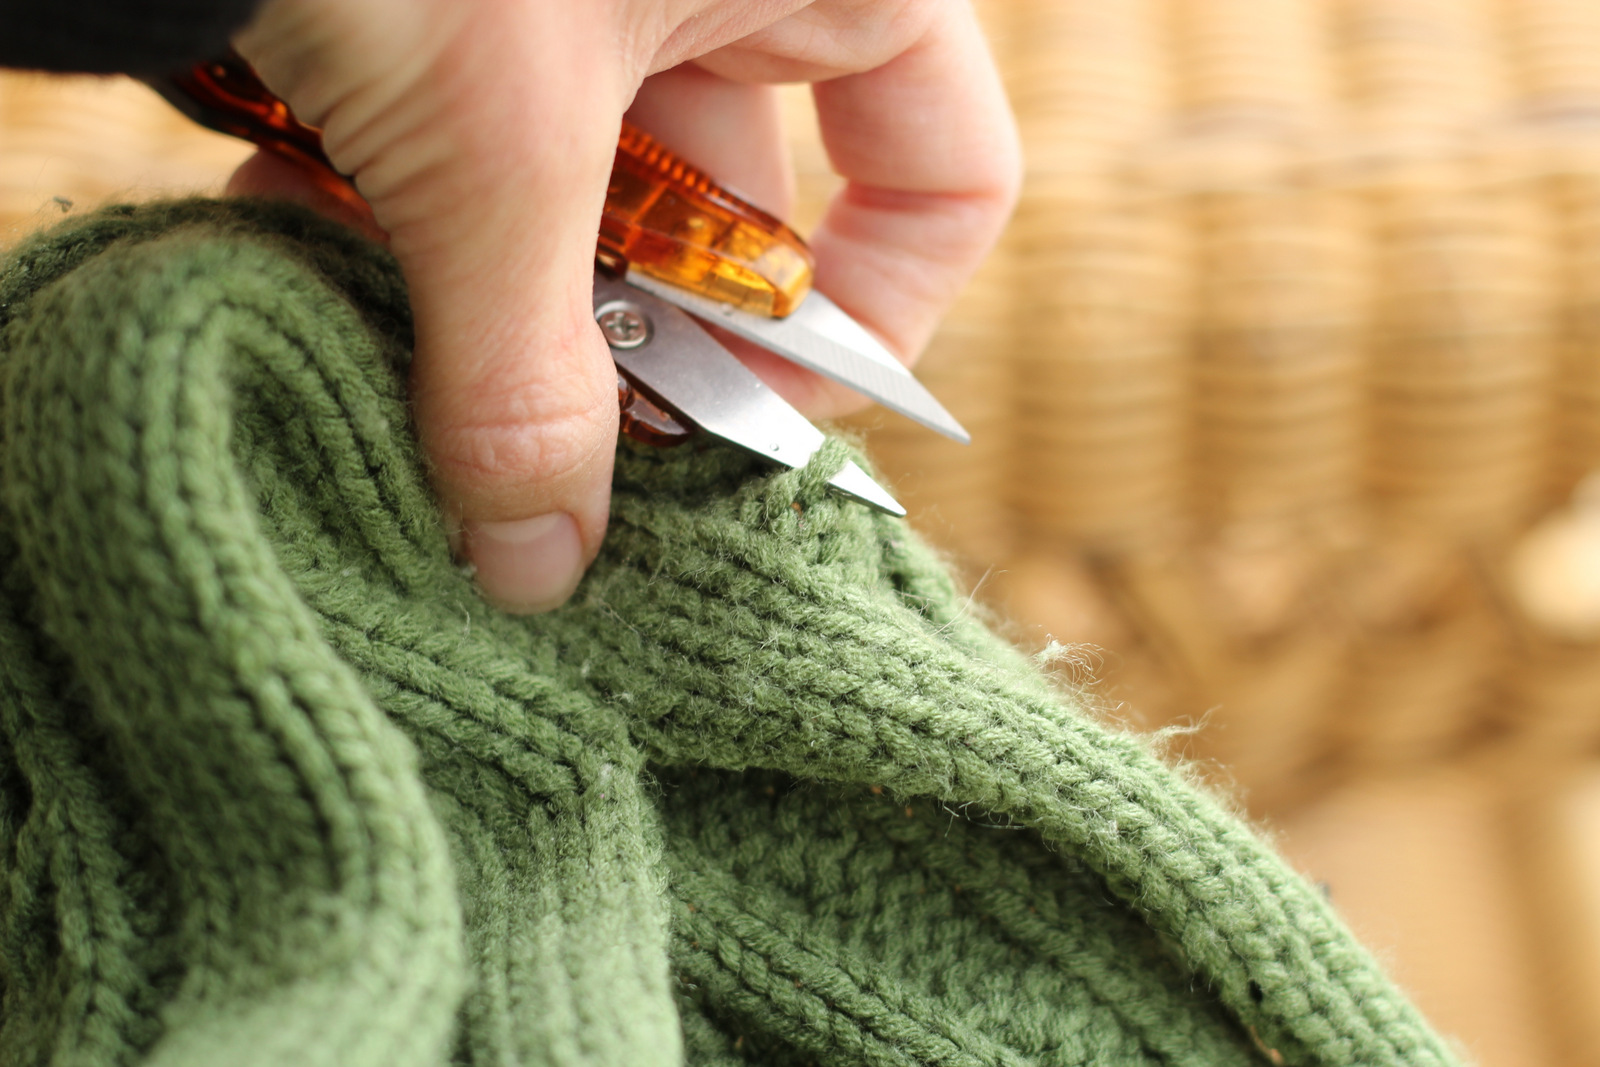 |
| snipping loop at mark |
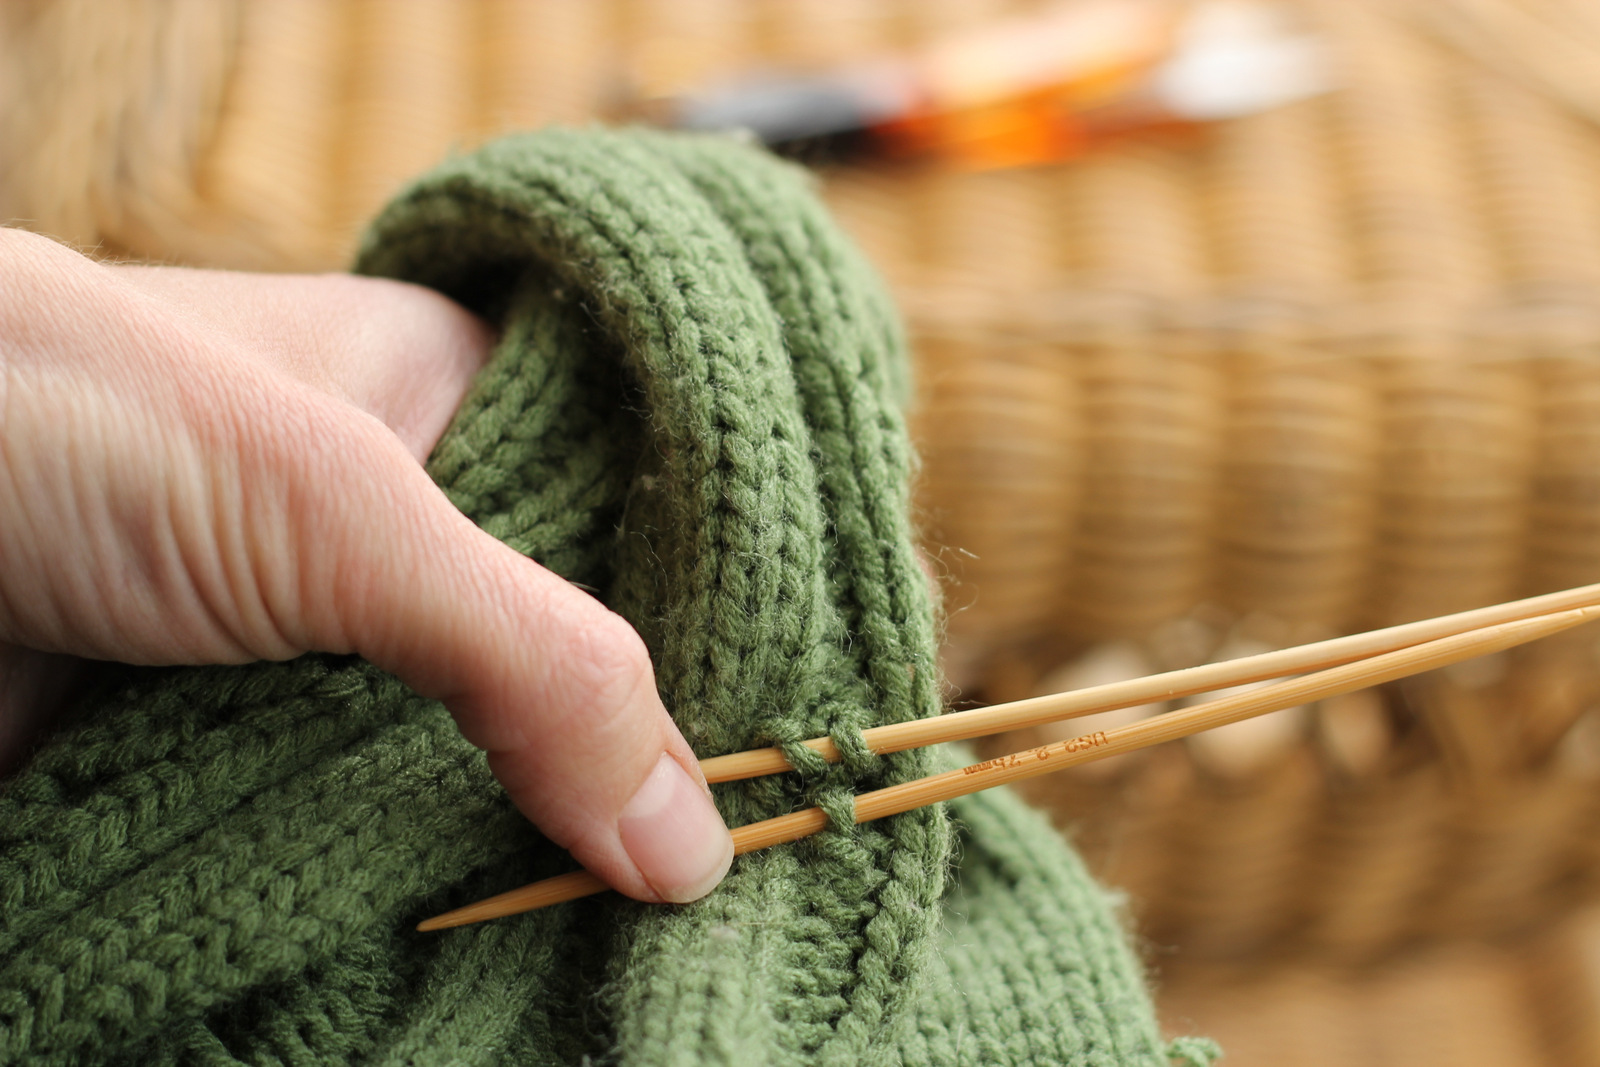 |
| putting loops onto needles |
The extra leftover section of sleeve I ripped into yarn by pulling on the working tail. (Just pull on both tails to discover which unravels it and which just tightens a knot…)

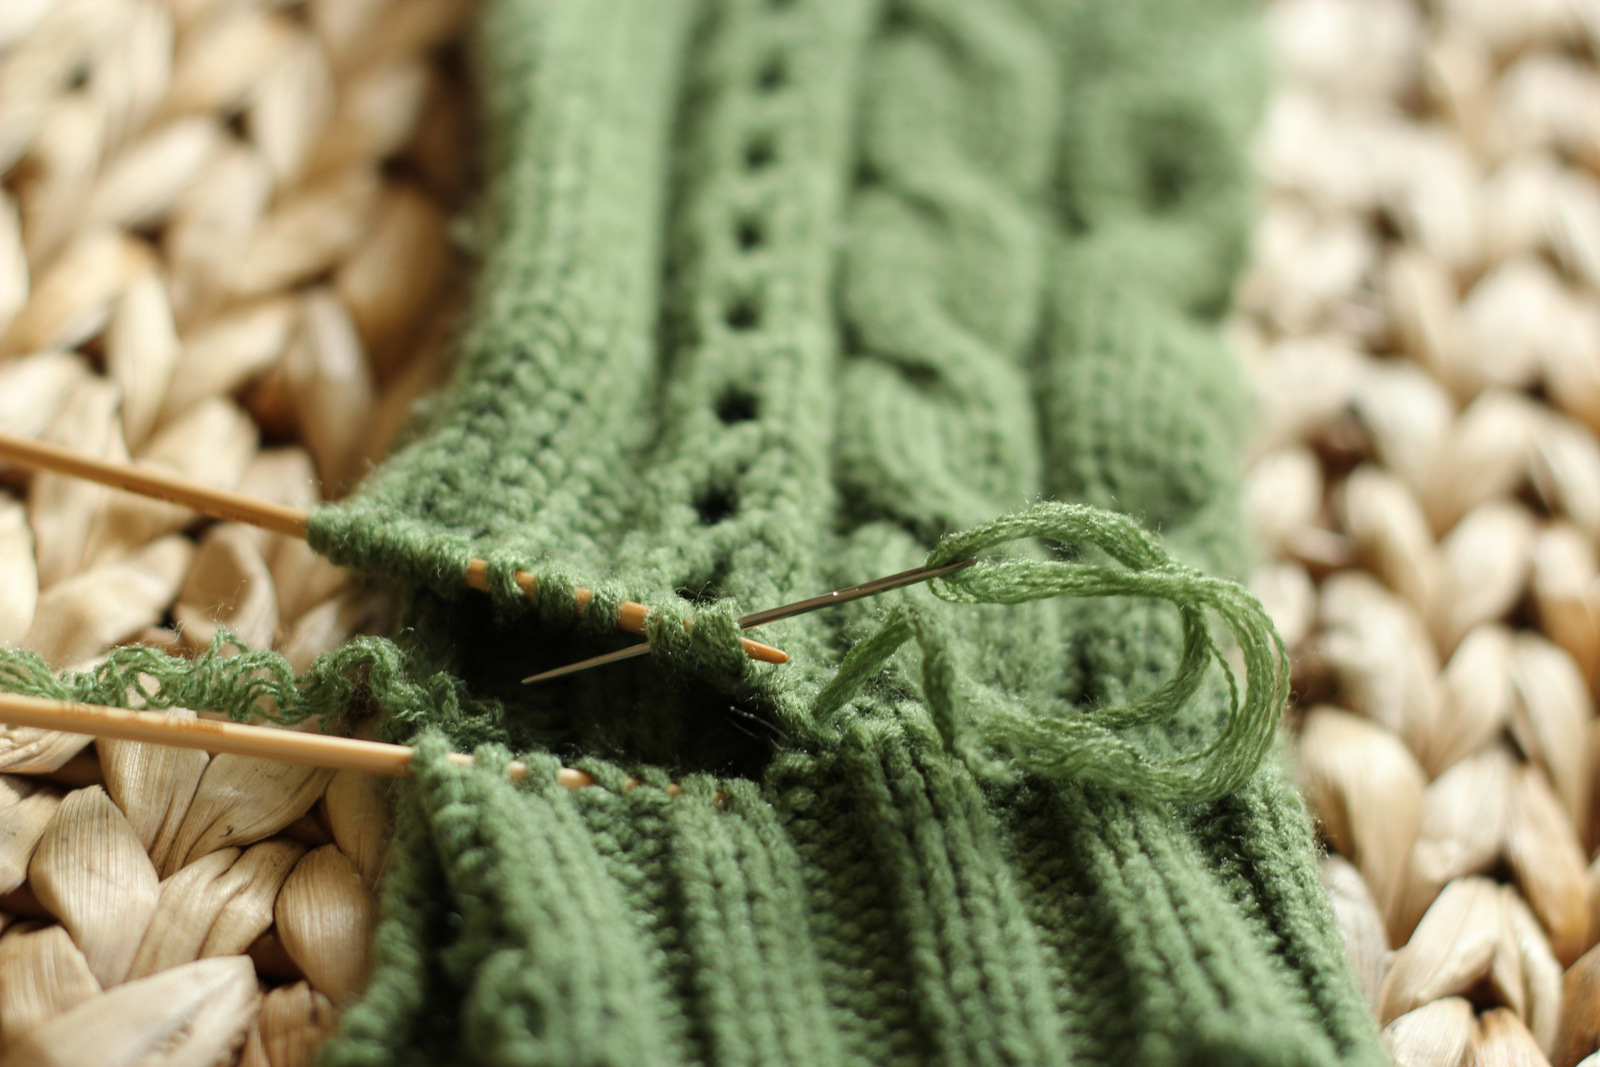
Now, you can line up the sleeve and cuff. Here’s a little tip that I learned the hard way. Count the cuff loops and sleeve loops to make sure they are equal. I had 45 sleeve loops and 40 cuff loops so I had to work in some decreases. I spread them out evenly so for every 8 cuff stitches I decreased once on the sleeve side. I’ll explain the specifics of how to decrease in a bit.
(I shortened my cuff to the length I desired so it didn’t just shrink from the last pictures.)
Don’t laugh at me but it took a ridiculous amount of time for me to understand how to purl… and how to knit… with my yarn on a needle. Hopefully this will be simple for you to understand though, with explanations and illustrations. I began at the seam where the working tail was, which was on the right side for me.
I matched the pattern of the cuff which was k2 p2, but it I’ll give an explanation of how to knit and how to purl in this manner, so you can follow whatever pattern you wish. First, though, a most important rule. As you take each loop to use it for a stitch, turn it to make sure it is not twisted as you go through it. Your stitches will look wrong otherwise.
 |
| not twisted knit loop example |
 |
| Not twisted purl loop |
To knit a stitch:
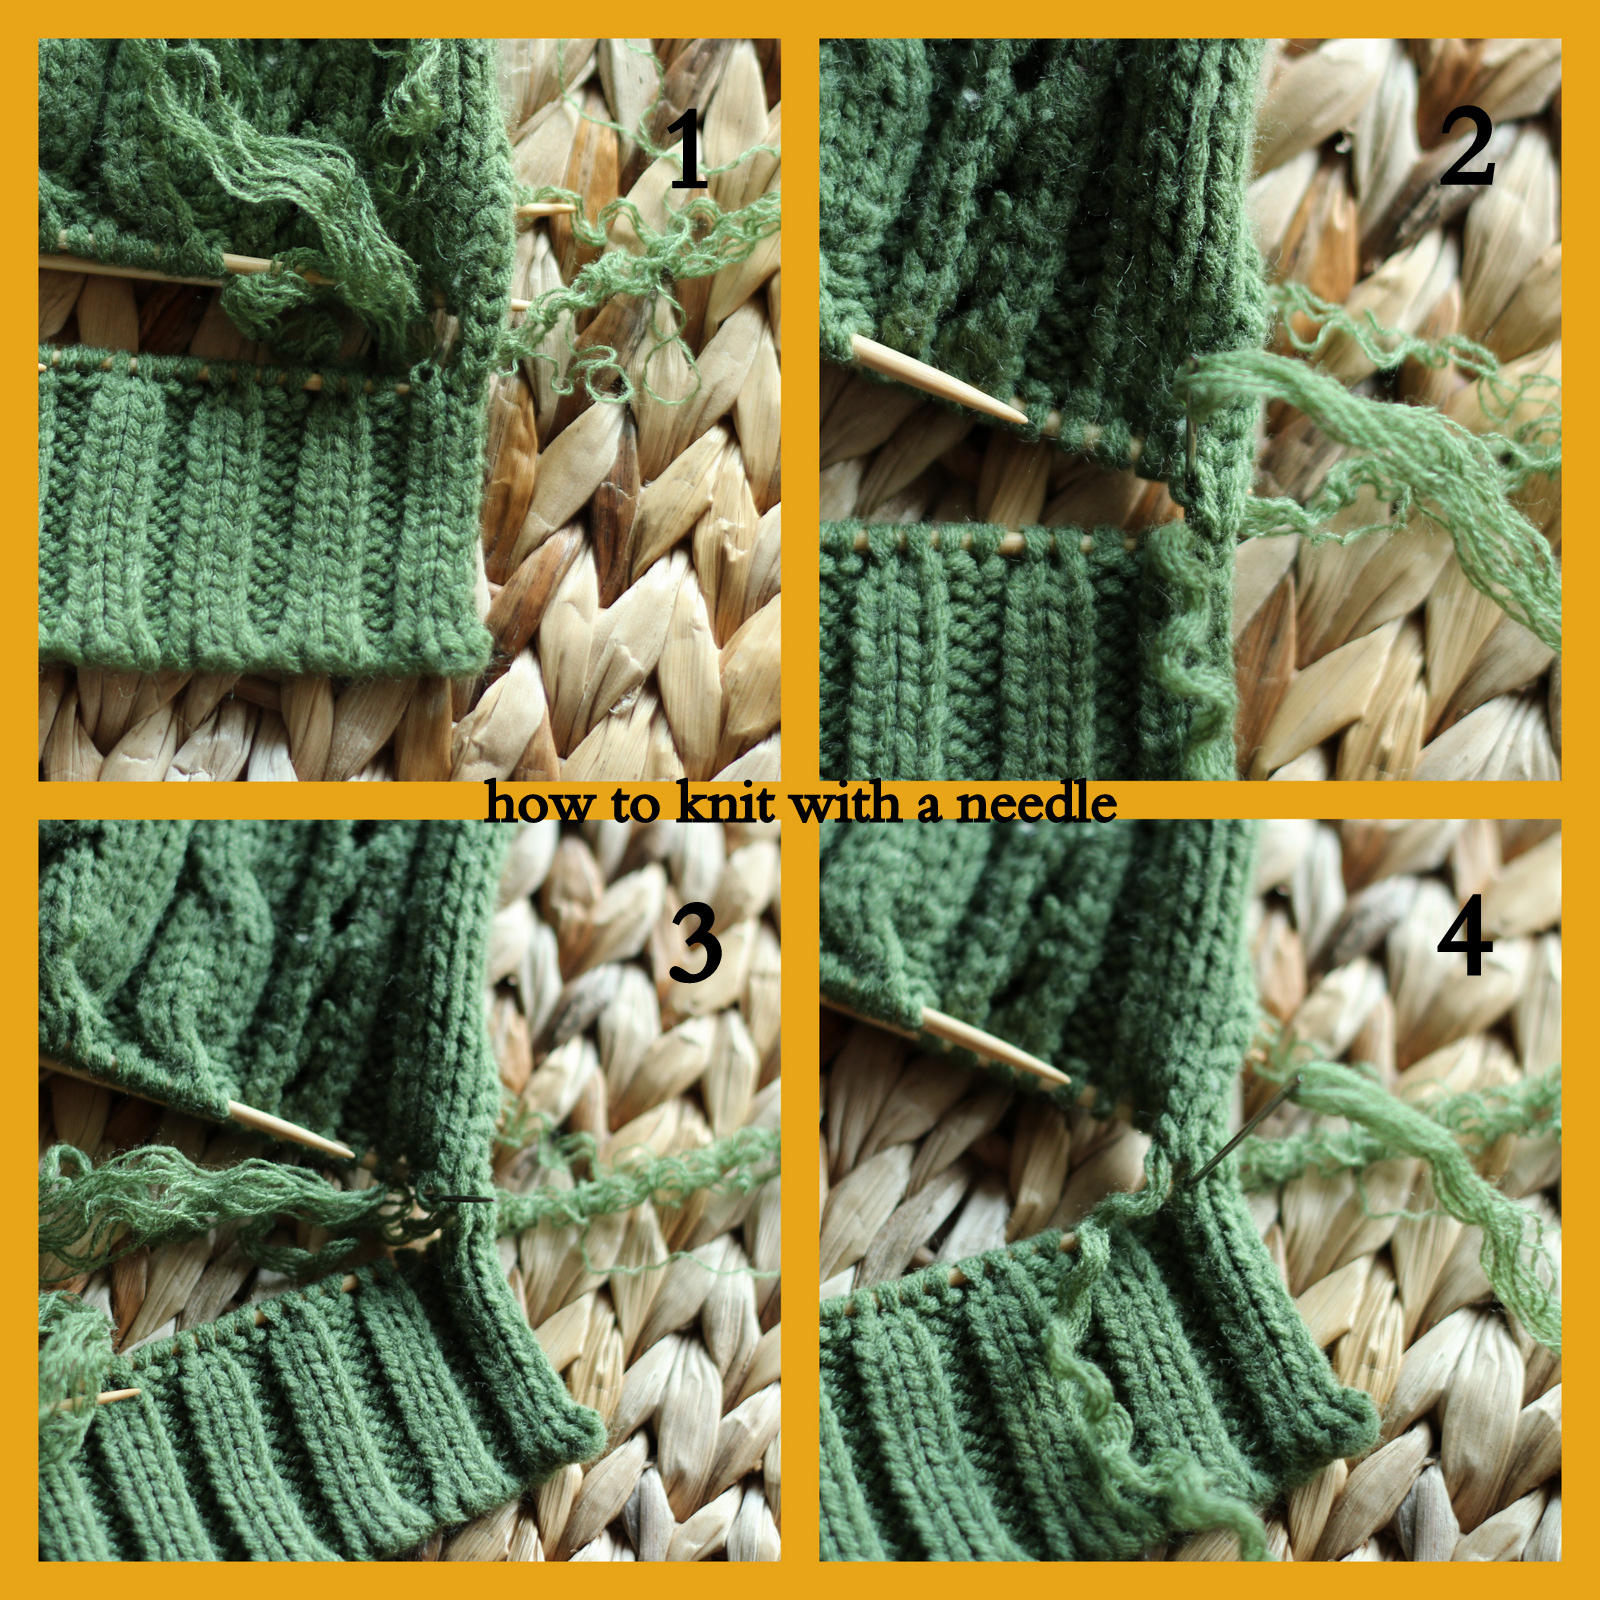
1: Go up through the next cuff loop 2: Then down into the last sleeve loop stitched in 3: Up through the next sleeve loop 4. Down into the same cuff loop as at the beginning of this stitch.
To purl a stitch:
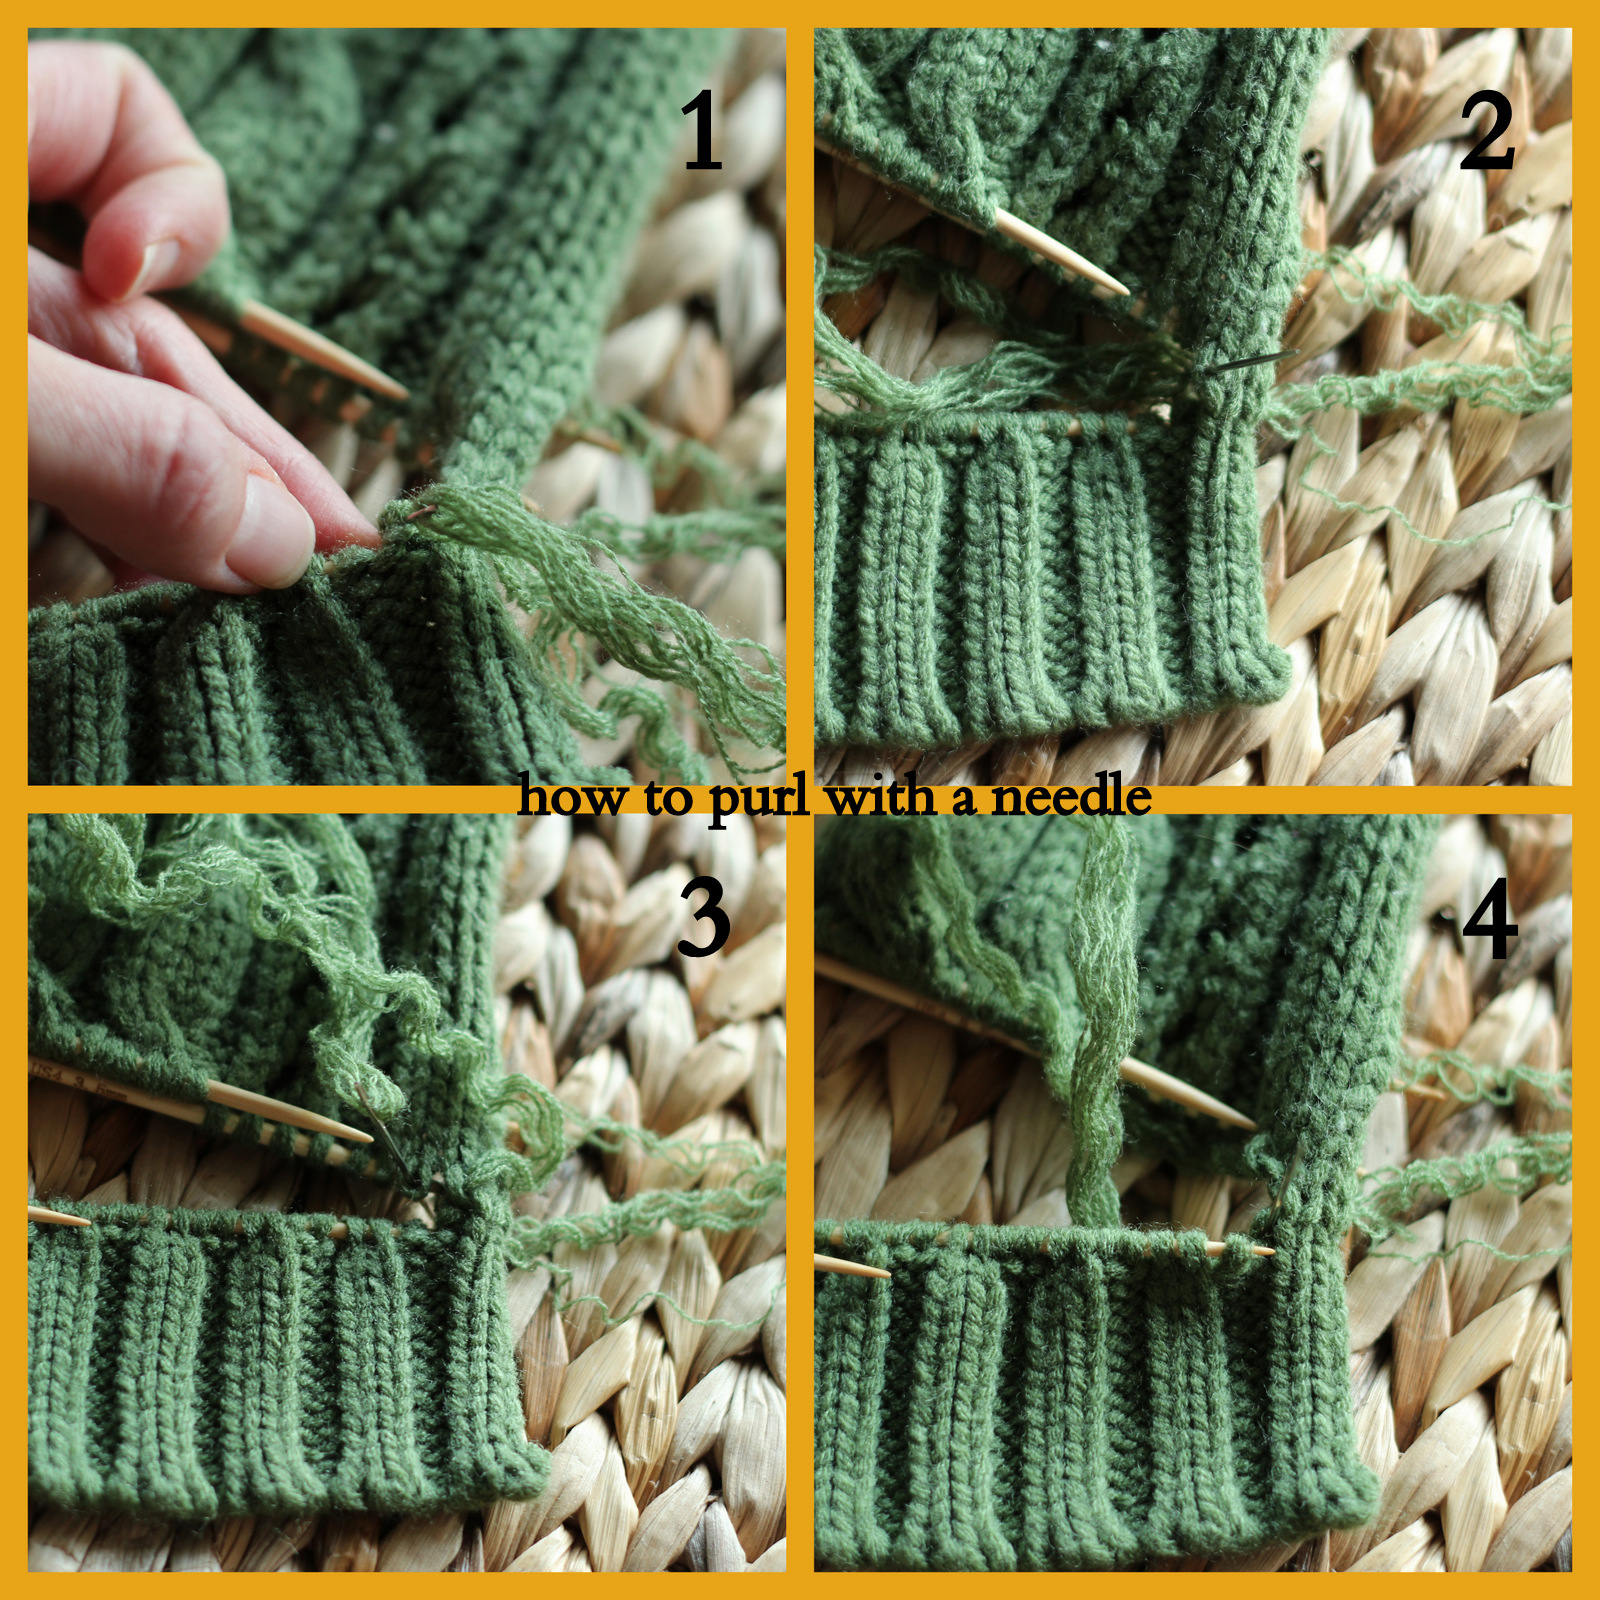
1: Go down into the next cuff loop 2: Then up through the last sleeve loop stitched in 3: Down through the next sleeve loop 4: Up through the same cuff loop as at the beginning of this stitch.
To decrease: Go through two loops at a time. For example, on this knit stitch I went up through the cuff loop, then down into the last sleeve loops stitched in, up through the next TWO sleeve loops, and down into the same cuff loop as at the beginning of this stitch. You can decrease on a purl stitch too. Just go down through two sleeve loops on the third step of making the stitch. Make sure those two loops are not twisted when you go through them. I turn them to untwisted and stack them up together and go through both at once. It may be easiest to go through them while still on the knitting needle.
 |
| Decreasing on a knit stitch (note that I went into the far loop first, then the closer one). |
 |
| Decreasing on a purl stitch. |
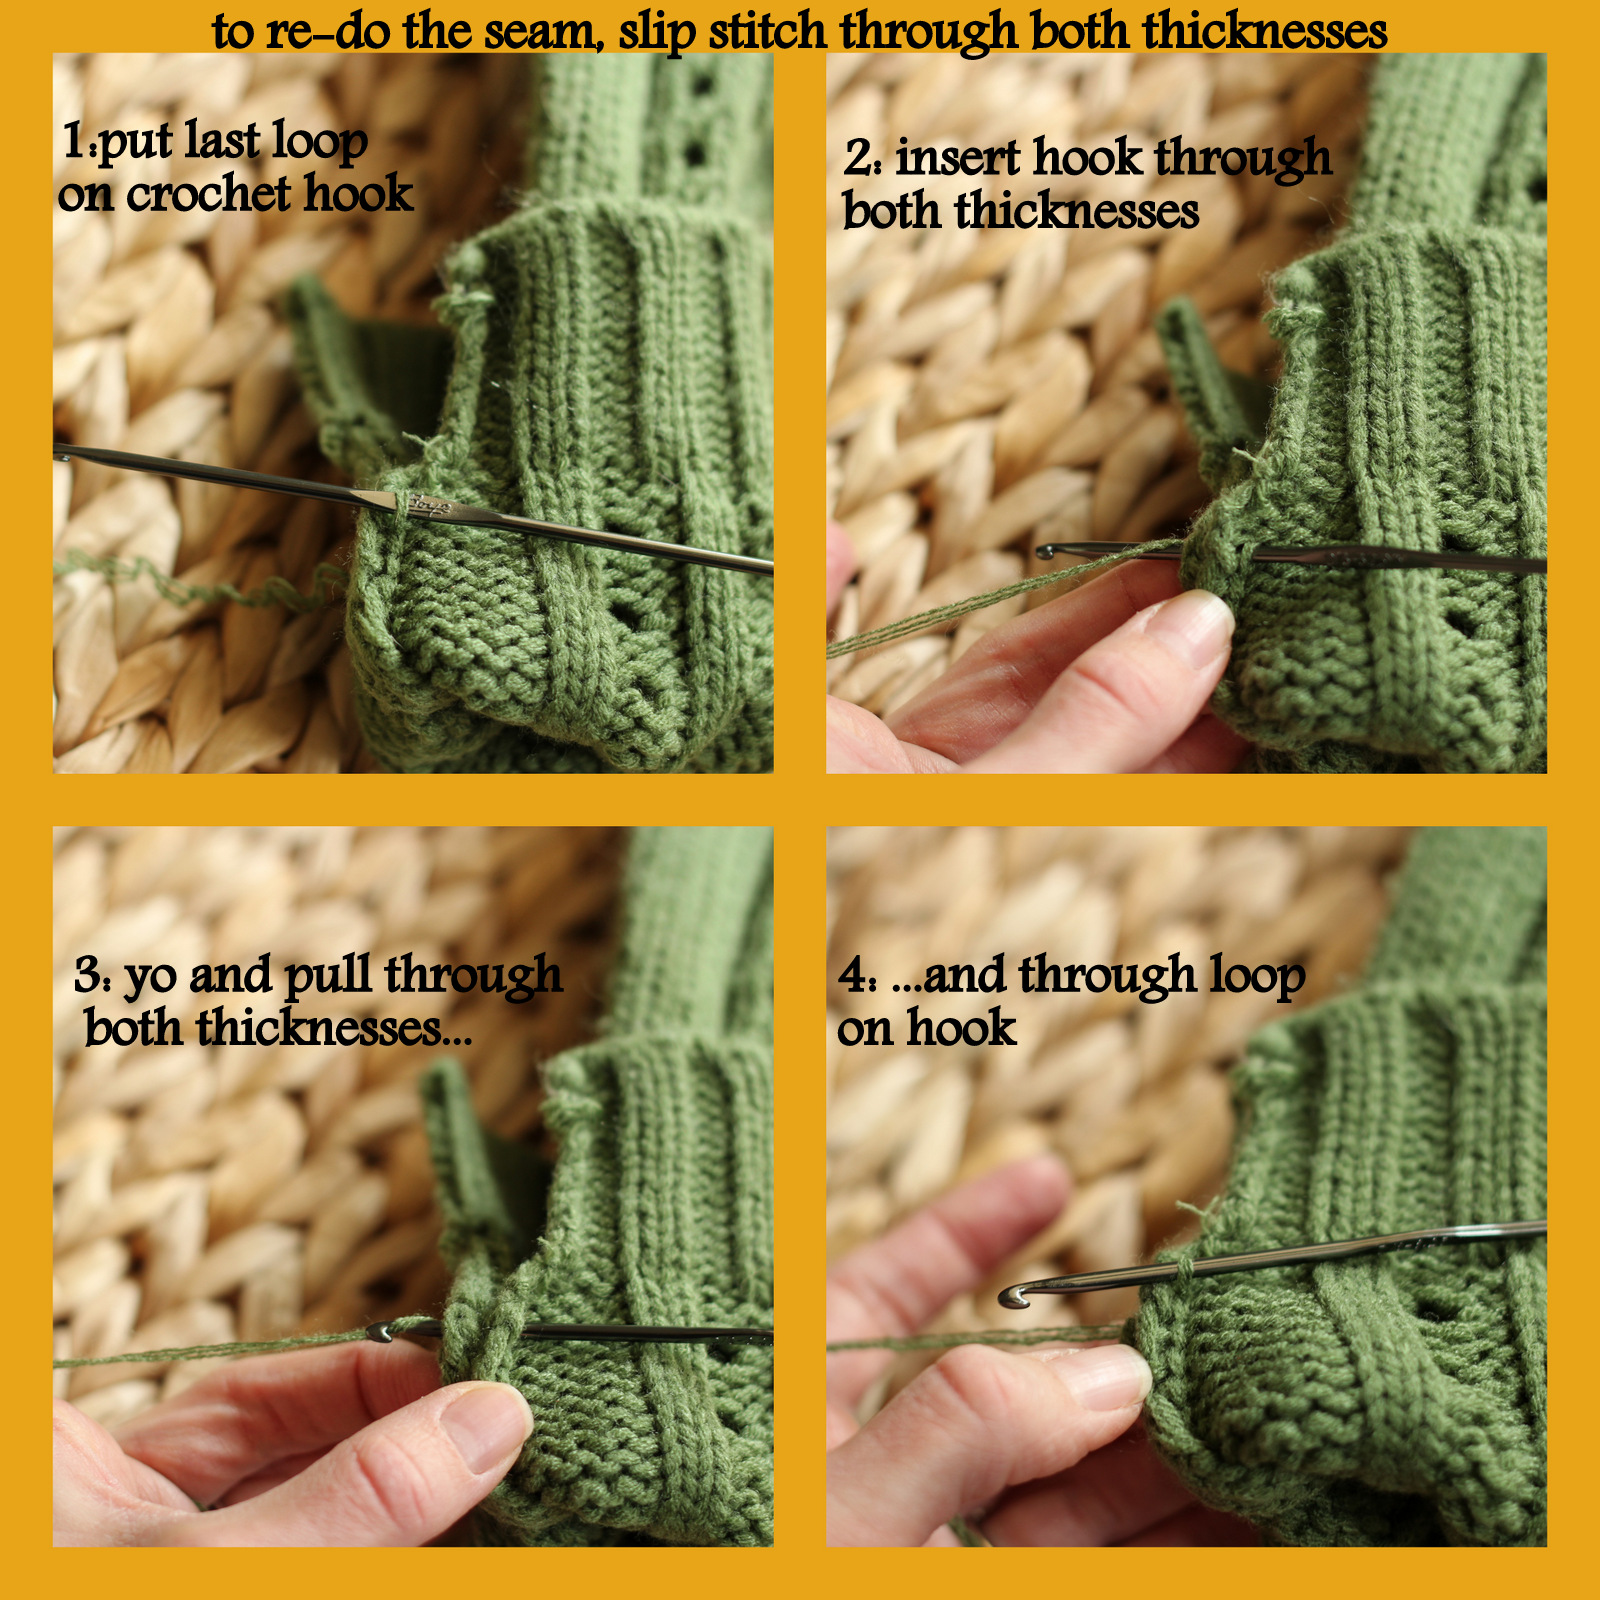
Once you’ve got the whole row stitched, work in any loose ends, and re-do your seam. You should be able to use the yarn from pulling out the seam and just sl st through both thicknesses.
That’s it. Done. I have to say that figuring out how to communicate this project and taking pictures of it was actually much more difficult than doing it. I hope that someone out there finds it informative and useful though. I know my girl likes her new sweater for the chilly spring mornings and evenings.
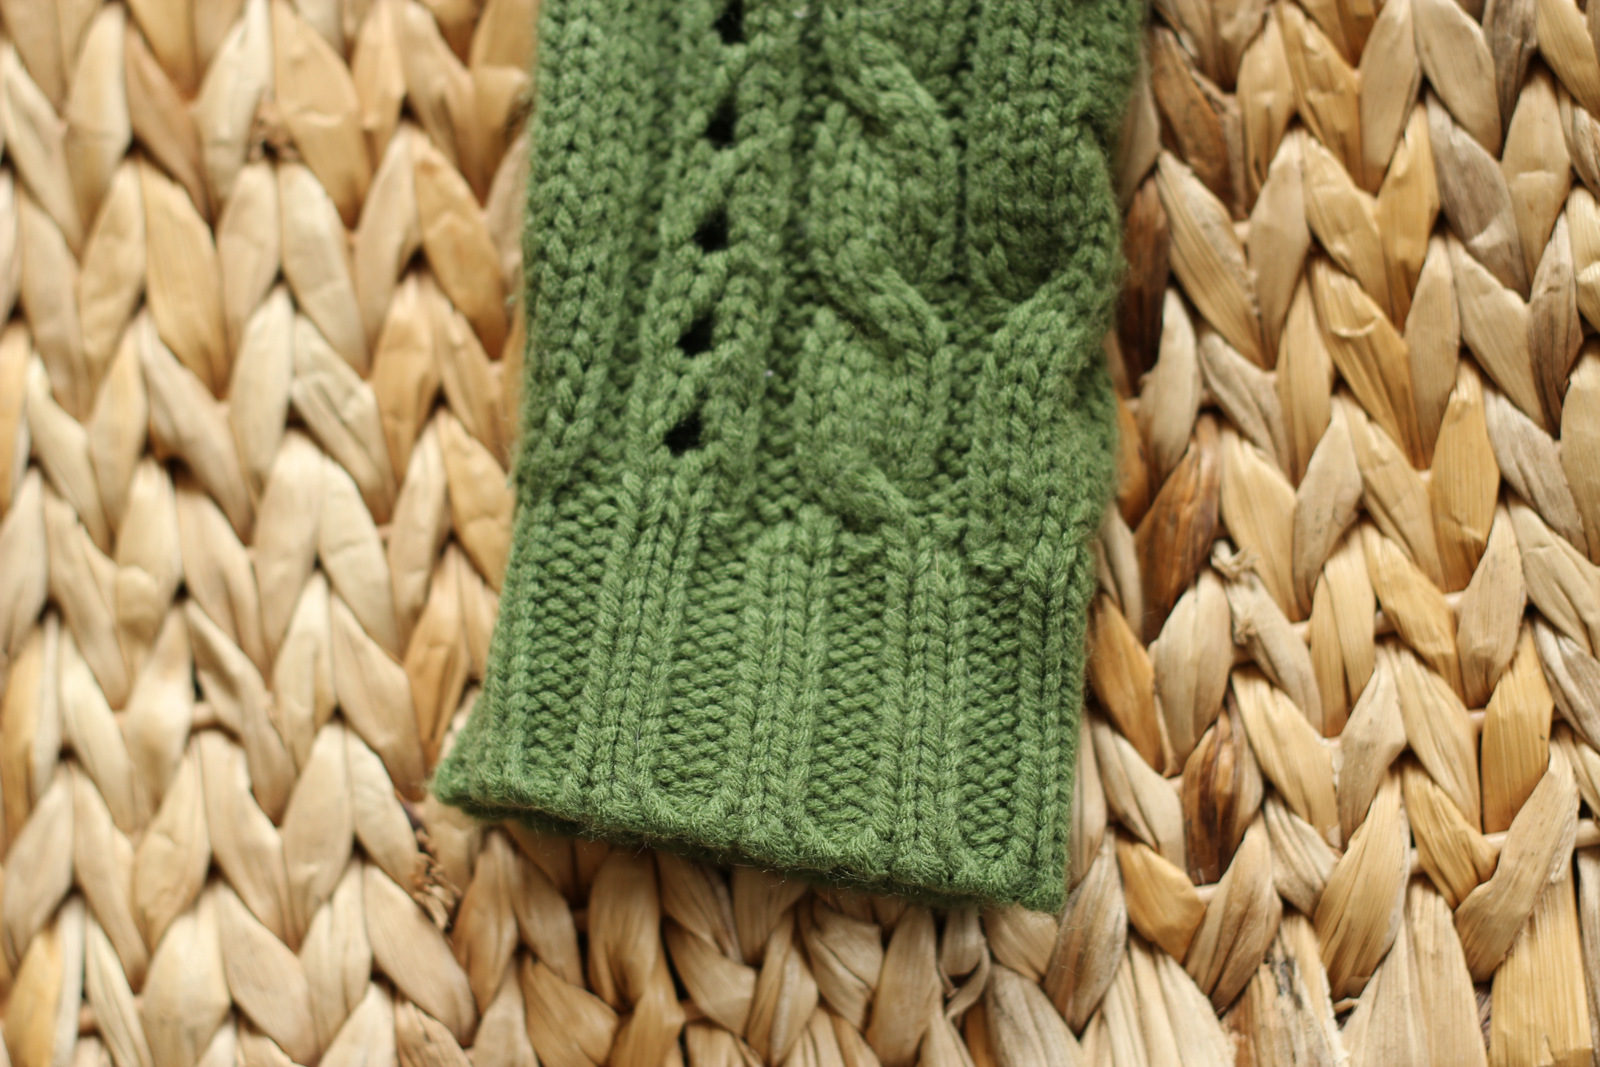 |
| Cuff done |
Sweater done. And it even fits! (Thank goodness!)
wow!!!